How to export flutterflow code and run it in vscode with android studio emulator
In this step-by-step guide we will show you how to export your FlutterFlow code and run it in your preferred code editor, such as Visual Studio Code (VS Code). But that’s not all—we also cover how to rigorously test your app using an Android emulator.
From exporting your project from FlutterFlow to setting it up in VS Code, and finally, running and debugging it in an Android emulator, we provide you with all the necessary steps to make your app development journey smooth and efficient.
Note:
- This feature is available only with the pro plan.
- You need an ide / code editor like “vs code and android studio” that has been setup with the flutter environment. If you don’t have one follow any guide online to install it on your mac/windows machine If you’re unsure about the installation process or encounter any difficulties, don’t hesitate to search for online guides and tutorials.
- For this tutorial Vs code is our primary code editor and android studio is used to set up an android emulator.
- Make sure the android studio is set up on your machine. If you don’t have it installed, follow any guide online to install it on your mac/windows machine If you’re unsure about the installation process or encounter any difficulties, don’t hesitate to search for online guides and tutorials.
Run Flutterflow code in vscode with android studio emulator.
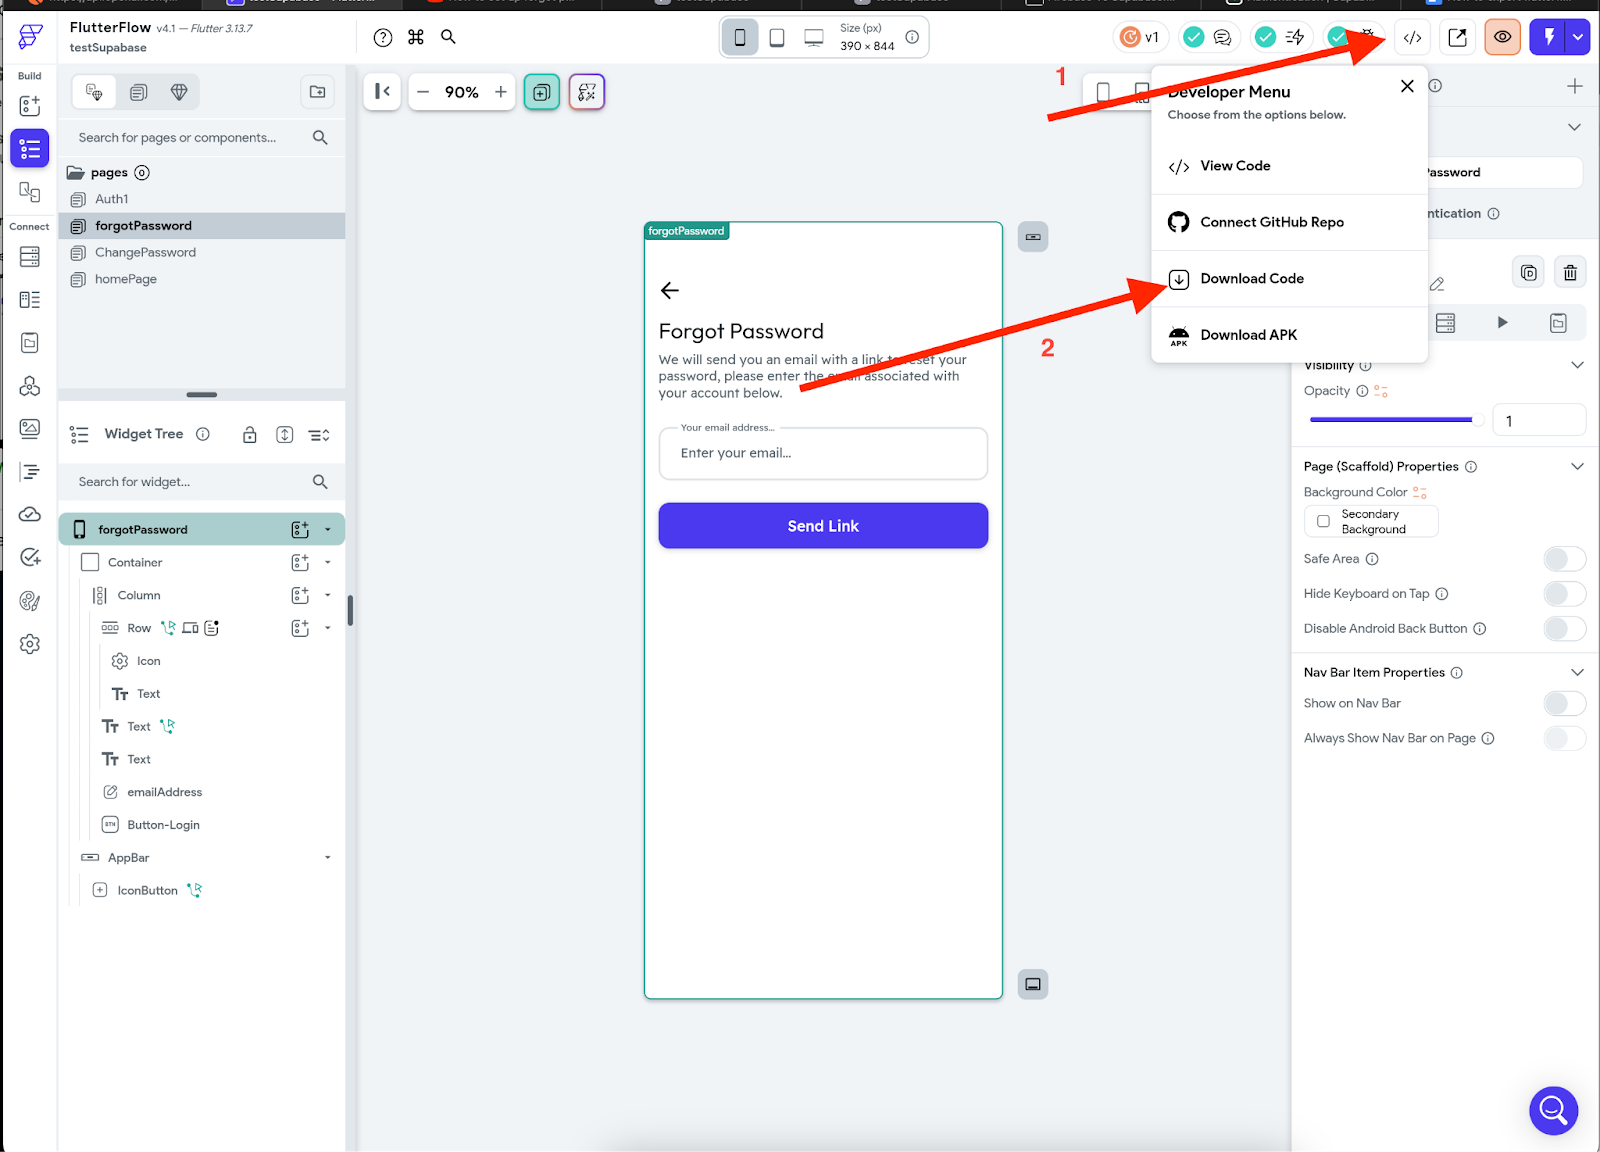
Step 1: Export Flutterflow code
Downloading your code from FlutterFlow is straightforward. Here’s a quick guide.
- Open your desired Flutter Flow project.
- Navigate to the top right corner of your screen.
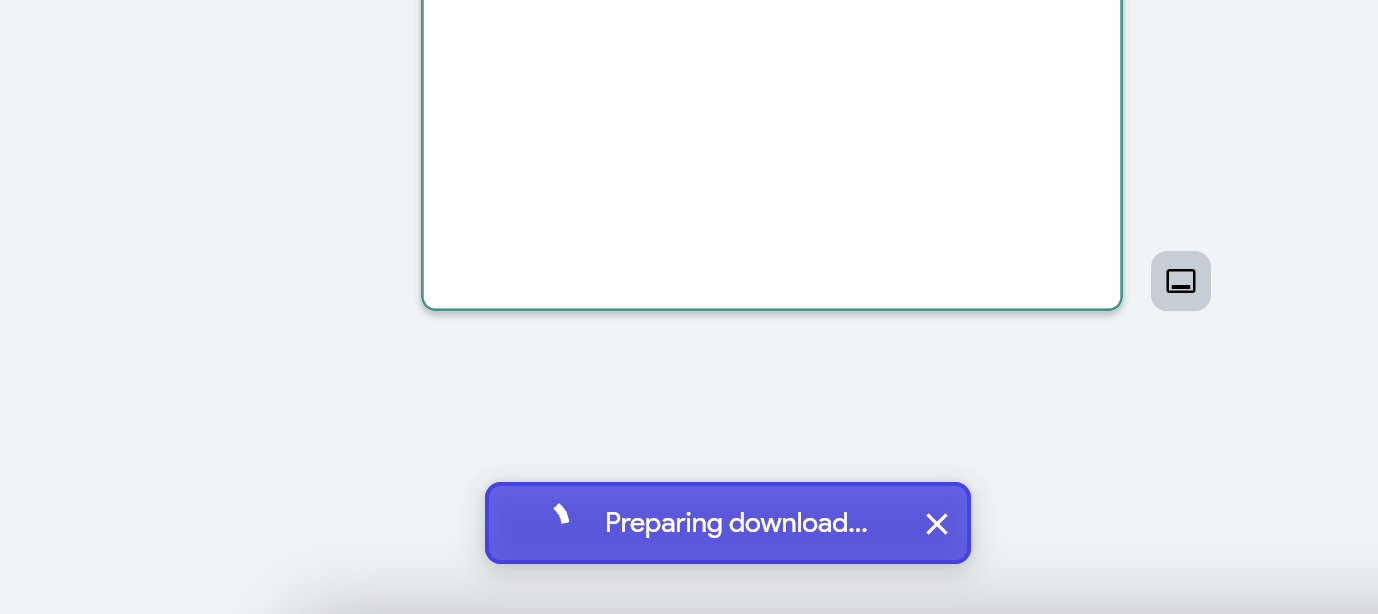
- Click on the download icon, and a pop-up window will confirm that your code has been downloaded.
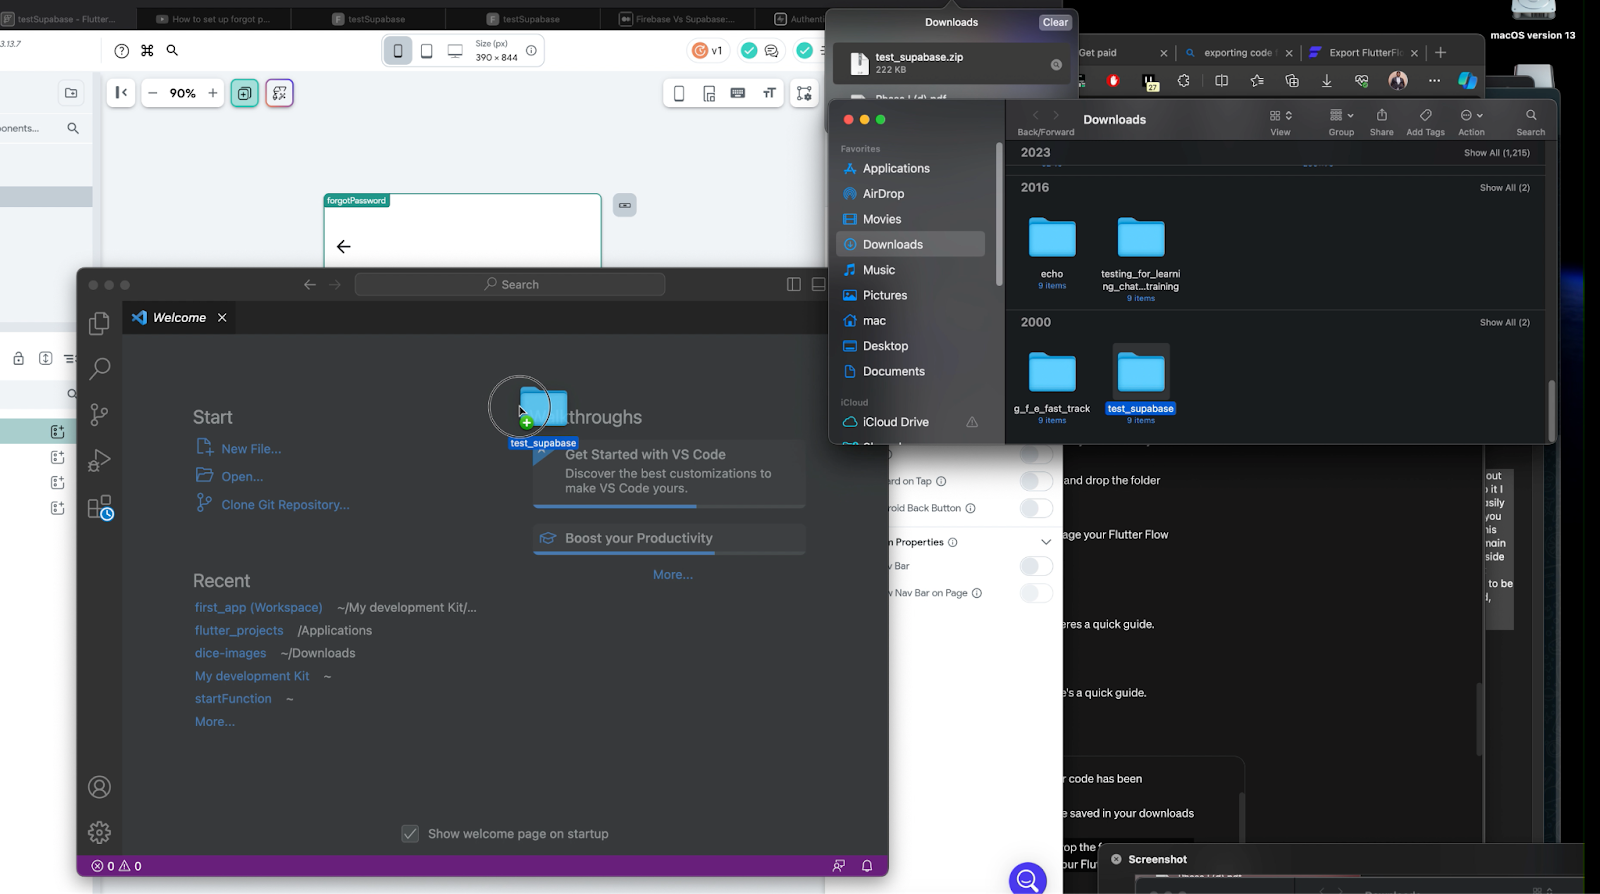
- The downloaded file containing all your application files will typically be saved in your downloads folder.
Step 2: Open your Flutterflow project in VsCode Code editor
To open your project in your local IDE/ Code editor, like VS Code, simply open the editor and drag and drop the folder into the IDE.

Now for the final part of this article, let’s proceed with running the code in a simulator:
Step 3: Setting up your IDE for running the code:
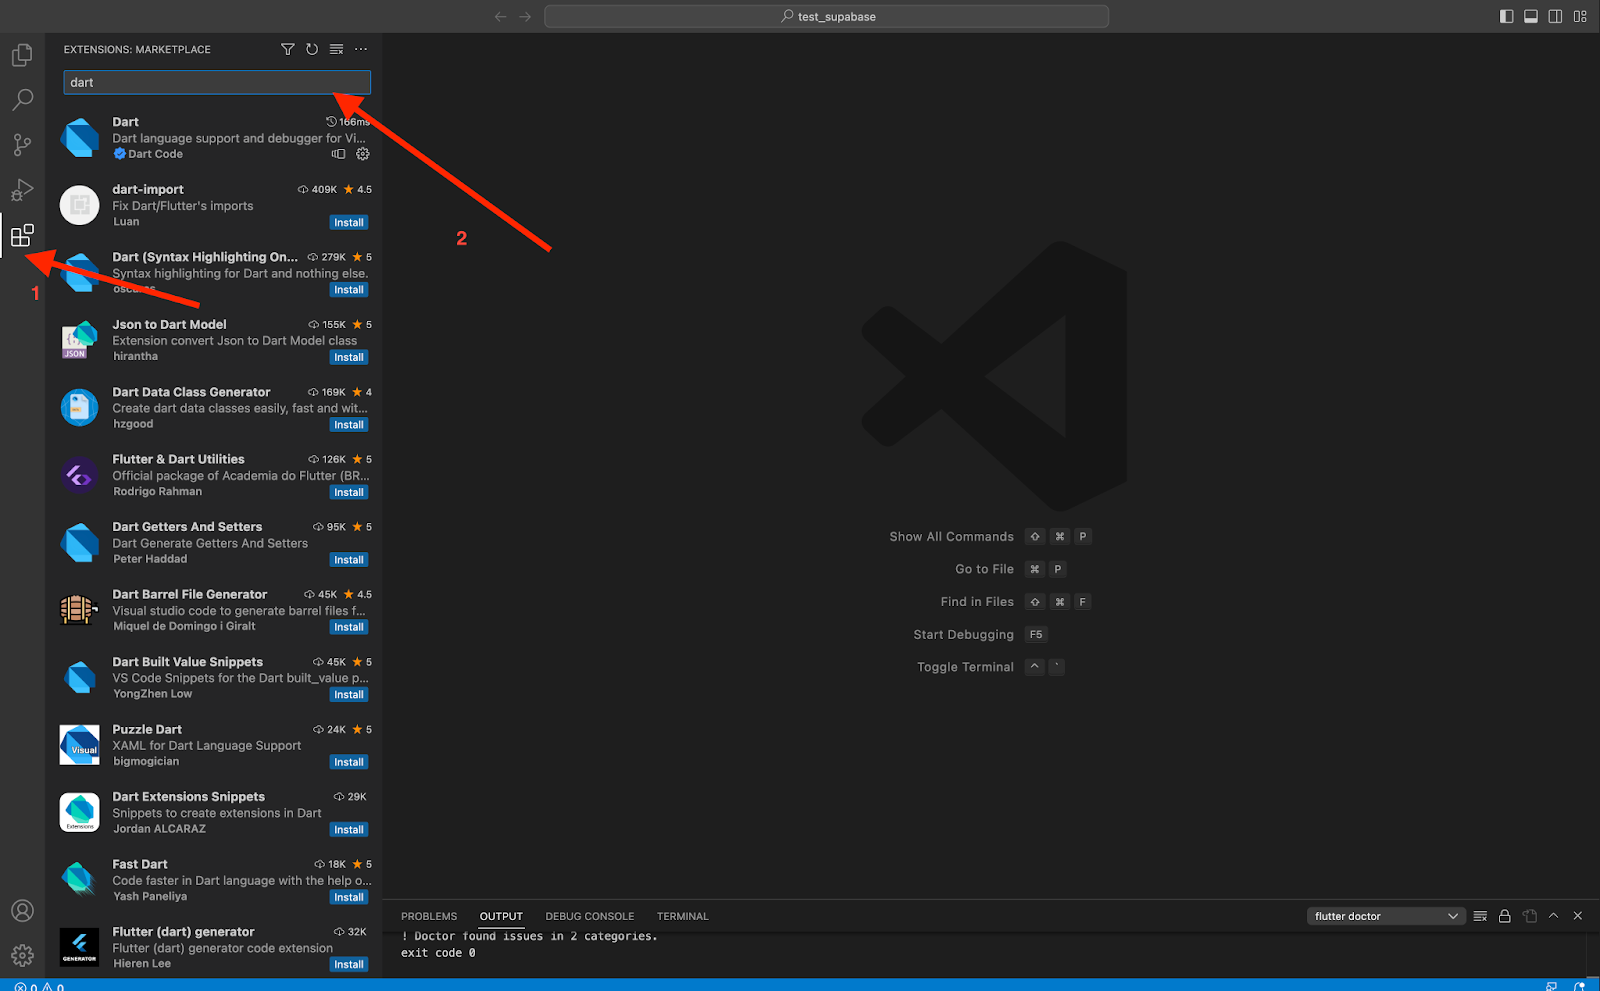
If you’re using VS Code, ensure you have the necessary extensions installed for Flutter and Dart support. You can do this by navigating to the extensions tab on the left sidebar and searching for “Flutter” and “Dart”. Install these extensions if not already installed.
Opening your Flutter project in the IDE:
In your IDE, locate and open the folder where you saved the downloaded FlutterFlow project files.
Before running the project, you may need to install dependencies. These are additional packages or libraries from pub.dev that your Flutter project relies on based on the features added in flutterflow.
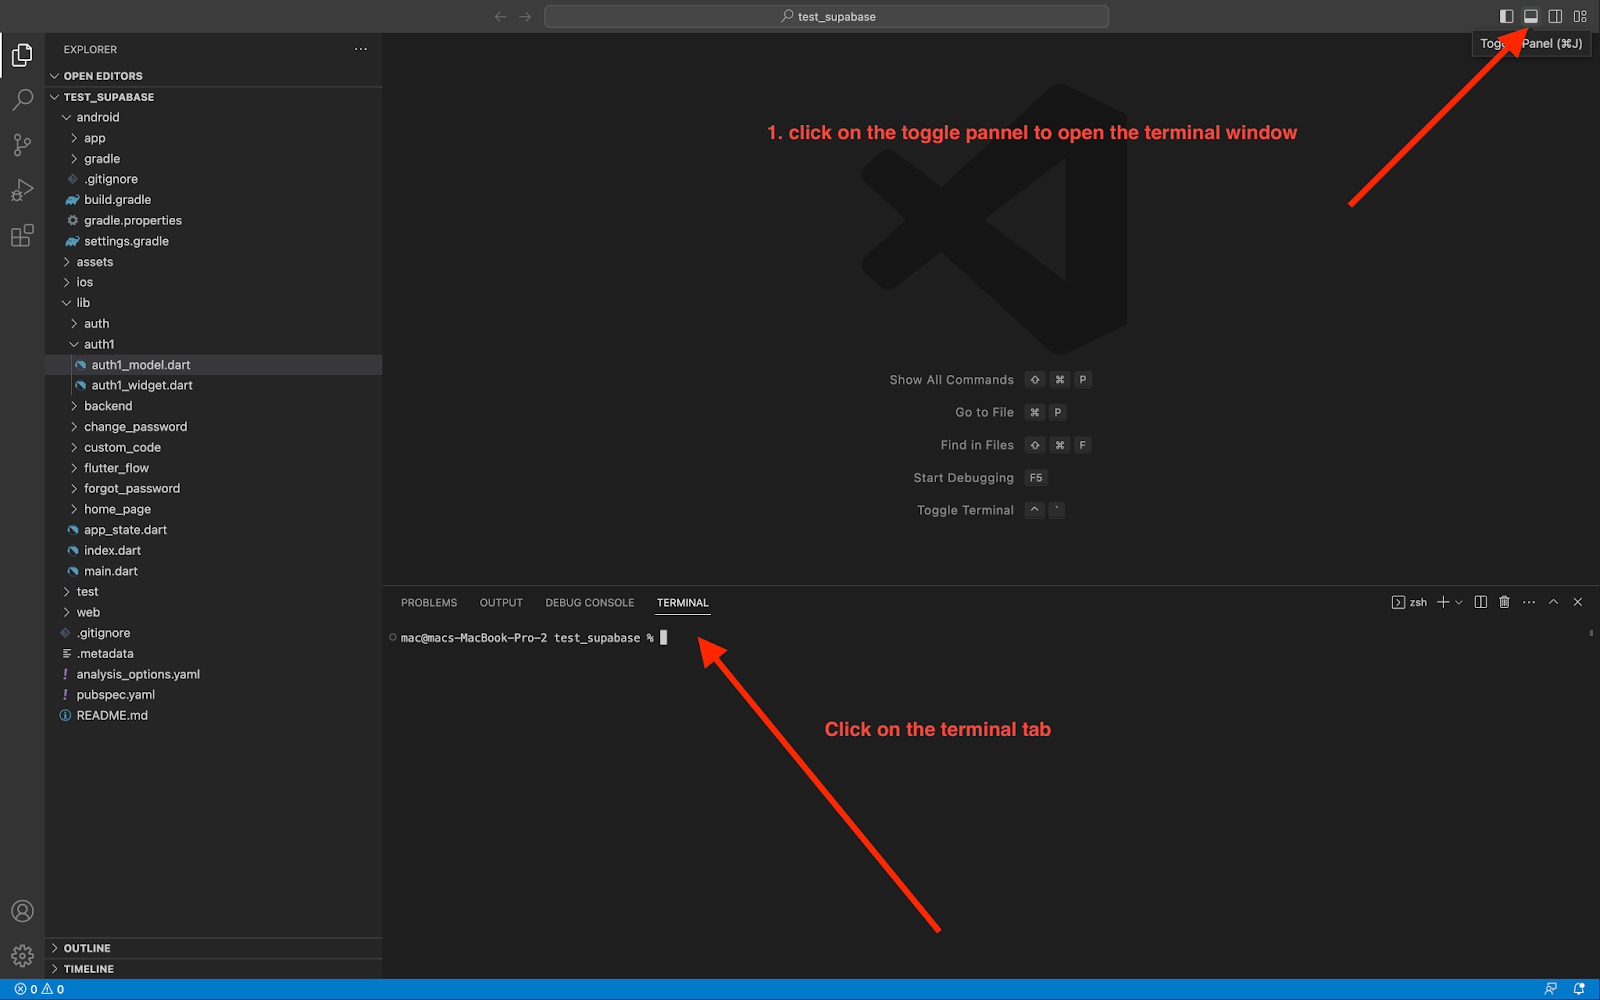
Open the terminal within your IDE and navigate to the root directory of your Flutter project.
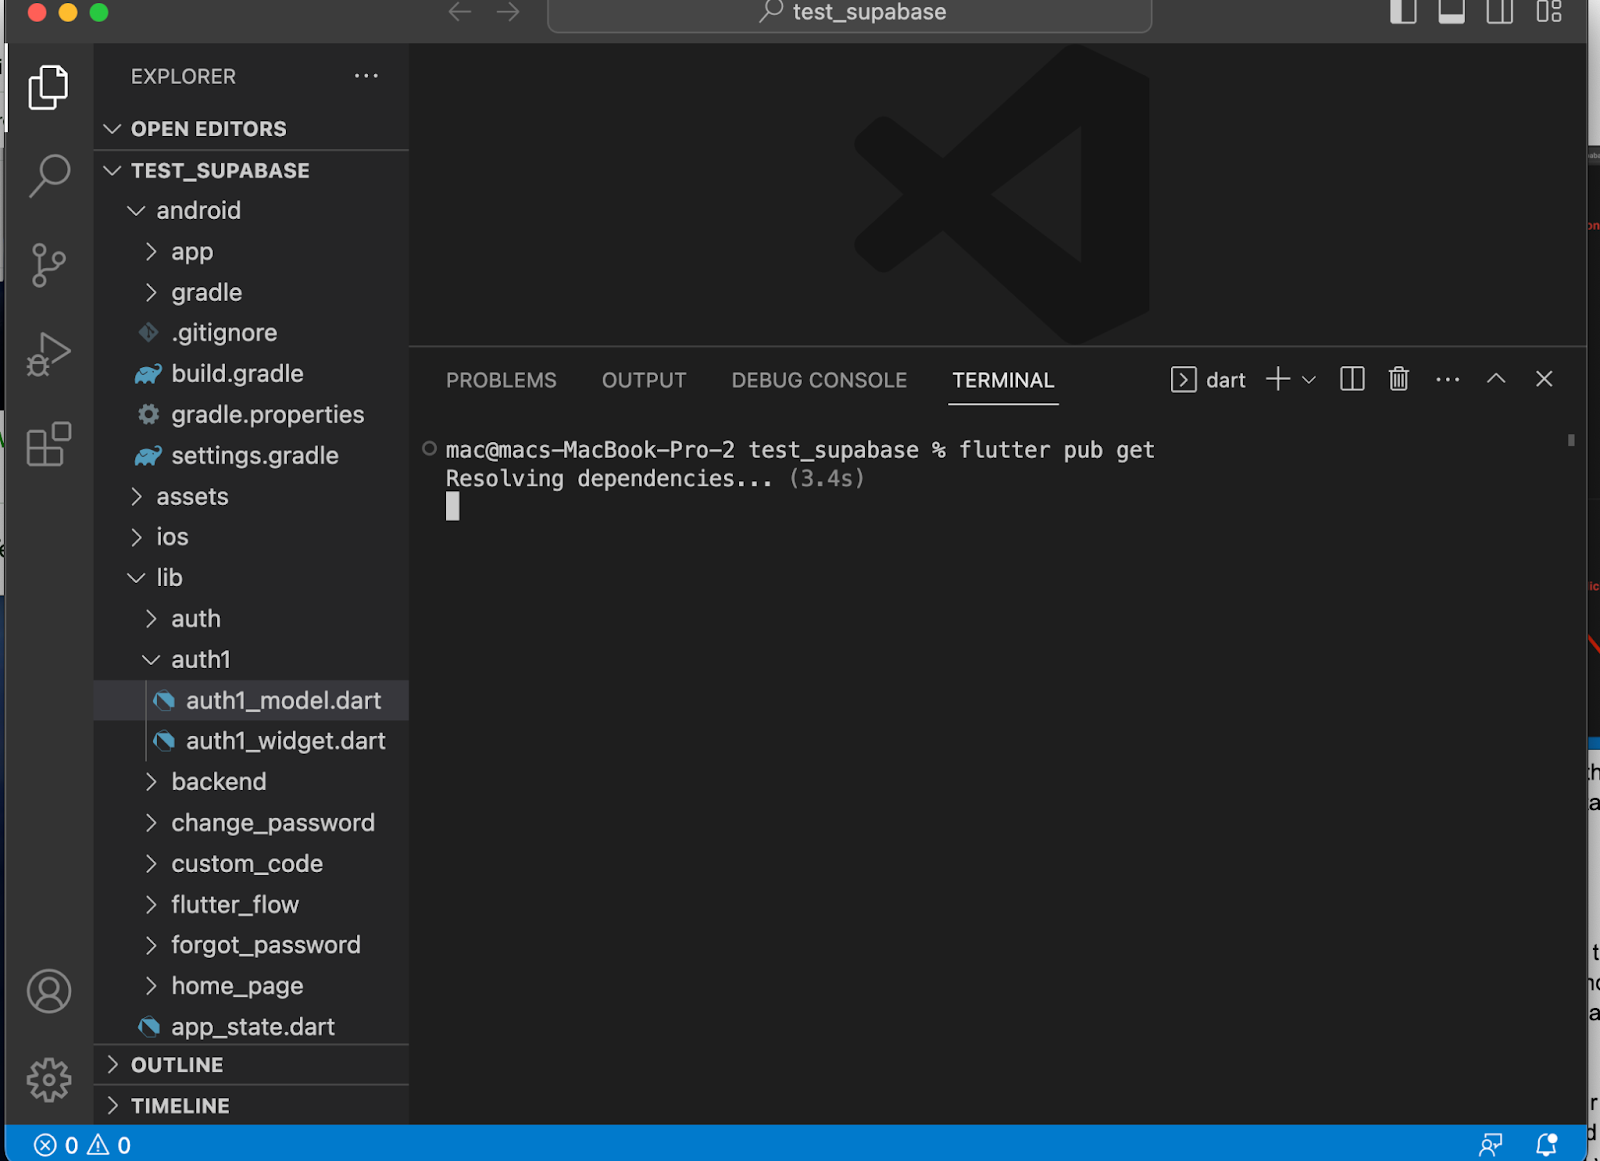
Run the command “flutter pub get” to fetch and install the required dependencies.
Note: if you experience any error in this phase then paste the error into chatgpt for quick solutions specific to your error code.
Step 3: Run your flutterflow project in an android emulator:
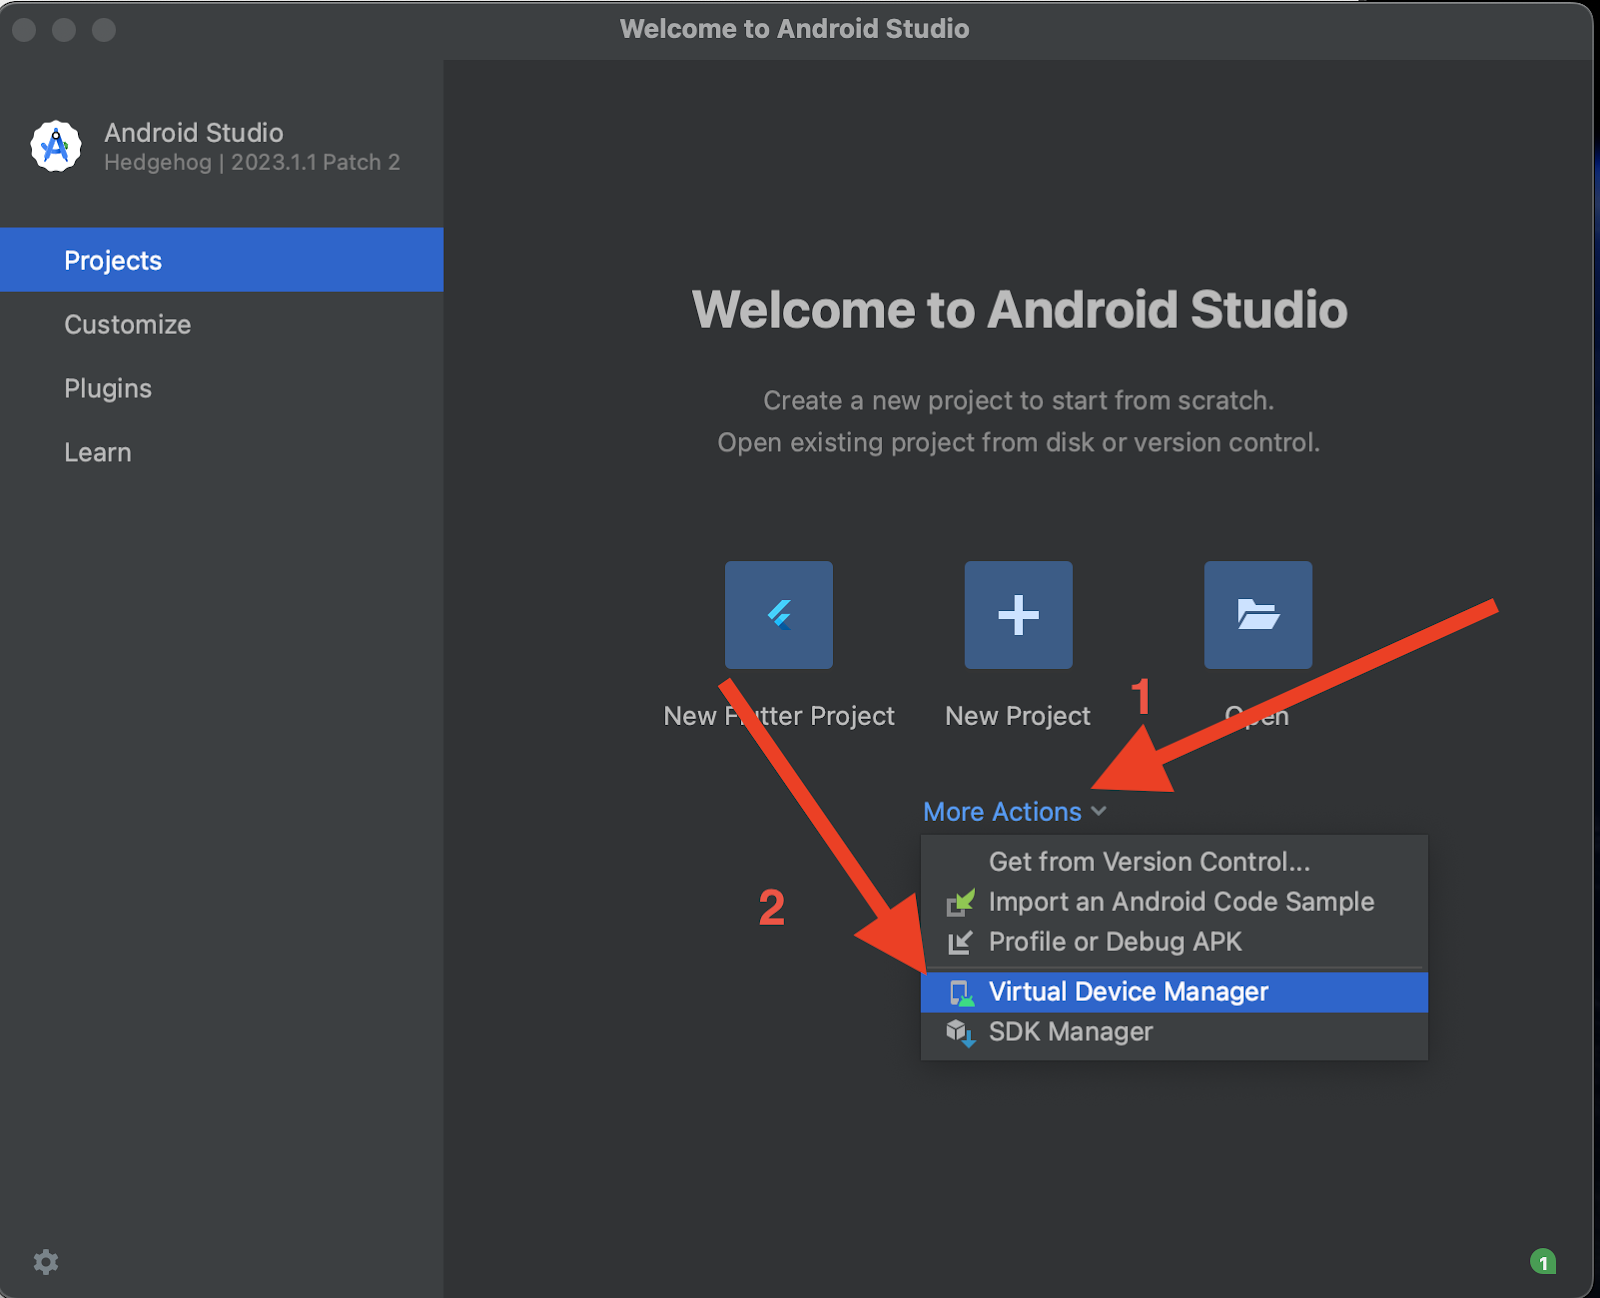
If you haven’t already, launch Android Studio and Click on the “More Actions” button on the welcome screen. From the dropdown menu, select “Virtual Device Manager”.
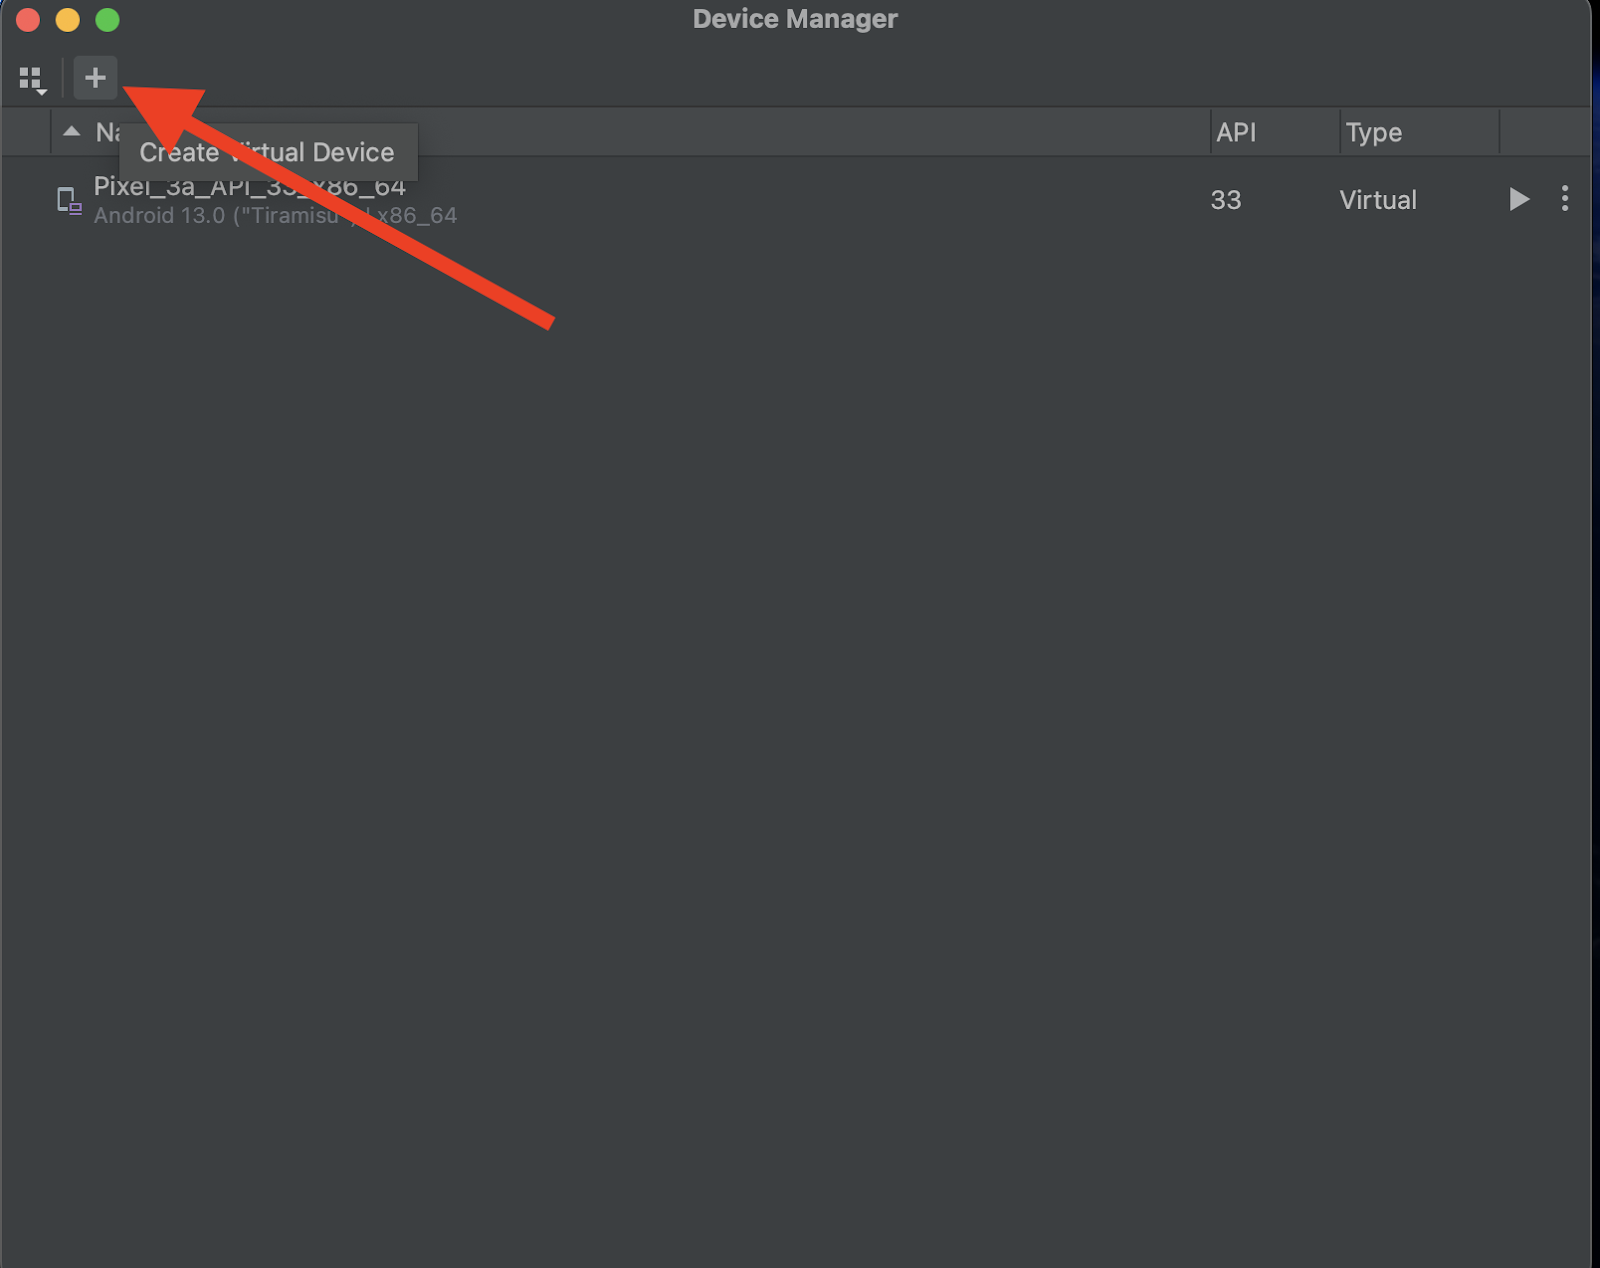
Click on the plus icon to follow the prompts to create a new virtual device. I already have the pixel 3A setup so I will click on it to start the emulator.

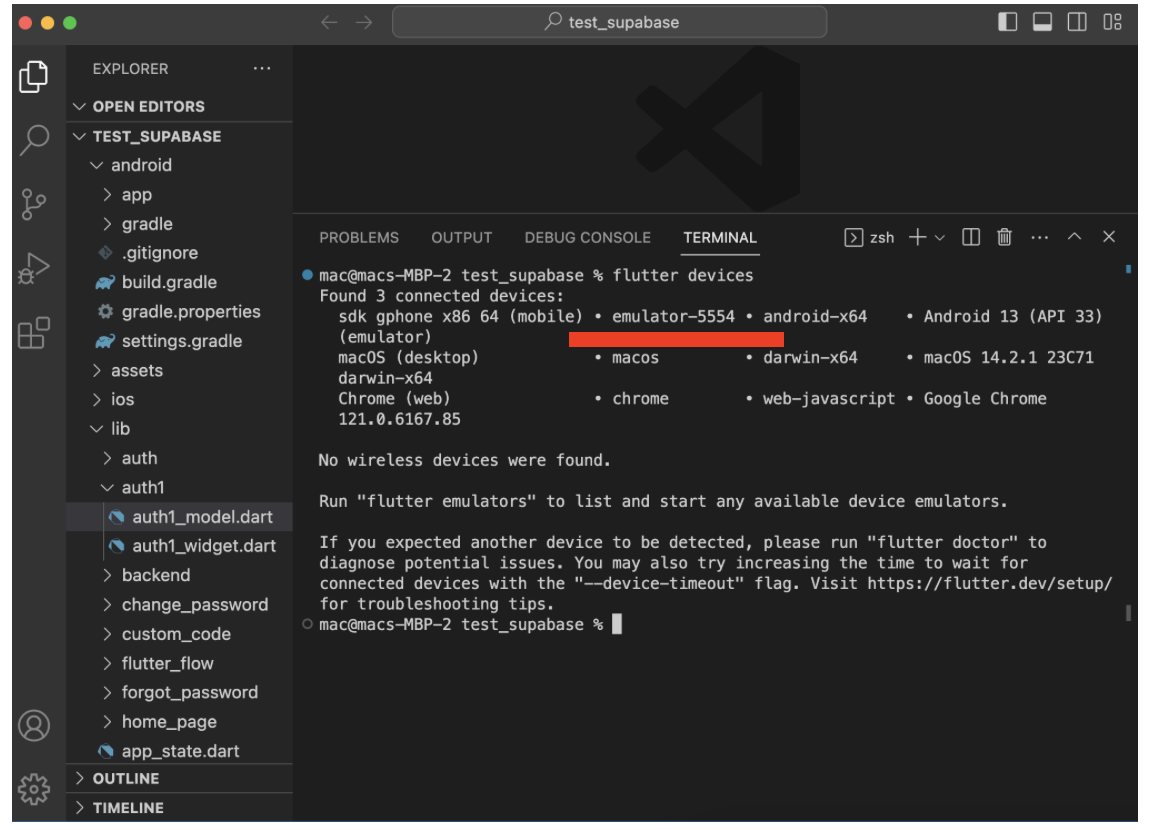
Once your AVD emulator is running, return to your IDE (vscode). open the terminal and run the command “flutter devices”. This will list all available devices, including your Android emulator.
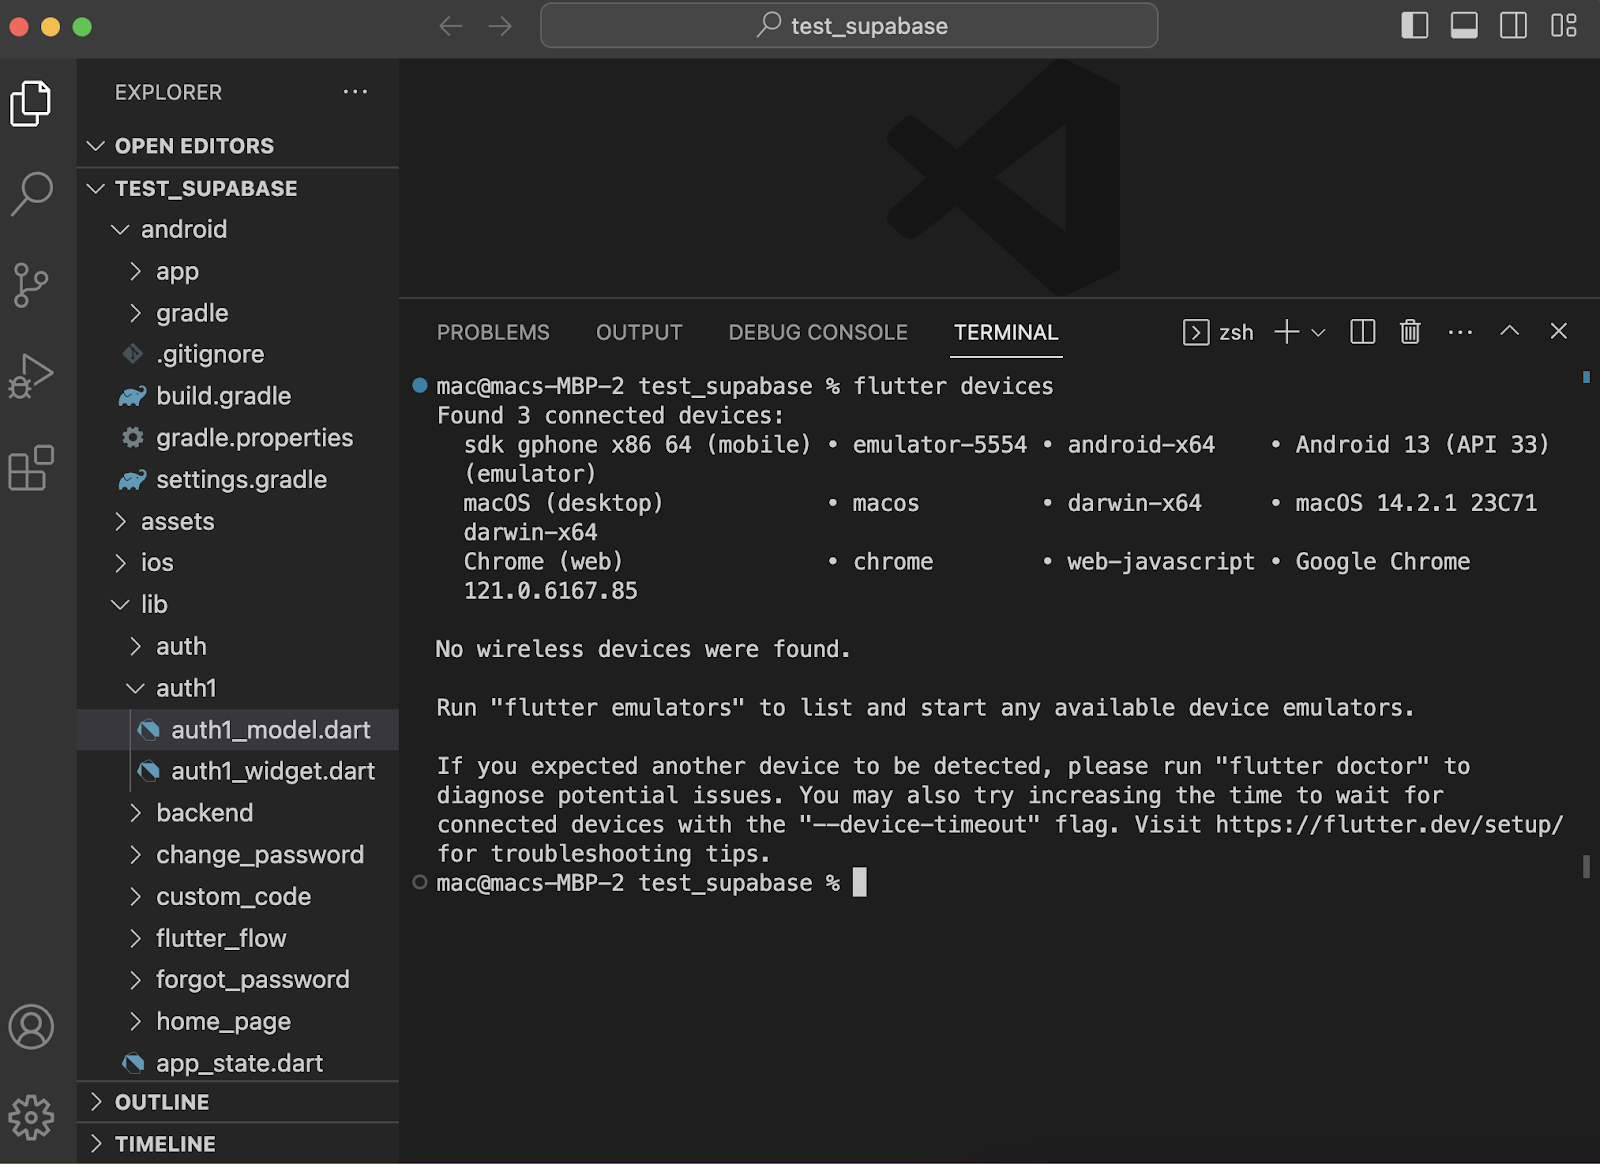
Copy the device ID of your Android emulator.
Run the command flutter run -d <deviceID>, replacing <deviceID> with the ID of your Android emulator.
This command builds and runs your Flutter app specifically on your Android emulator
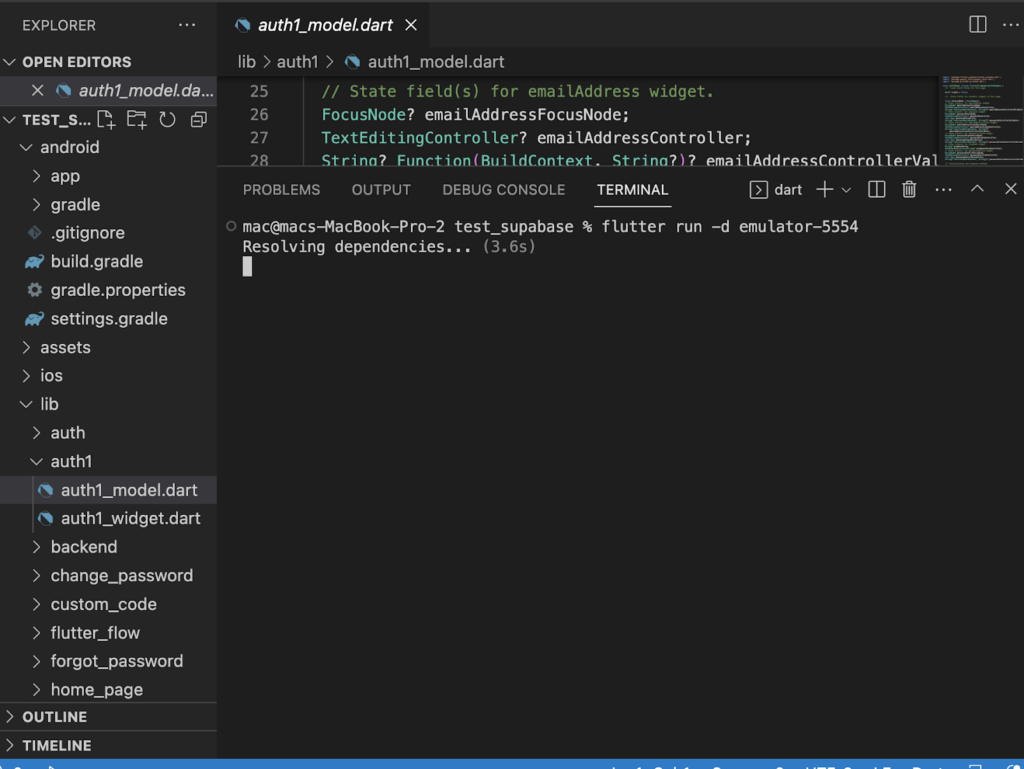
If everything is set up correctly, you should see your app running in the simulator.
You can interact with your app, test its features, and debug any issues that may arise.
By following these simple steps, you can download your code from Flutter Flow, set up your IDE, and run your Flutter project in a simulator for testing and development purposes. Happy coding!
Read more:
Moving Pages between Projects in FlutterFlow: A Step-by-Step Guide
How to make an editable listview in flutterflow step by step