How to make an editable listview in flutterflow step by step
Have you ever encountered challenges managing the state of widgets within a ListView while working with FlutterFlow? If so, you’re not alone. In this article, we delve into the nuances of ListView state management, explore common errors, and provide effective solutions to streamline your development process.
Mastering ListView State Management in FlutterFlow
The error we’re tackling in this article emerges when attempting to incorporate widgets like text fields into a ListView that generates dynamic components.
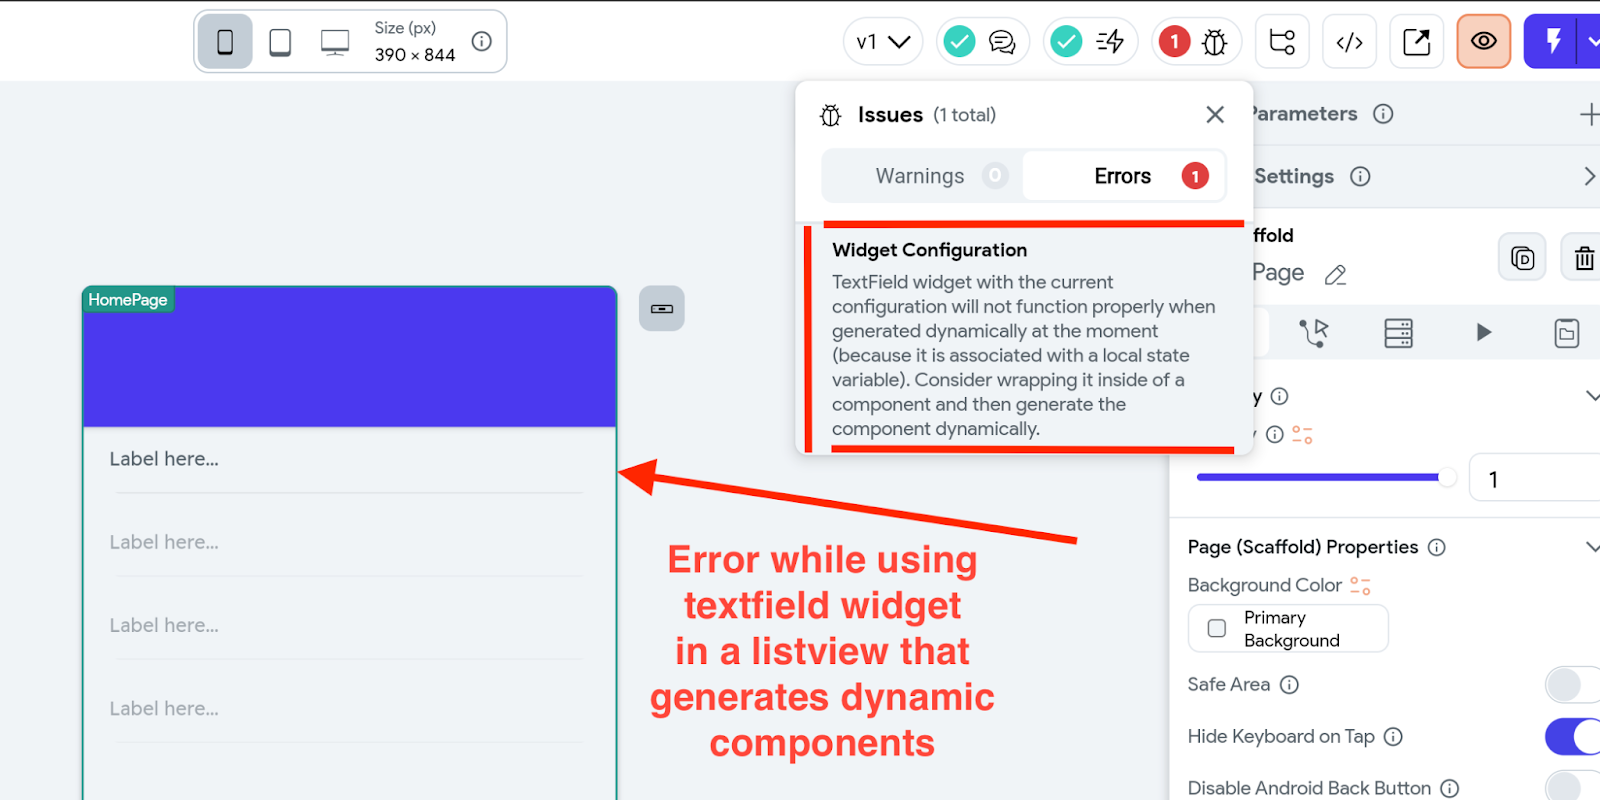
This error commonly arises in FlutterFlow when developers integrate ListView components connected to databases or variables within their applications.
Firstly let’s understand how a listview functions.
Understanding ListView in Flutter
Before delving into ListView state management, it’s essential to comprehend the fundamentals of ListView within the Flutter environment. ListView serves as a powerful tool for connecting to external data sources such as API calls, Firebase backend, or Supabase backend.
It facilitates the dynamic generation of UI components based on retrieved data, enabling developers to create compelling user interfaces that reflect real-time information from the backend database.
By leveraging ListView in FlutterFlow, developers can seamlessly integrate widgets like text, containers, or custom components to showcase dynamically generated UI elements derived from backend data.
Whether you’re building a chat application or displaying a list of products, ListView empowers you to visualise and interact with data from your backend database effortlessly.
The Challenge of ListView State Management
The challenge arises when you seek to dynamically generate widgets that interact with user input or manage app-specific information.
Examples include a timer widget monitoring action timing, a text box widget gathering user input, or a checkbox widget recording user responses.
The predicament lies in the behavior of a list view, which refreshes and regenerates widget instances each time it scrolls.
Consequently, it may forget previously inputted data or fail to track ongoing user interactions, particularly concerning widgets embedded within the list view.
For instance, when utilizing text boxes within a list view, the list view’s periodic refreshes might cause it to lose track of user-entered text.
However, for simpler widgets like containers or text widgets that don’t entail state tracking, such issues do not manifest. Hence, the crux of the matter lies in managing what we refer to as “states.”
In essence, states encapsulate the current information held within a widget. It serves as a term to describe the management of data input into a widget or the information tracked by the widget, especially concerning widgets requiring user interaction.
Addressing ListView State Management Challenges
Alright, now that we’ve identified the core issue concerning how ListView interacts with certain widgets, such as text boxes, and the necessity to preserve the state of these widgets, particularly those that retain or track user information within our application, let’s delve into the solution.
The most straightforward approach to address this challenge and maintain the state of such widgets is by converting them into components.
This method is consistently recommended by FlutterFlow whenever you encounter similar errors while developing your FlutterFlow application.
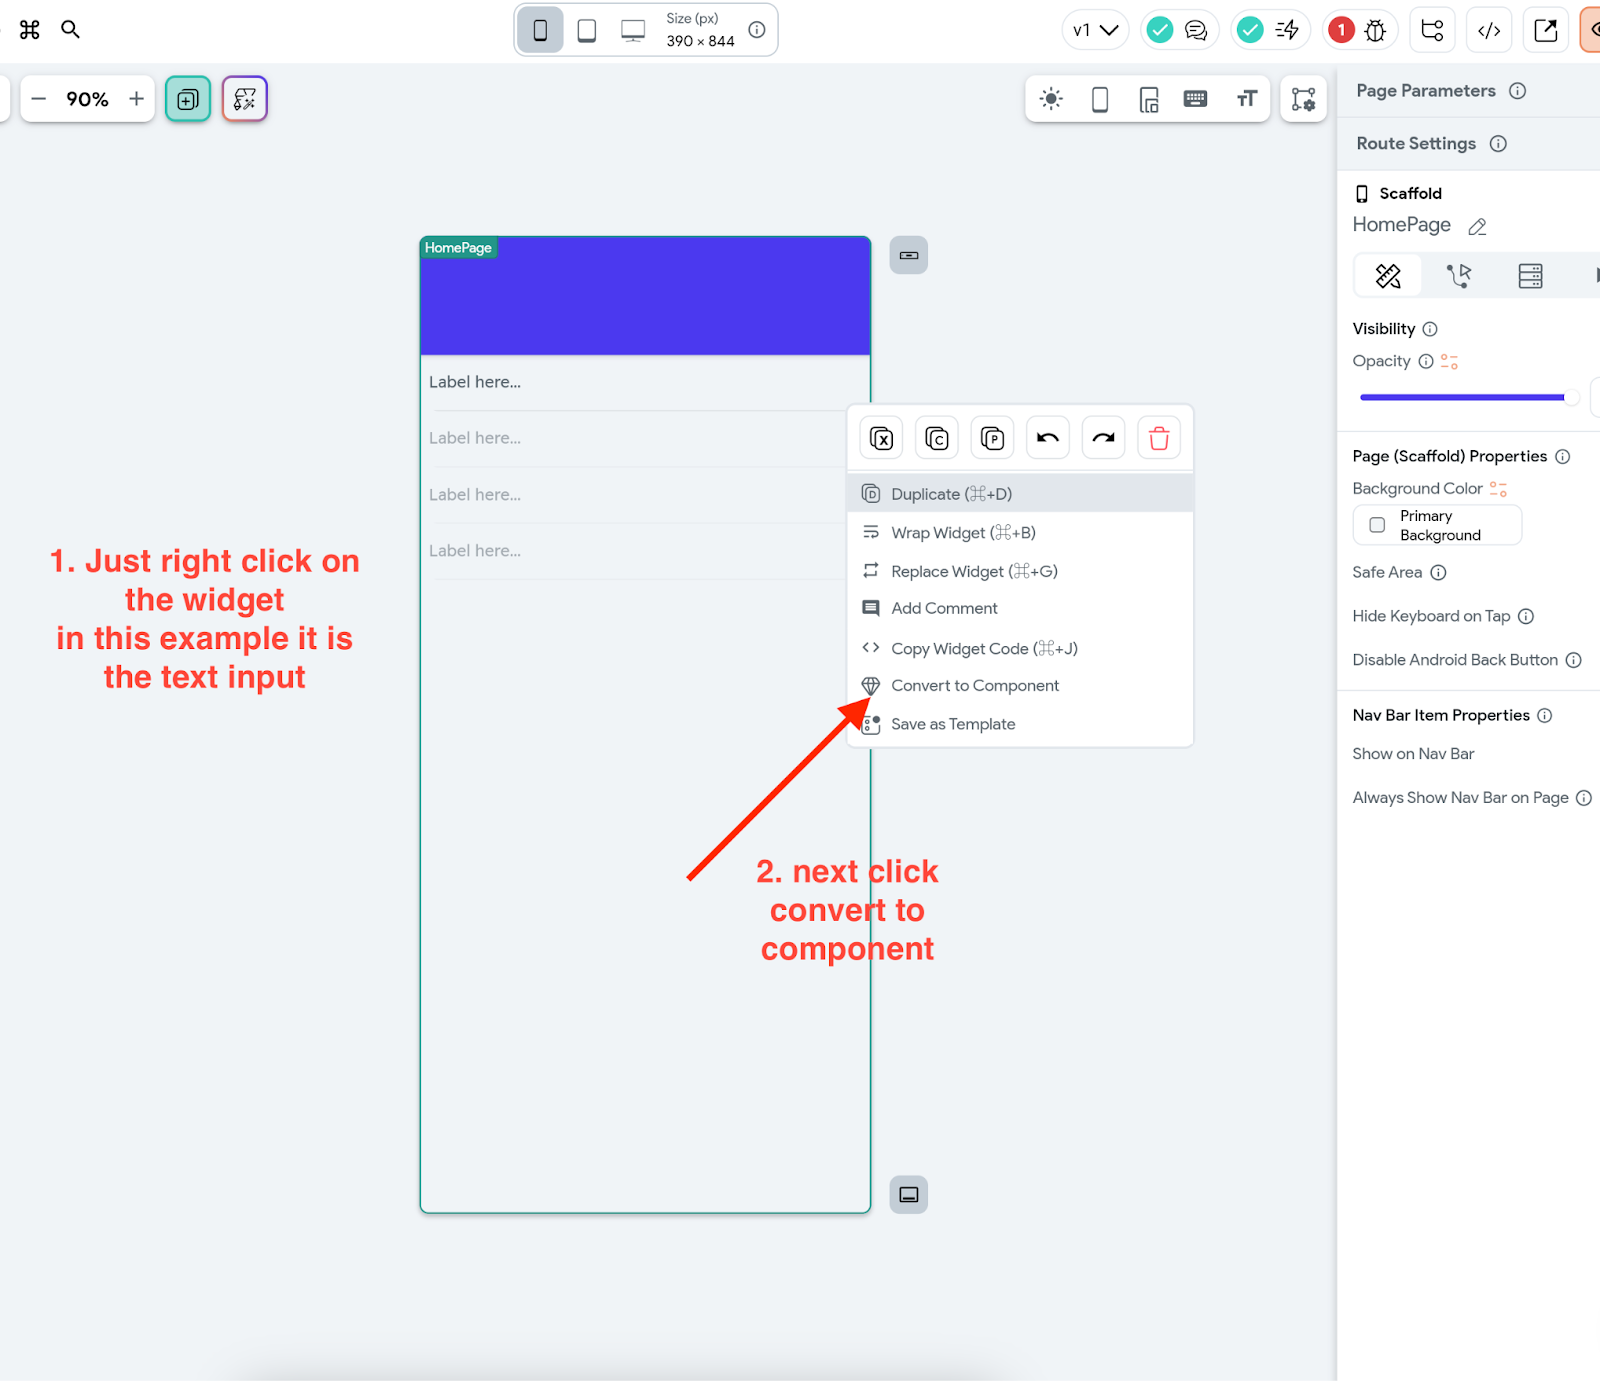
Converting a widget to a component is a simple process: just right-click on the widget, and you’ll find the option to convert it to a component.
But what exactly is a component? To put it simply, a component in FlutterFlow is a reusable UI element or component that can be utilised across various sections of your application.
For instance, in a chat application, we have a component view dedicated to displaying individual chat items, complete with message previews and additional details.
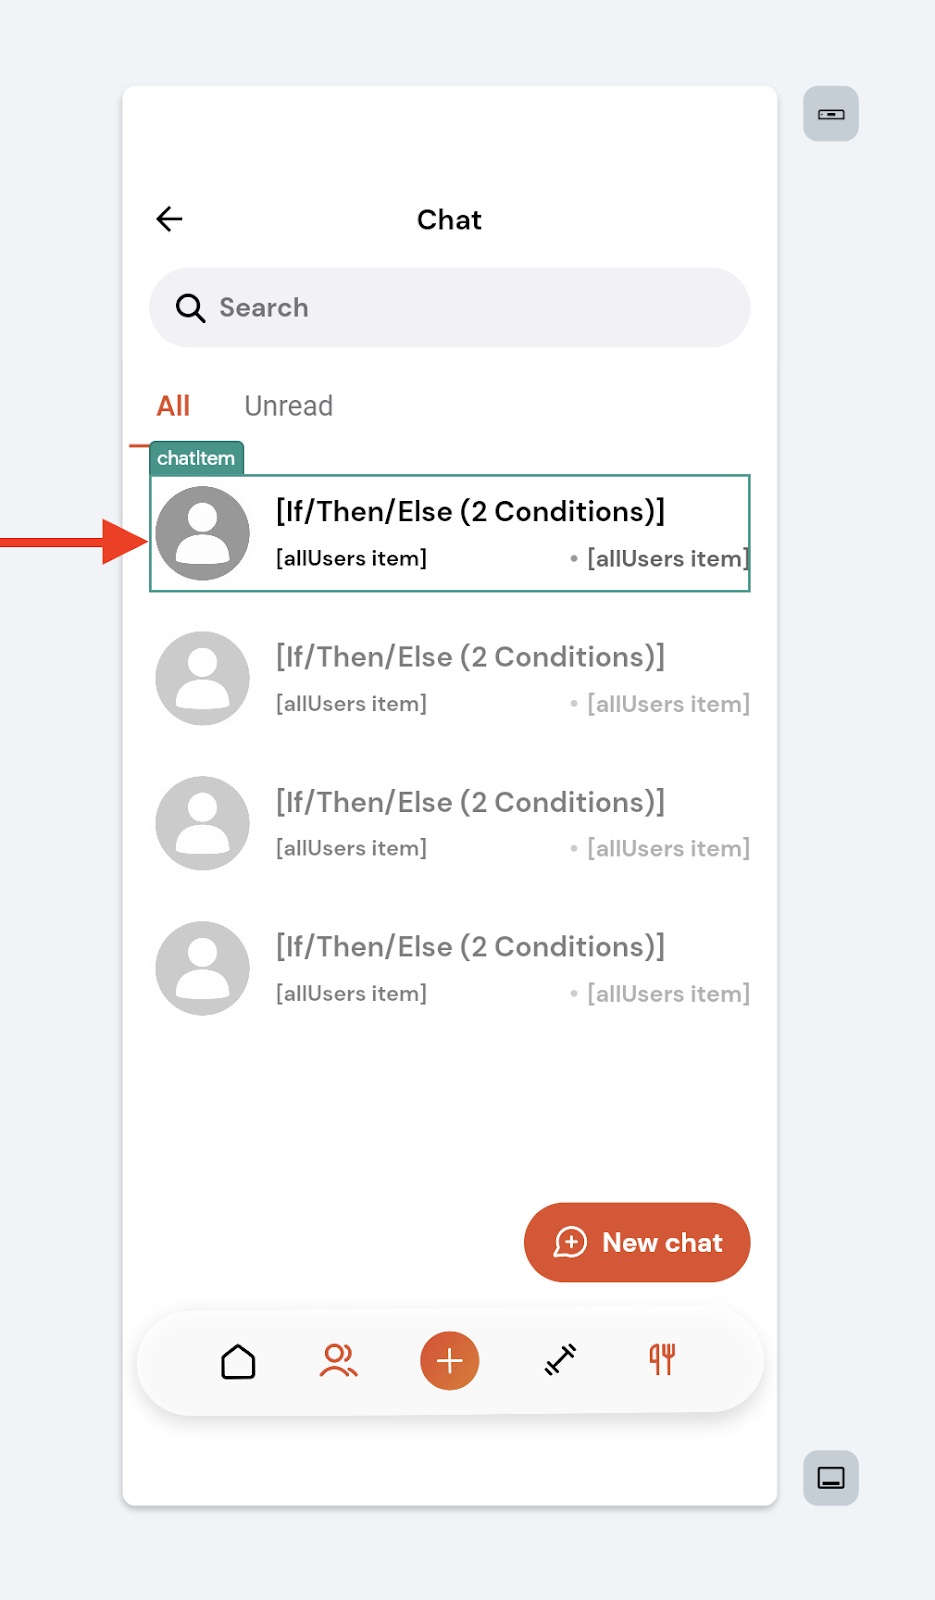
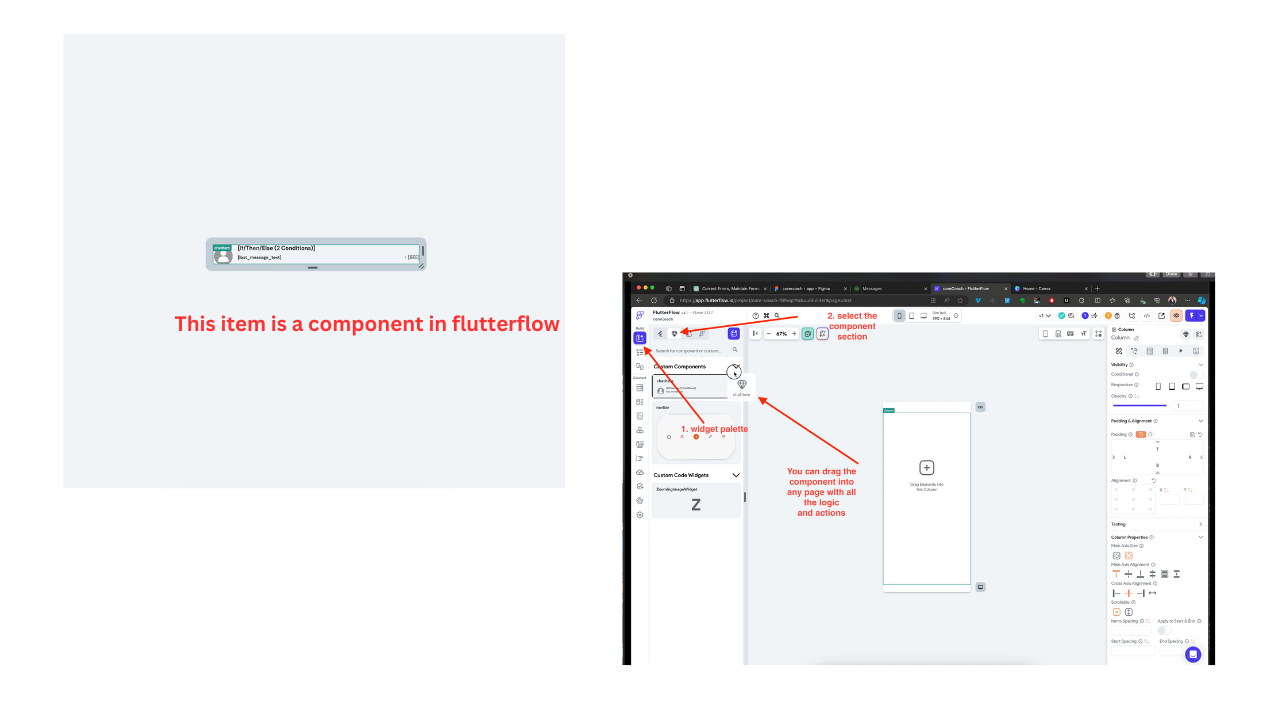
By creating this as a component, we can easily reuse it throughout our application without the need to recreate it every time.
This means that you can access it from the widgets palette and drag it onto different parts of your screen, facilitating seamless reuse without the hassle of rebuilding it repeatedly.
One of the key advantages of using components is their ability to preserve state and manage state management effectively within your application.
While a detailed discussion on state management is reserved for another article, it’s worth noting that components play a crucial role in this aspect.
With components in FlutterFlow, you can even save information within component states, ensuring that data remains intact even when ListView refreshes on the user’s device. It’s truly remarkable, and delving deeper into state management will unveil its full potential.
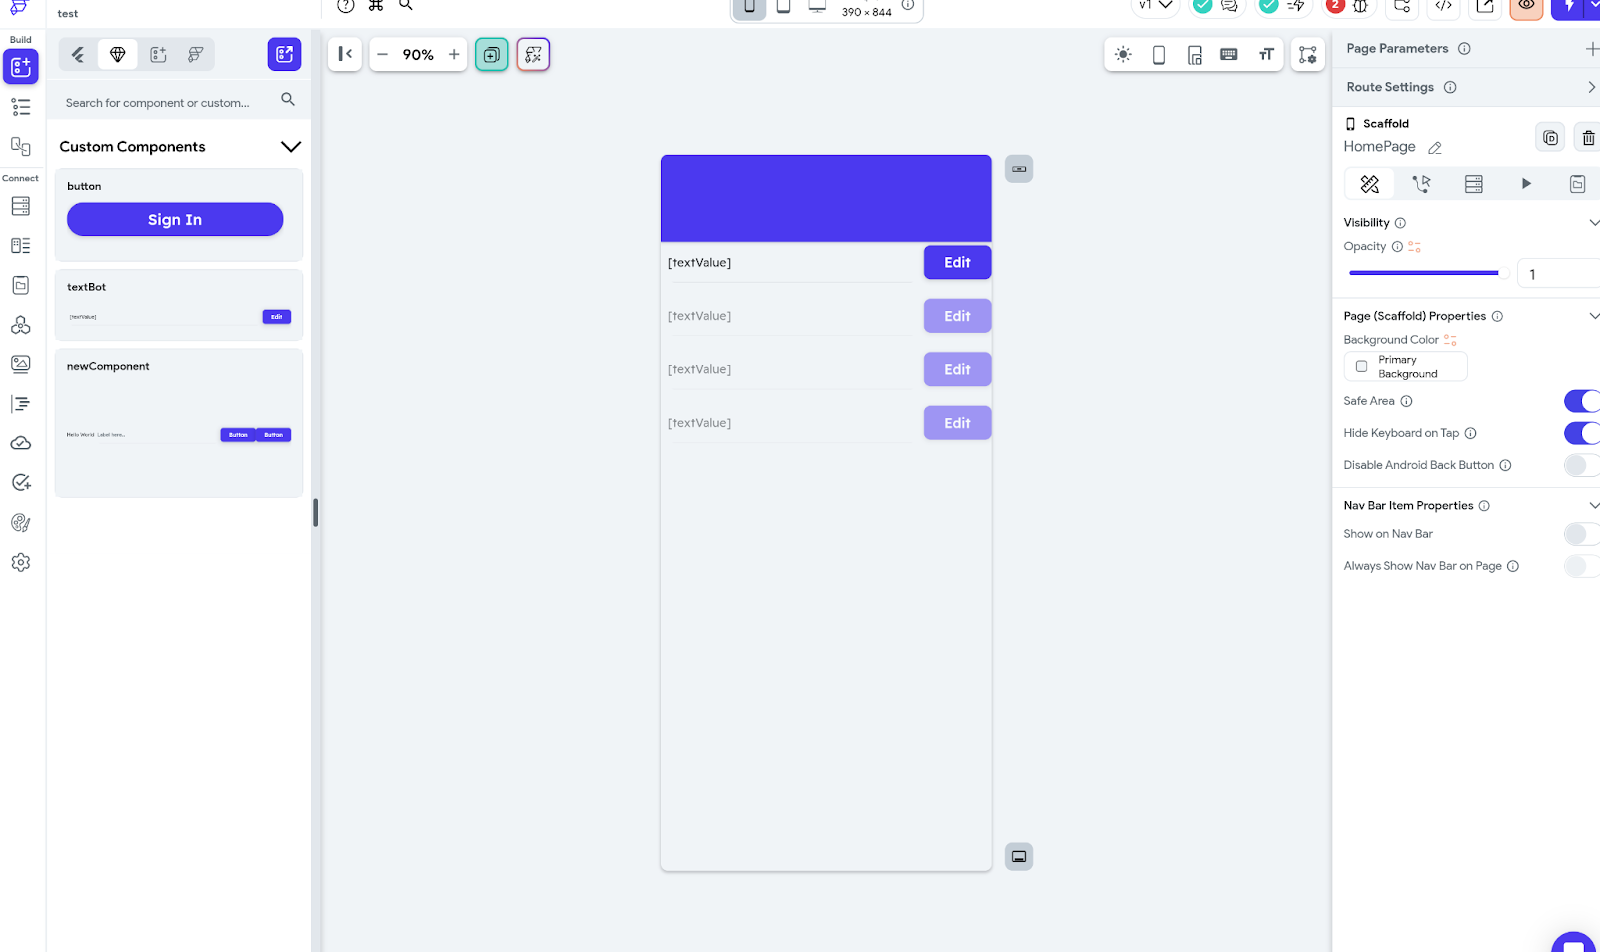
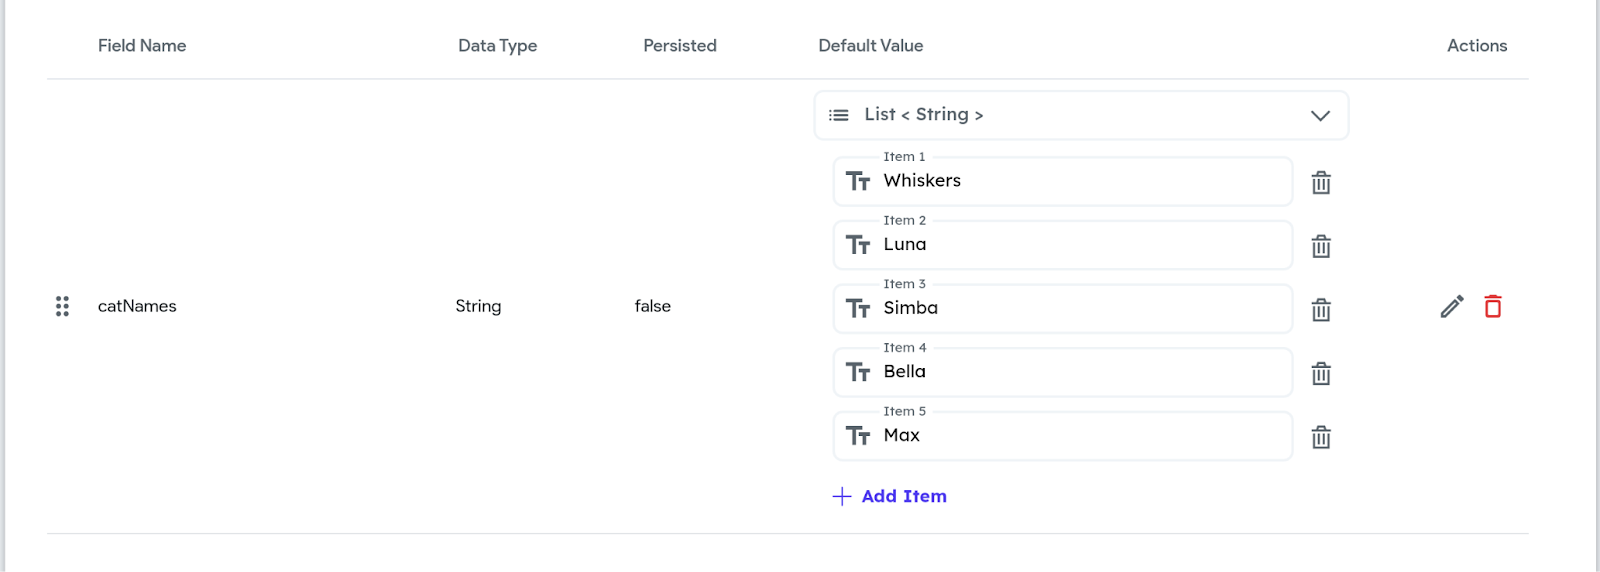
Now, let’s demonstrate how we can leverage a simple ListView widget to showcase a list of cat names from an appState and seamlessly edit the information within the ListView by allowing the user to change the name of a catname in the list with a text input widget inside a component.
We have already defined a list of catnames in an appstate list <string>
To recap, our requirements include a ListView, a text widget, a text box, and a button widget. Let’s proceed to action.
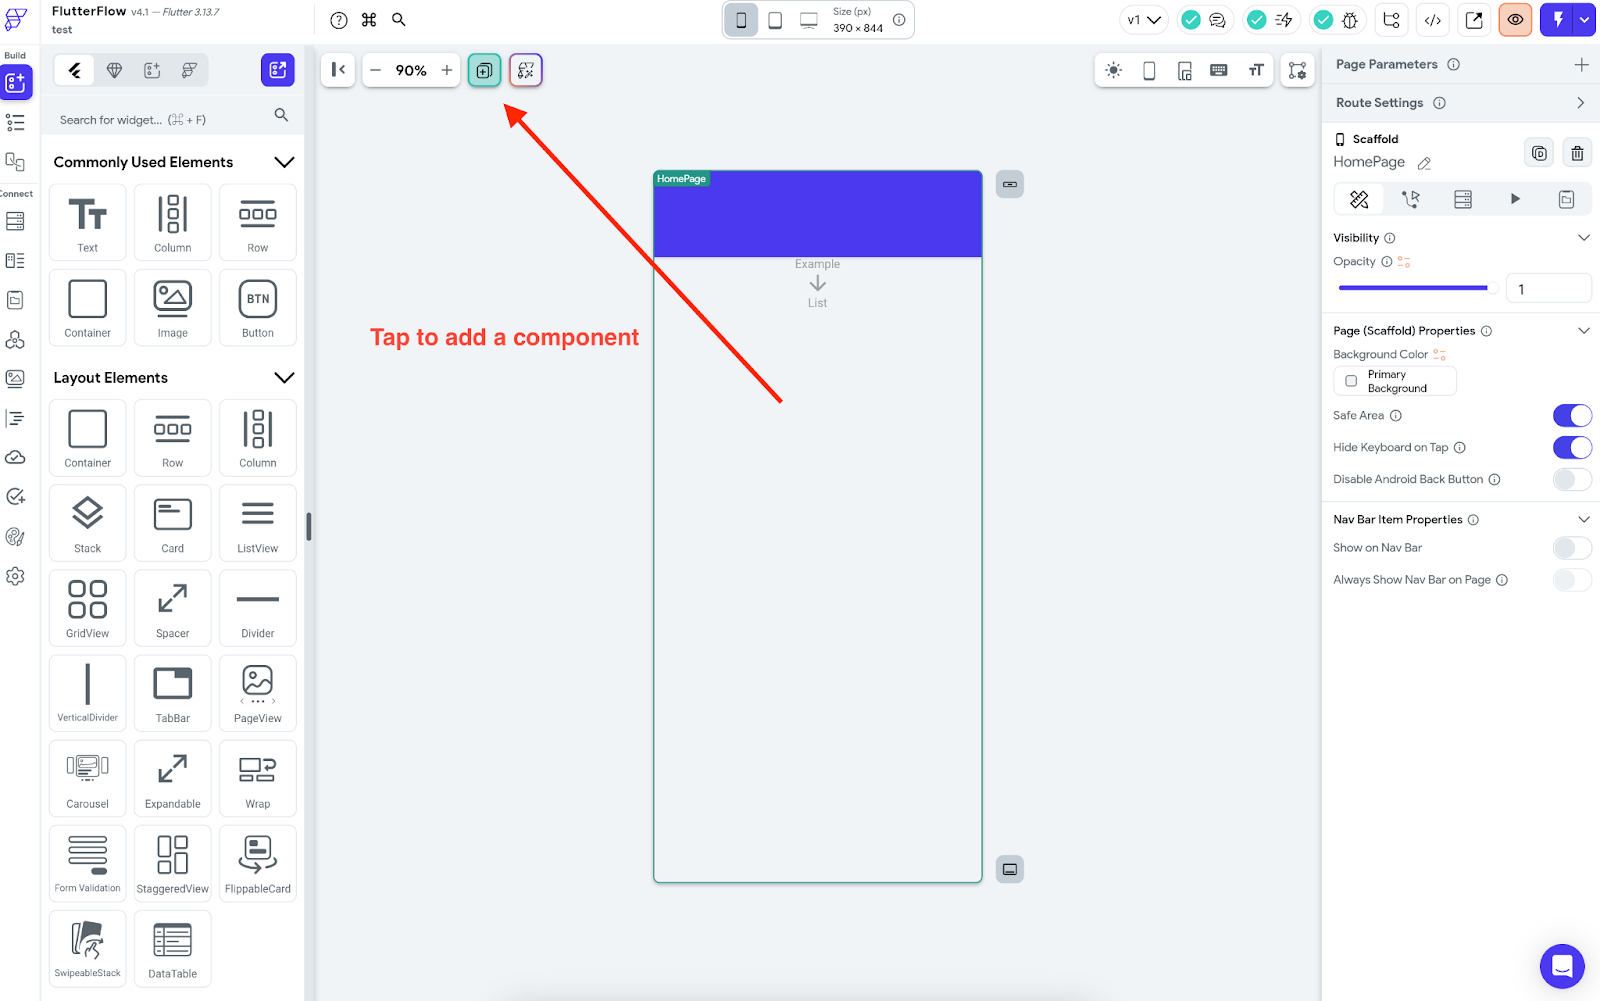
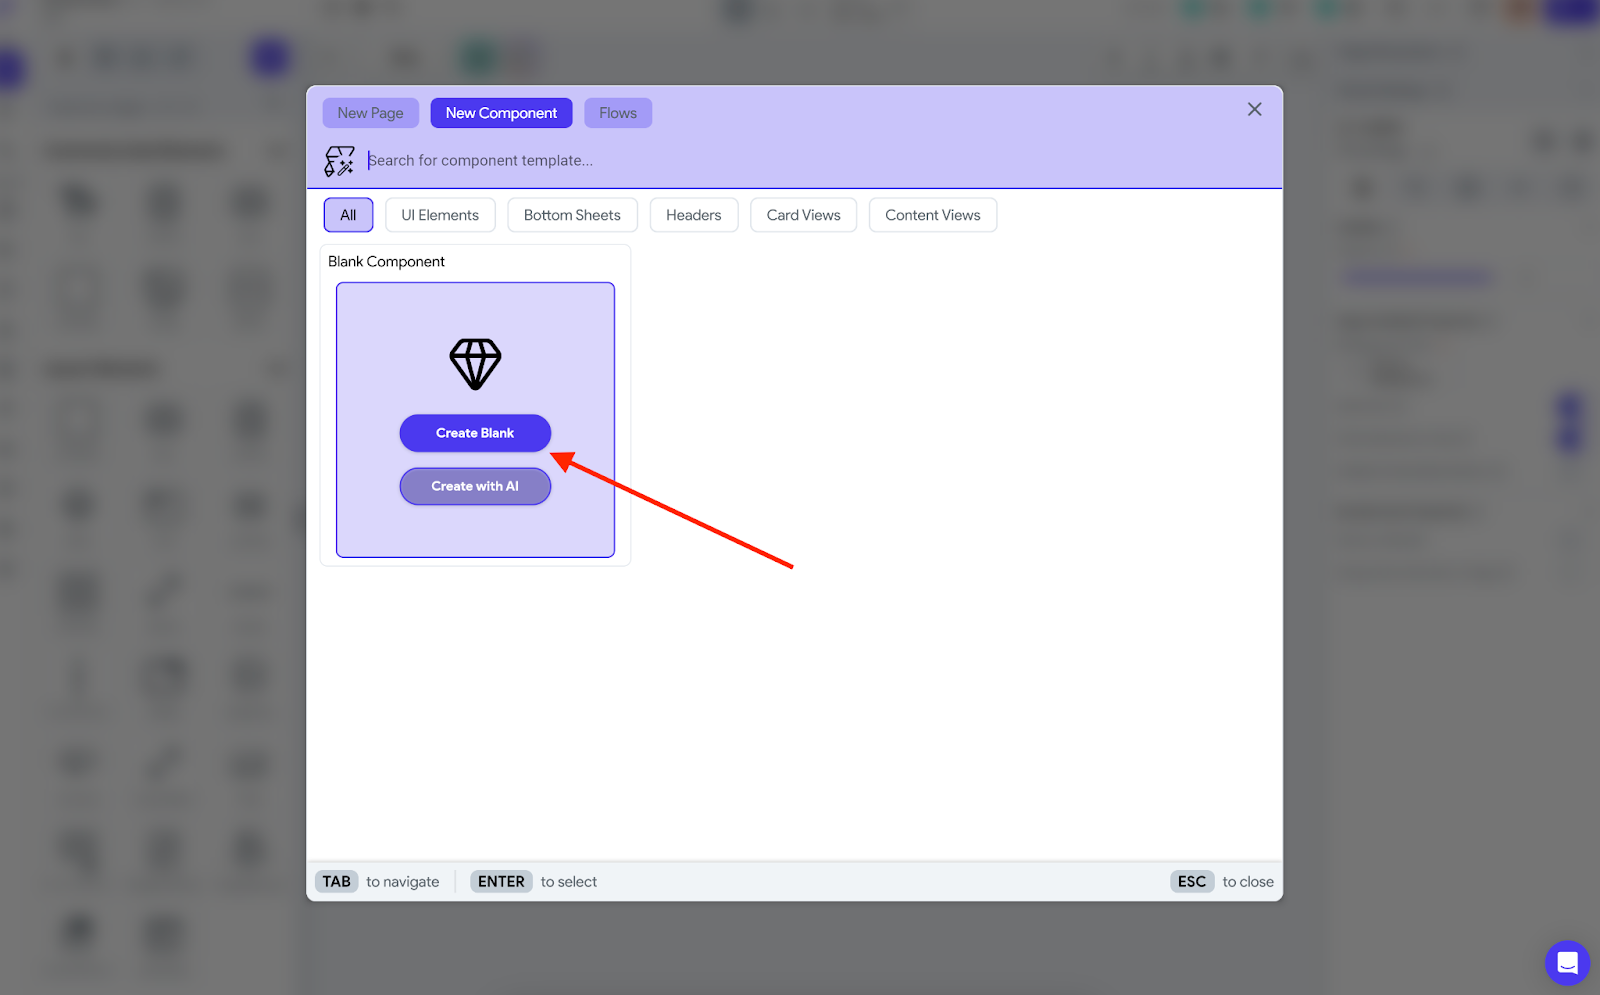
Step one: create a component for the list view
Firstly, we’ll add a new blank component and give it a name.
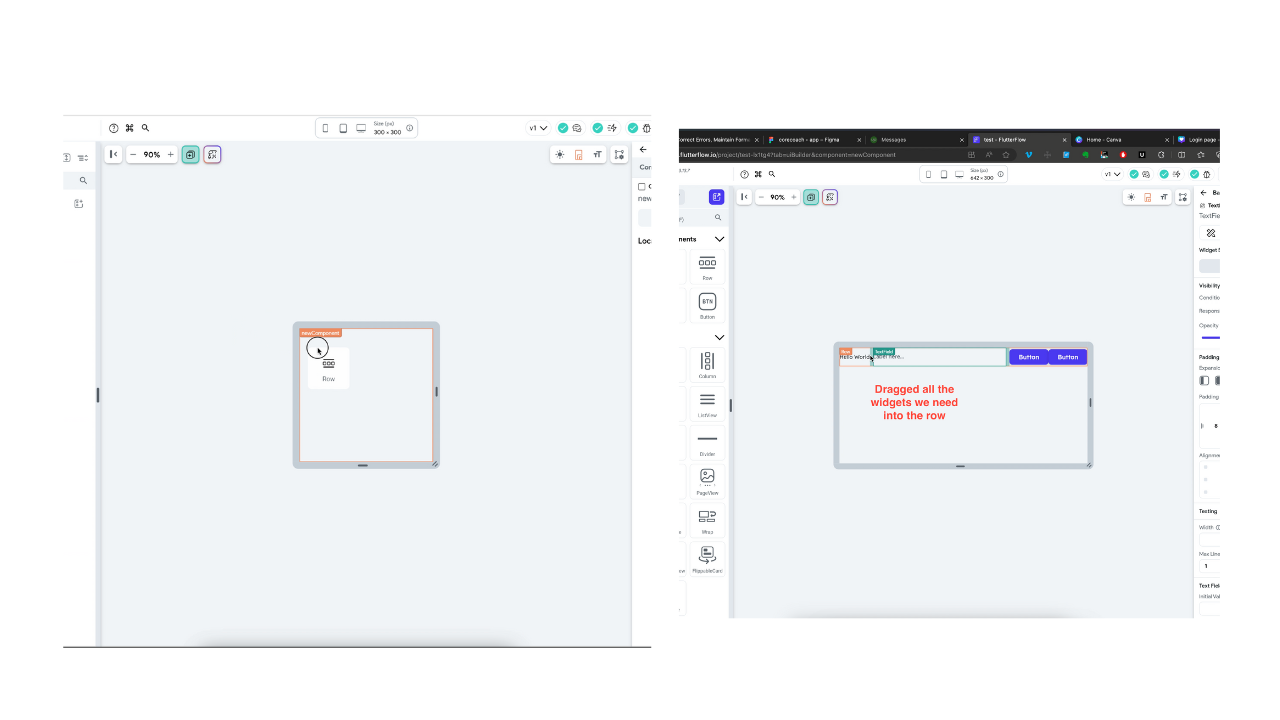
We will add a row to the base of the component so that it can outline widgets from left to right, including a text box, a text widget, and two buttons (one to edit and one to save the edit).
The text widget and the “edit” button will be visible when the user wants to preview information from our app state, while the text input and the “save” button will be visible when the user wishes to edit the information.
One of the advantages of components is their capability to manage individual component states effectively.
For instance, we can create a component state to determine whether the user intends to edit a particular component or not, in our new component we can create a component state to track when a user wants to edit any data from the listview inside our component.
Click on the component state tab, tap on the “Add field” button and assign a name and define the type of value you want the component to store and manage.
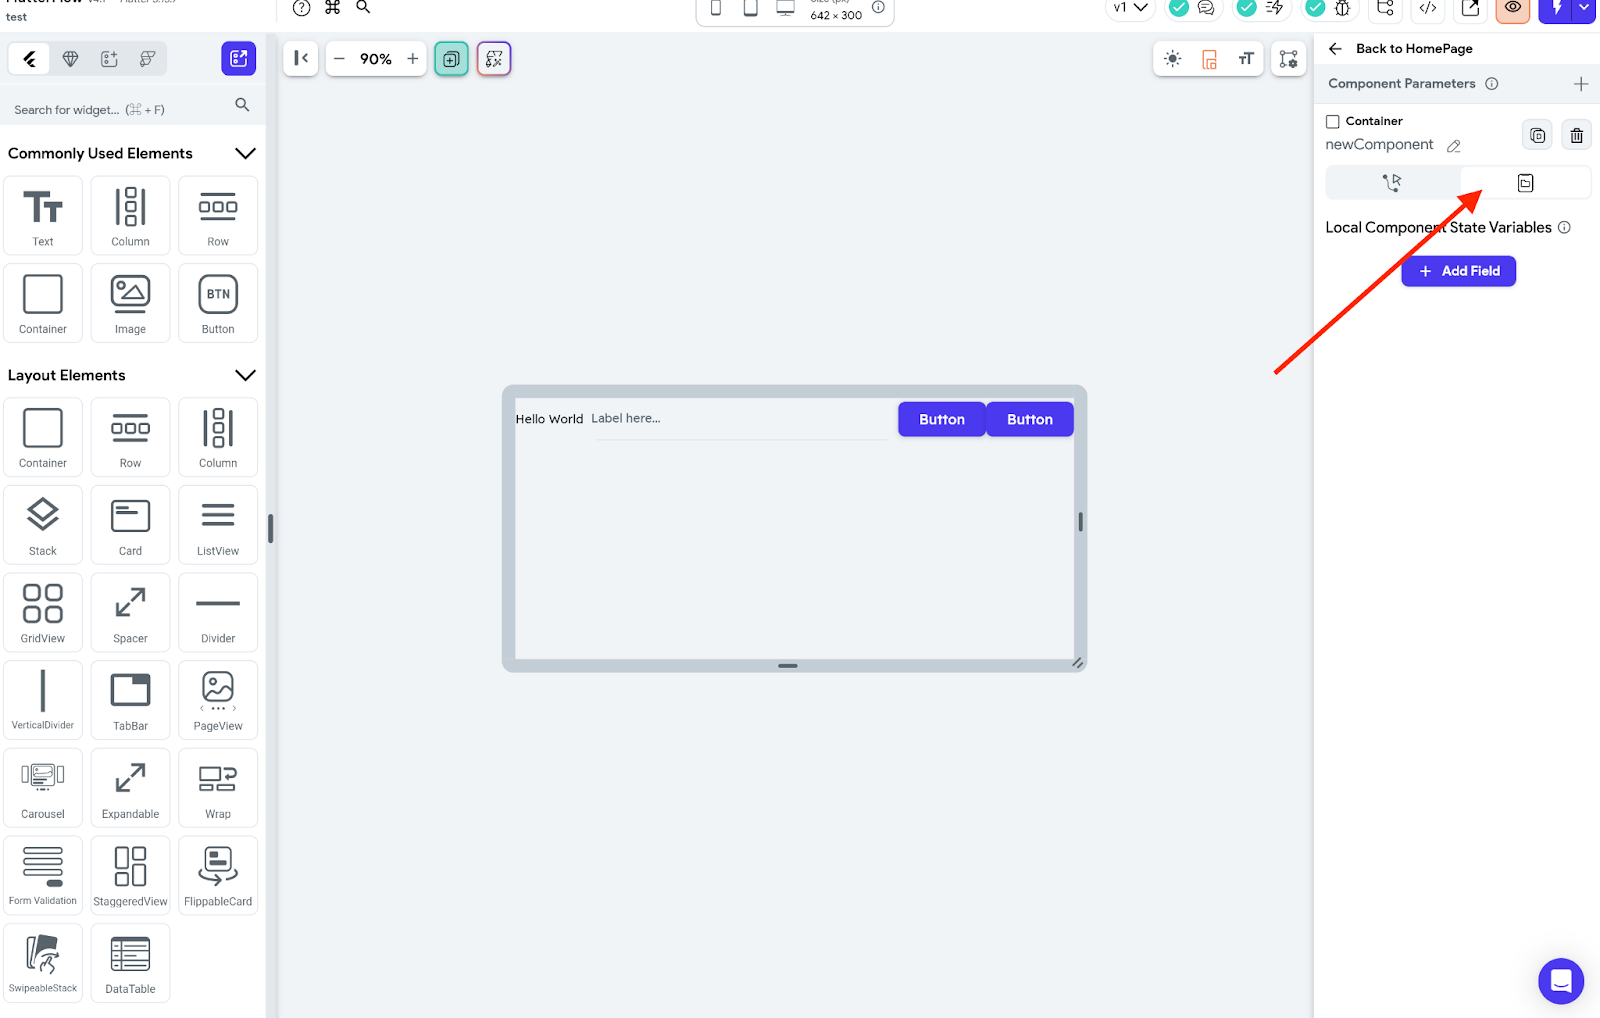
By adding a component state, we can assign it a name and define the type of value it will store.
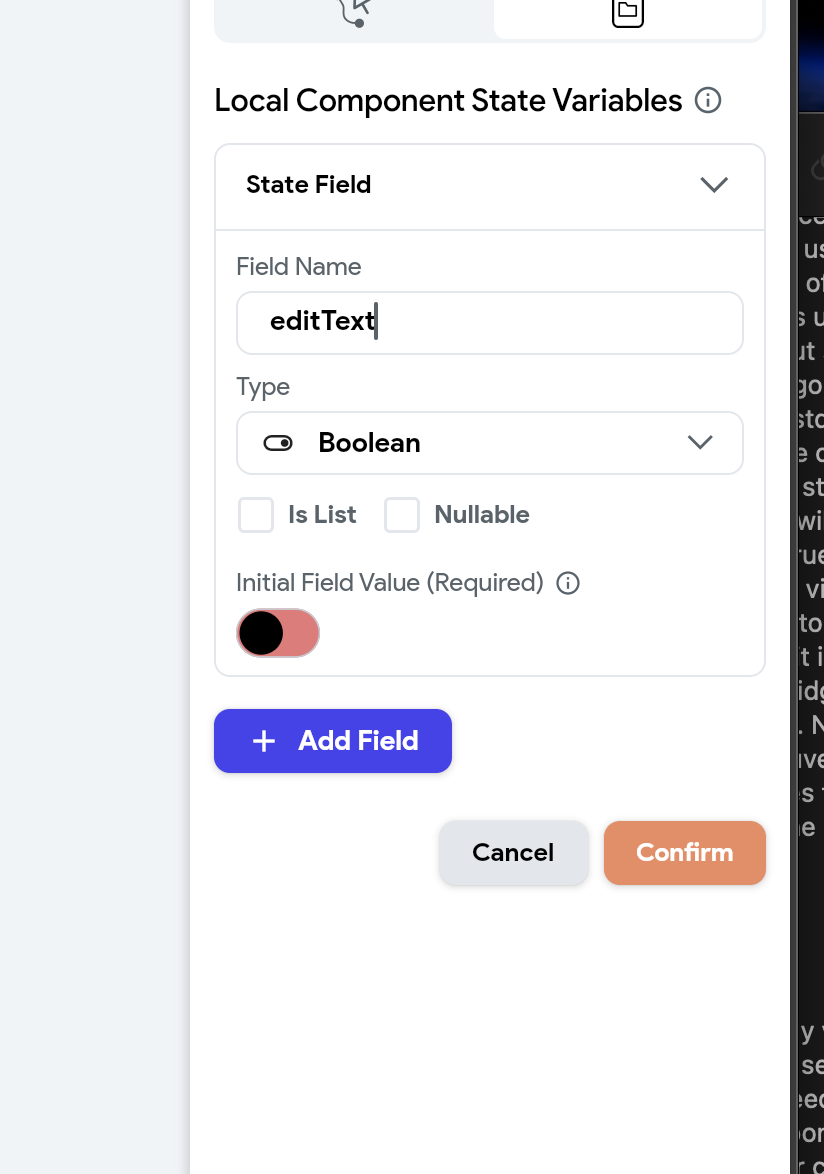
In this scenario, we’ll use a Boolean to represent whether the user wants to edit the information (true) or not (false) we will call the state “editText” and we will save the initial value as false to avoid errors so when we load the component in our app the initial value will be false .
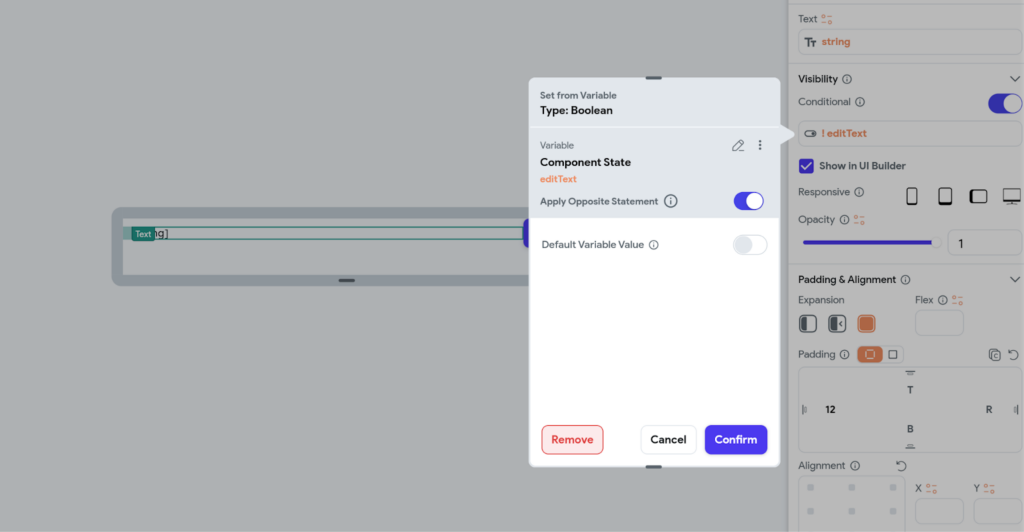
Using conditional visibility in Flutterflow, we’ll link the text widget and the “edit” button to the condition when the component state “editText” is false, meaning that the text widget and the edit button will be visible editText is false indicating that the user does not wish to edit.
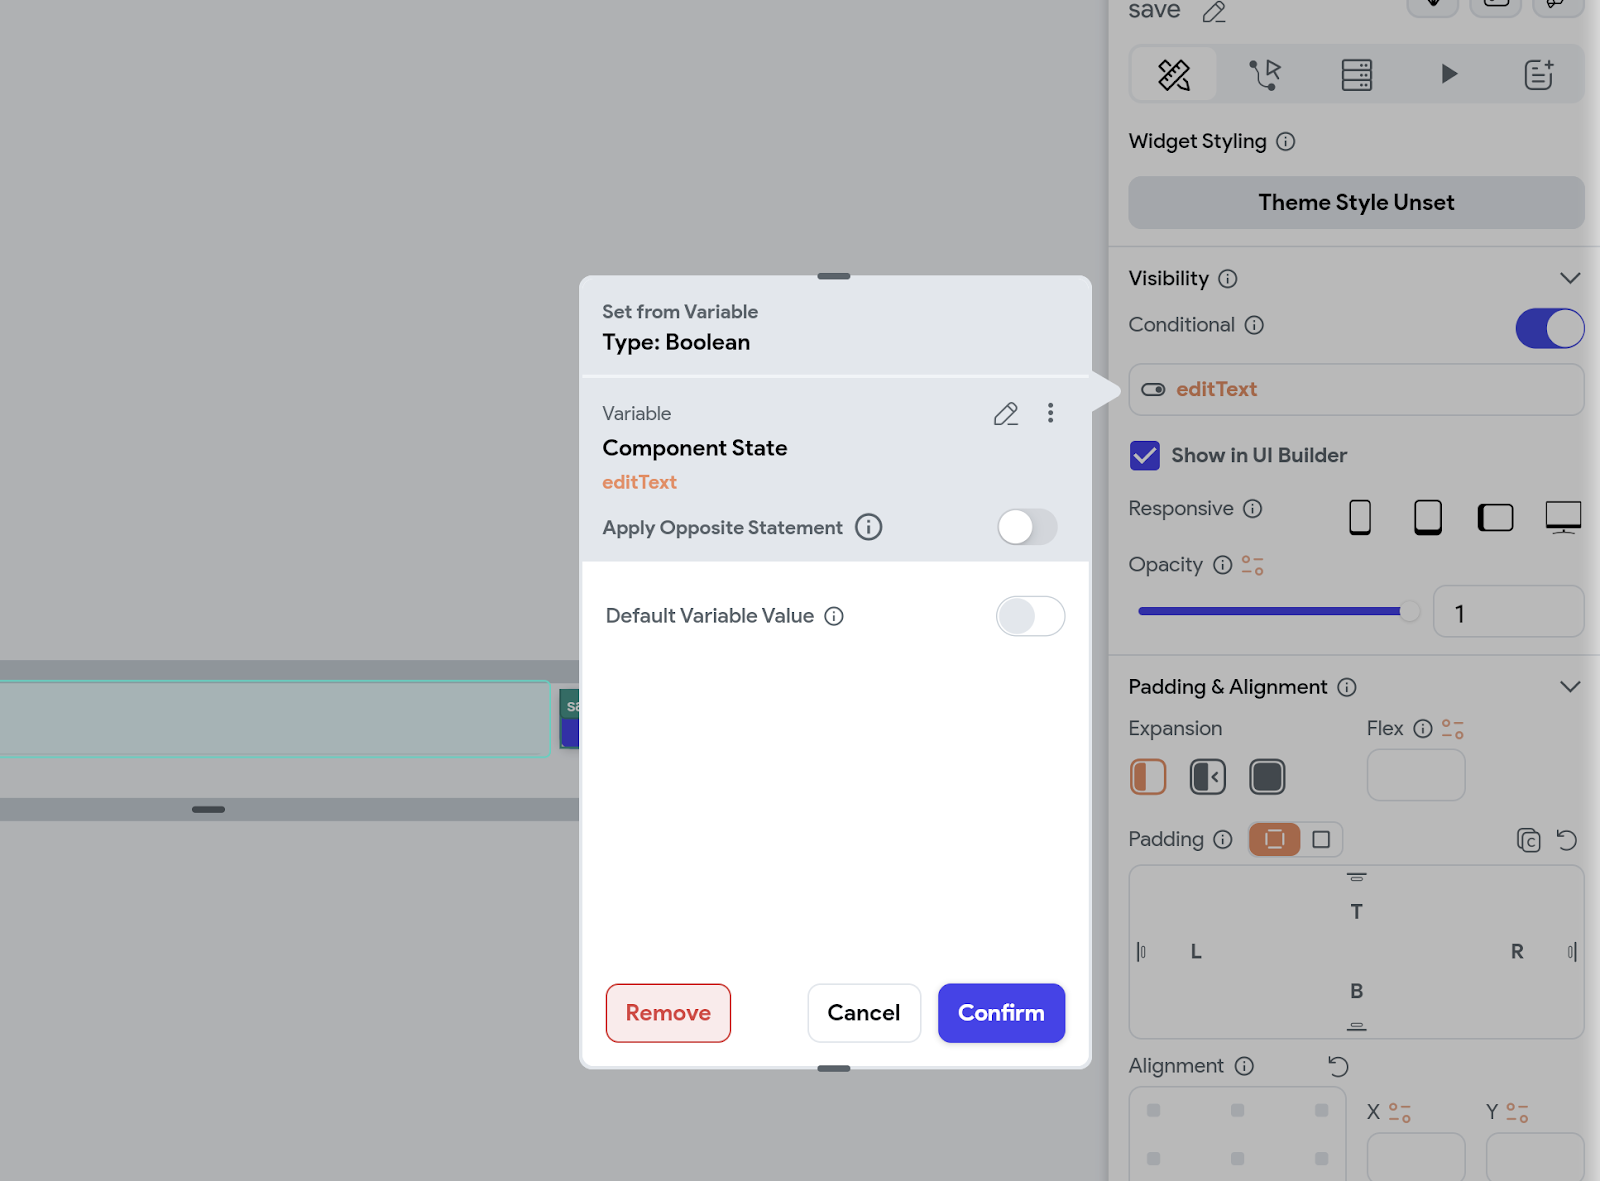
Next, we’ll link the text box widget and the “save” button to the conditional visibility condition when the edit mode is true in the component state.
Before proceeding with assigning actions to the “edit” and “save” buttons, it’s crucial to highlight another feature that significantly enhances the capabilities of components: component parameters.
Components possess the ability to receive parameters from the parent component, there by allowing them to access information passed from the ListView.
To add component parameters, follow these steps:
- Tap on the plus icon located at the top right corner of the component interface.
- Enter the desired component name that accurately describes the parameter you intend to receive.
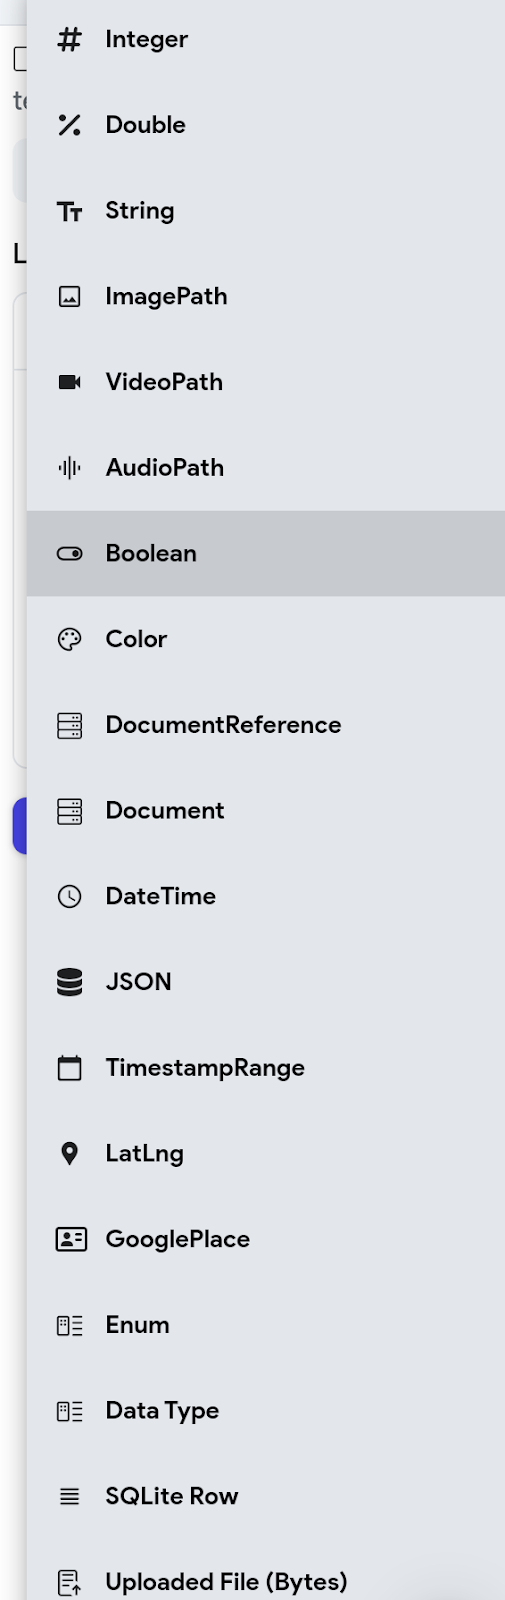
- Choose the appropriate data type for the parameter that the component will receive externally. This could be a string, integer, boolean, or another suitable data type.
- Select whether the parameter is required. If a parameter is marked as required, it indicates that the component must receive this information to function correctly. This is particularly important for essential data that the component relies on to perform its tasks effectively.

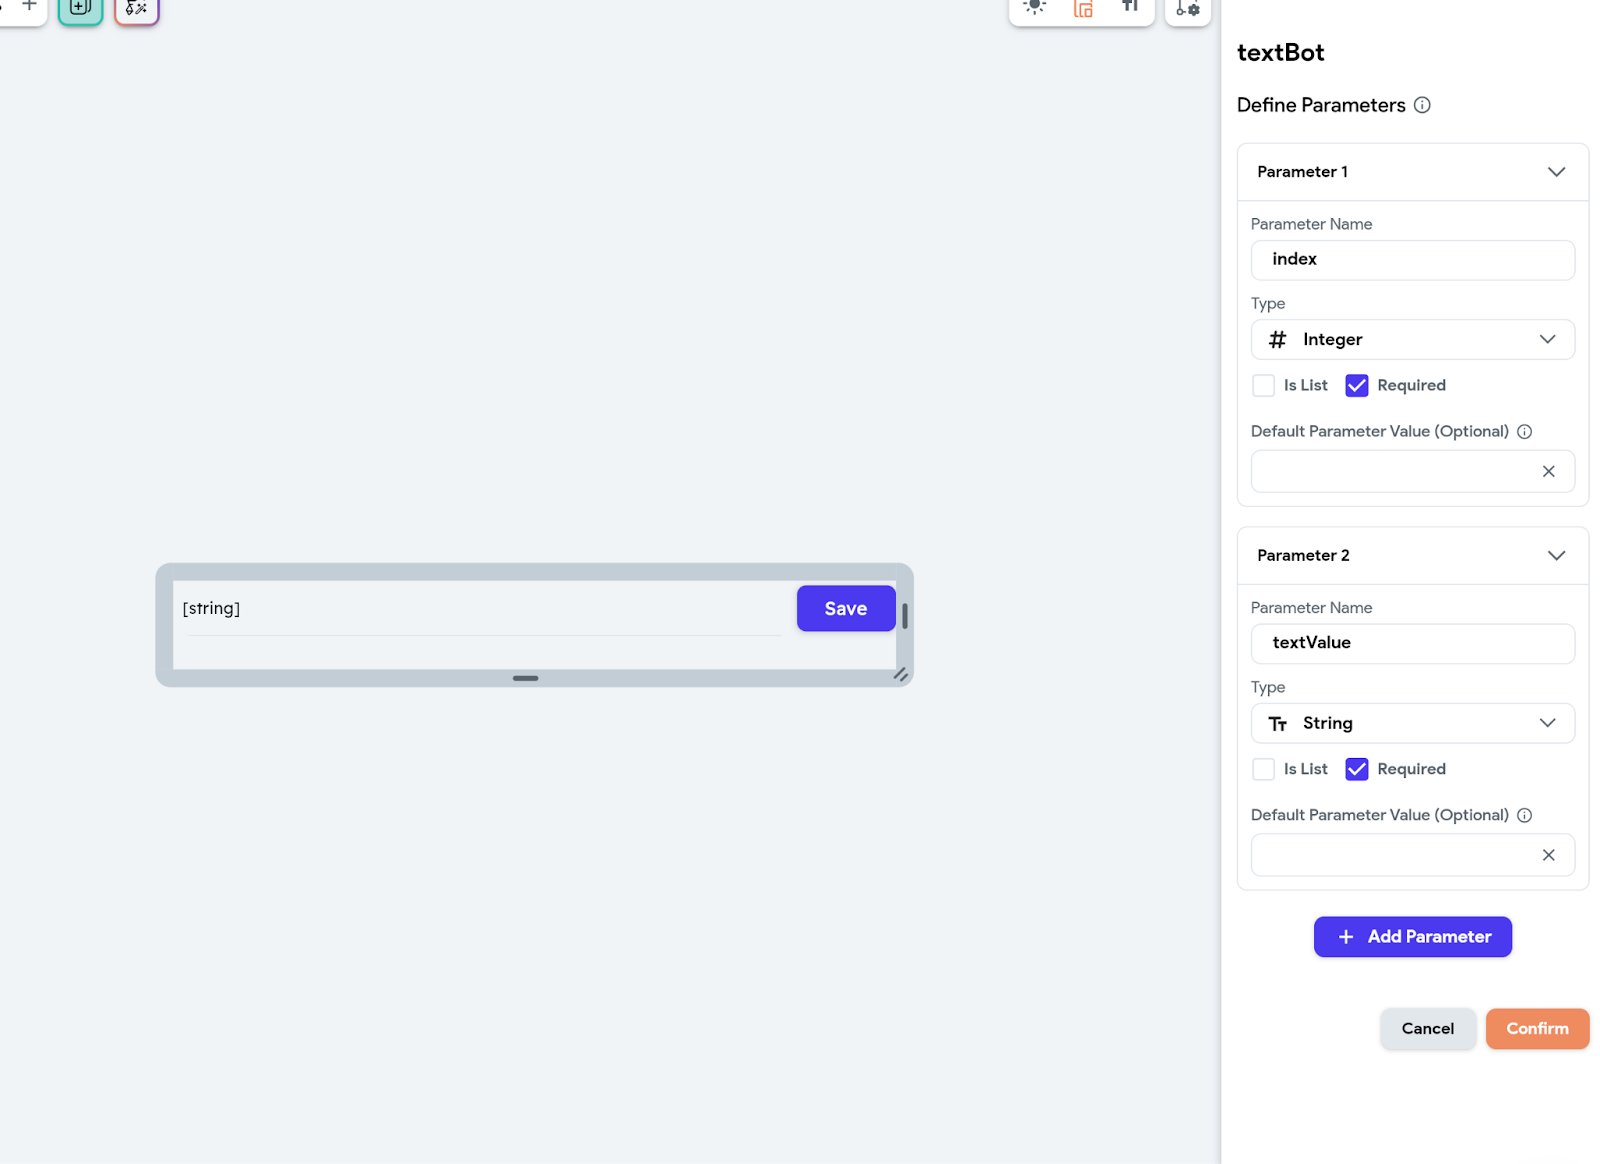
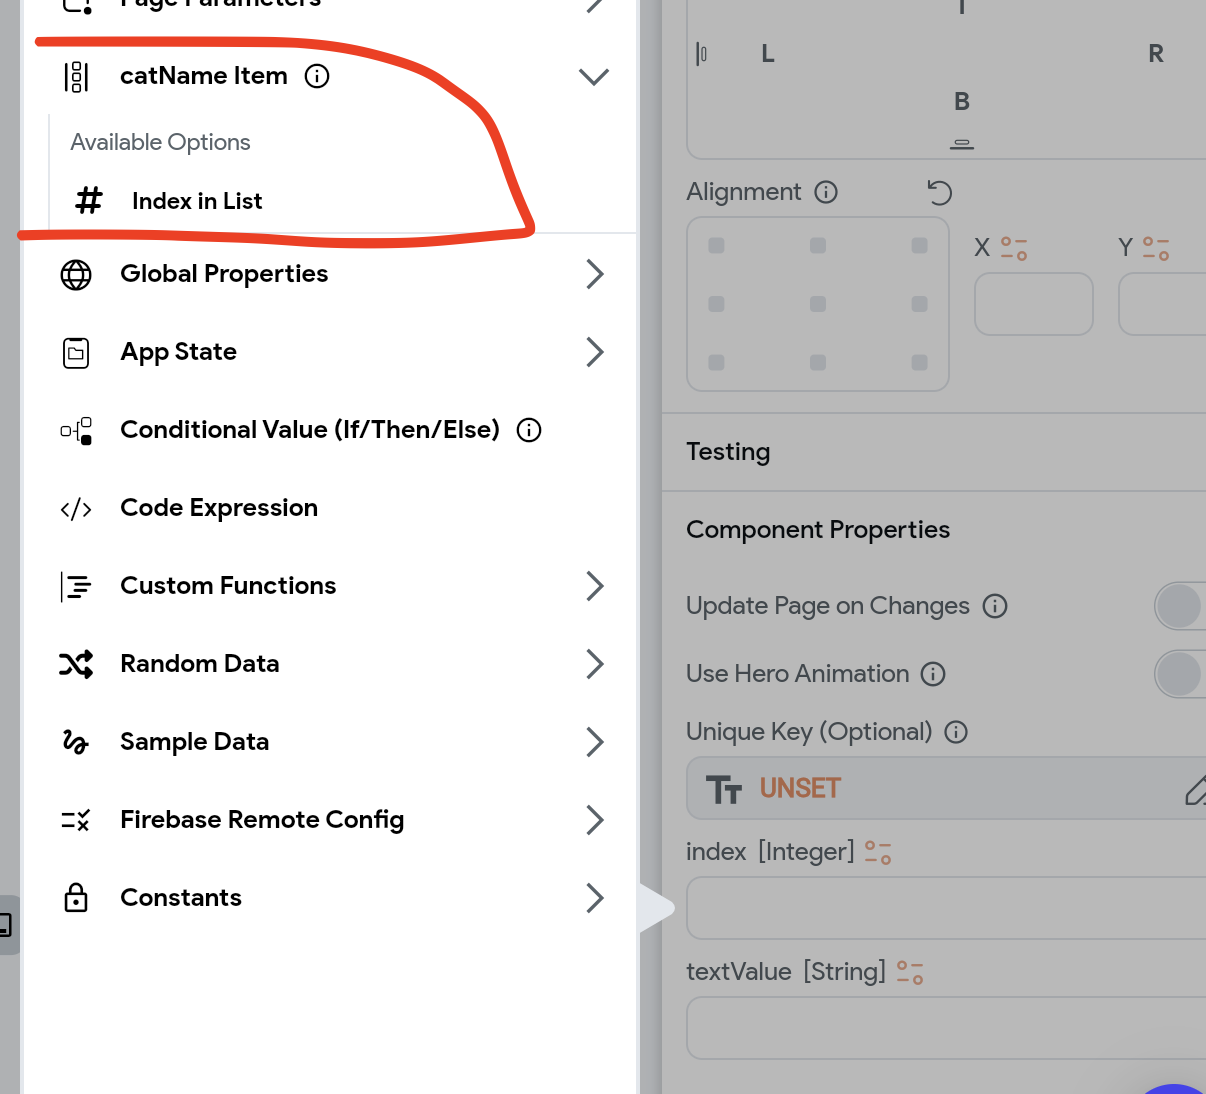
In our context, we intend to pass two parameters: an index and a text value. The text value represents the cat name, which corresponds to the value of the app state currently being viewed in the ListView.
Meanwhile, the index denotes an integer indicating the specific position of the string within the list of strings.
It’s important to note that we’re utilising an index because the only method for updating information in an app state list of strings is through the “update at index” feature. This feature requires the current index of the item in the list of strings that we intend to update.
By leveraging component parameters, we can seamlessly integrate the ListView and the component, facilitating efficient communication and interaction between them.
This ensures that the component has access to the necessary information to perform updates accurately and effectively.
It’s worth noting that components can receive various types of information, ranging from document references for firebase to supabase rows, allowing for interactions with external databases.
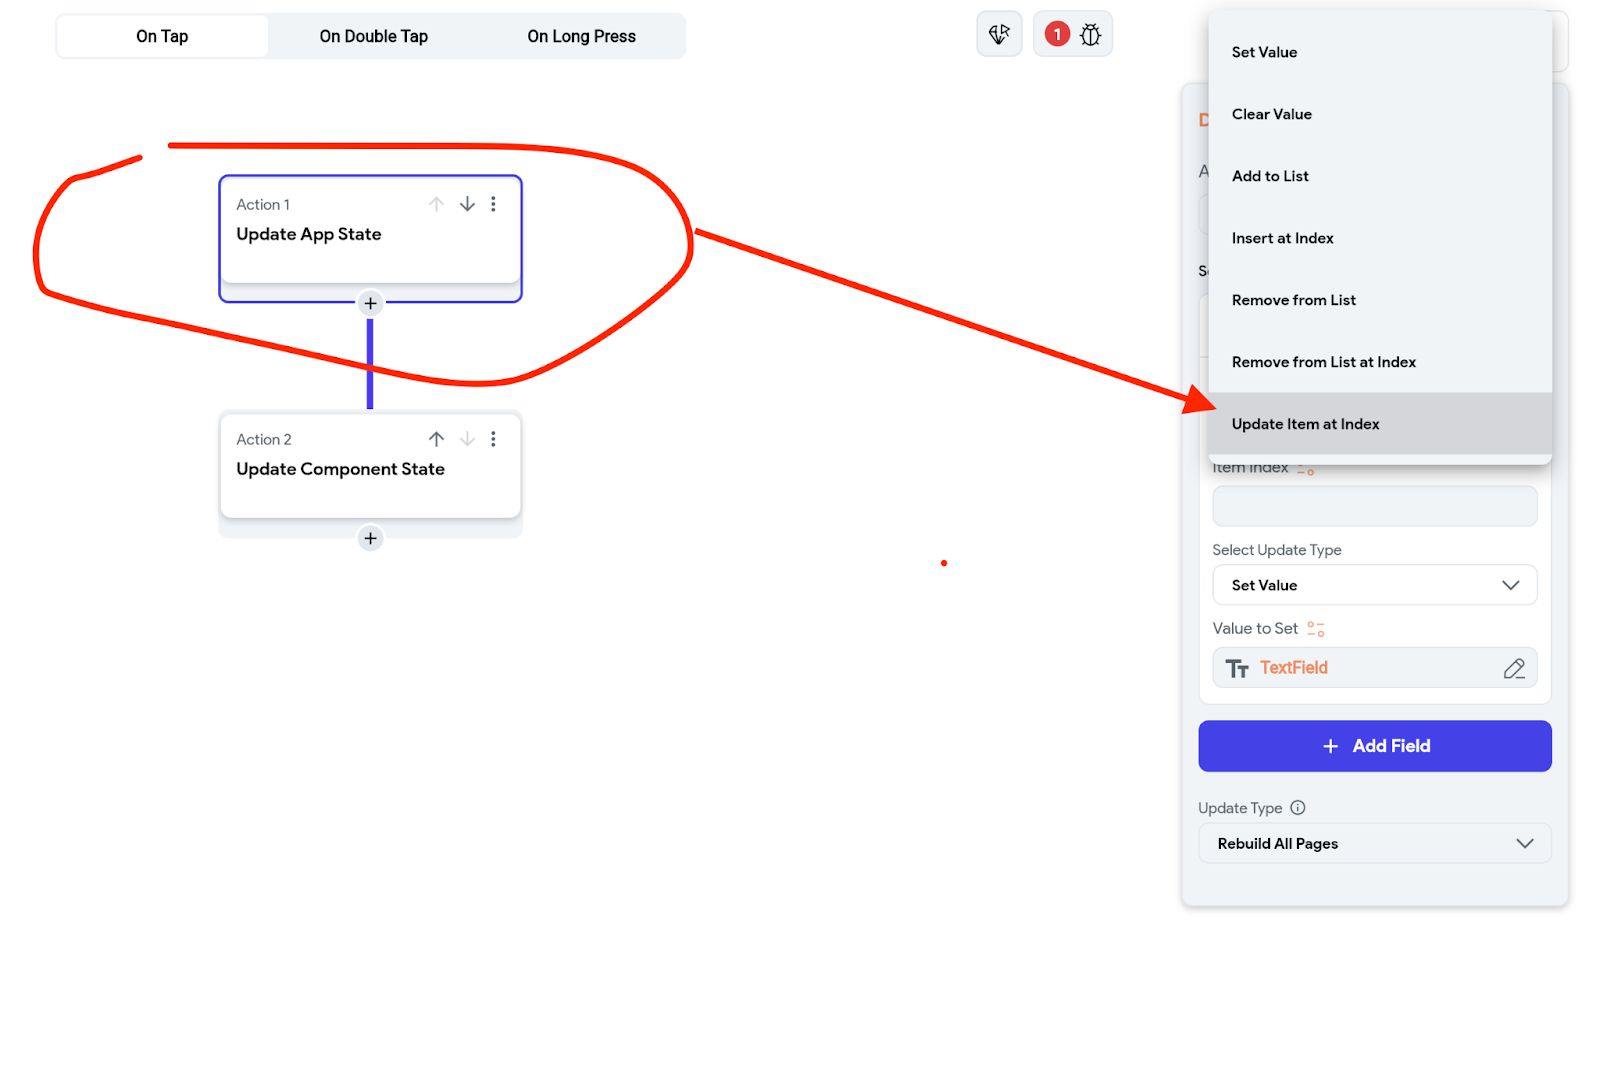
However, for our purposes, we solely require the index. Once we pass these parameters to the component, the Save button will have the action to update the app state at the specified index from the parameter, with the new value derived from the text input widget housed within the component. Subsequently, the save button will update the component state “editText” to false.
Note: It’s important to note that the update type for the app state is configured to “rebuild all pages.”
This setting ensures that whenever changes are made to the app state, all pages within the application are promptly refreshed to reflect these modifications.
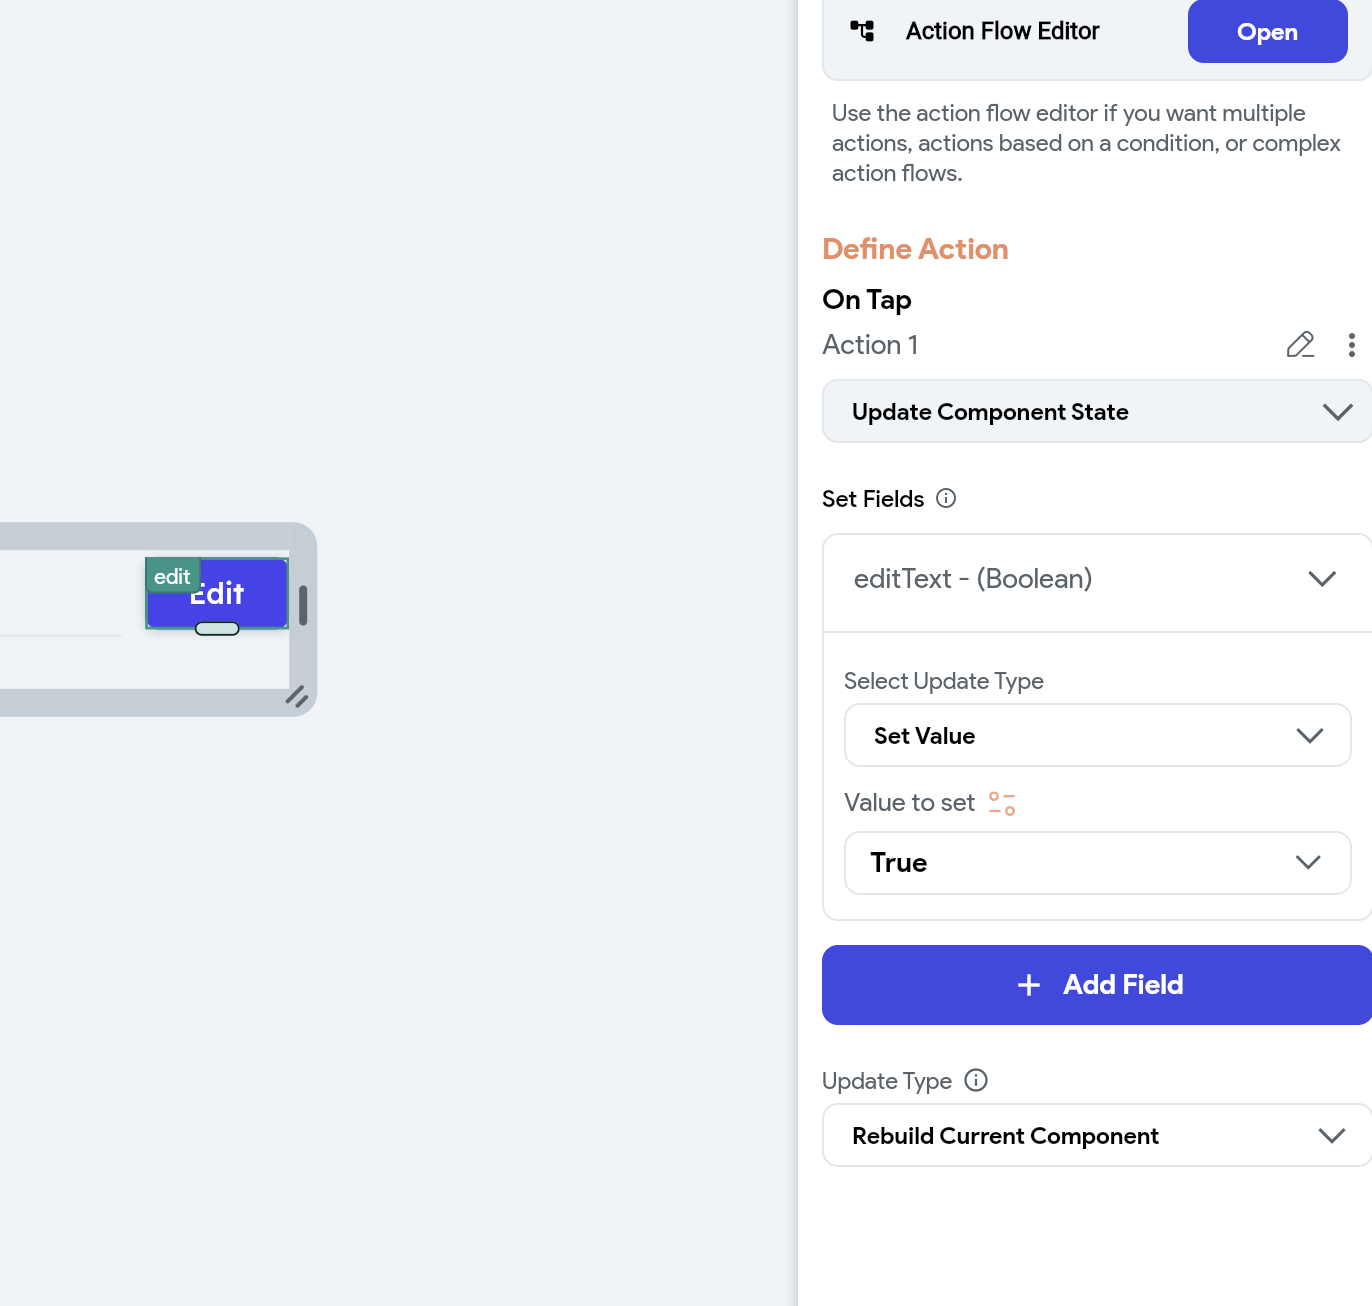
When the user taps on the “edit” button, it triggers an action to update the component state named “editText” to true. This action dynamically reveals the text input and the save button, which have been configured to appear when the value of “editText” is true.
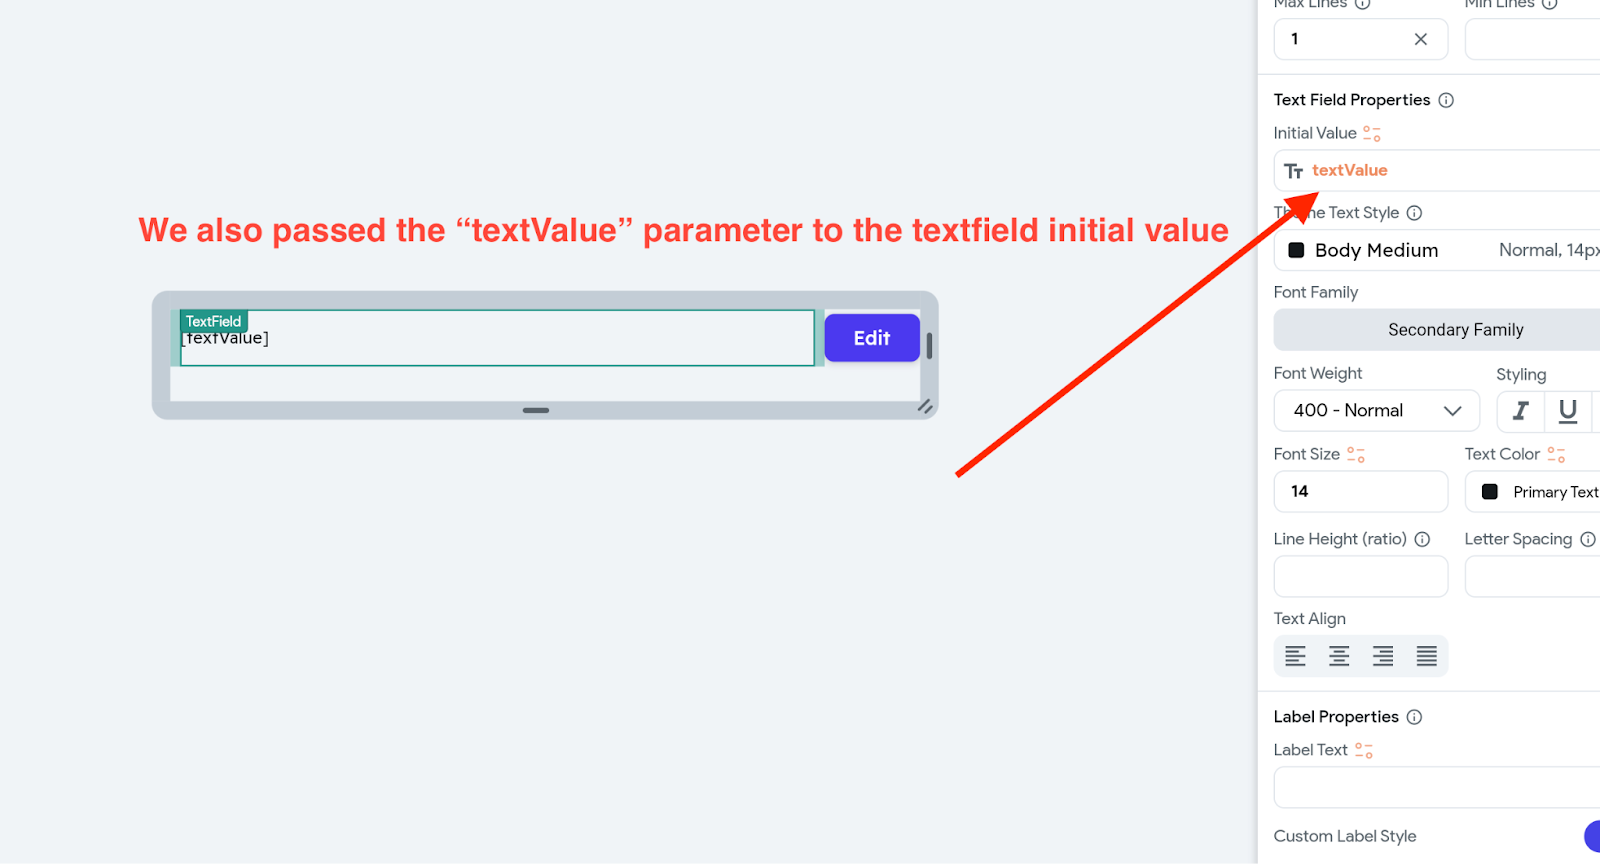
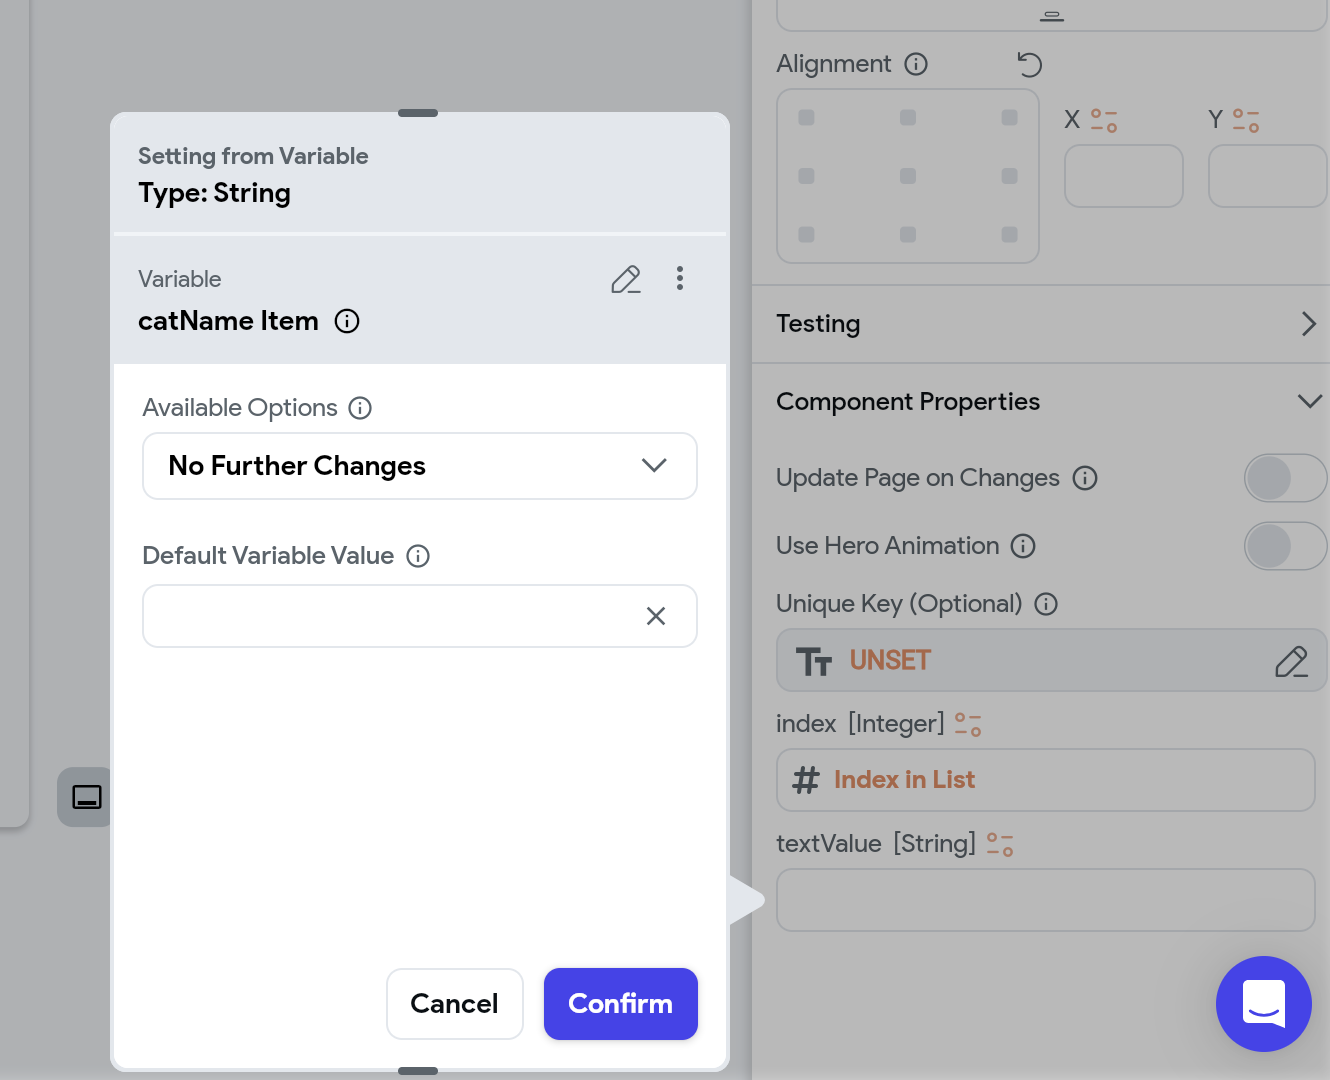
The text widget and the textinput would also have some import configurations:

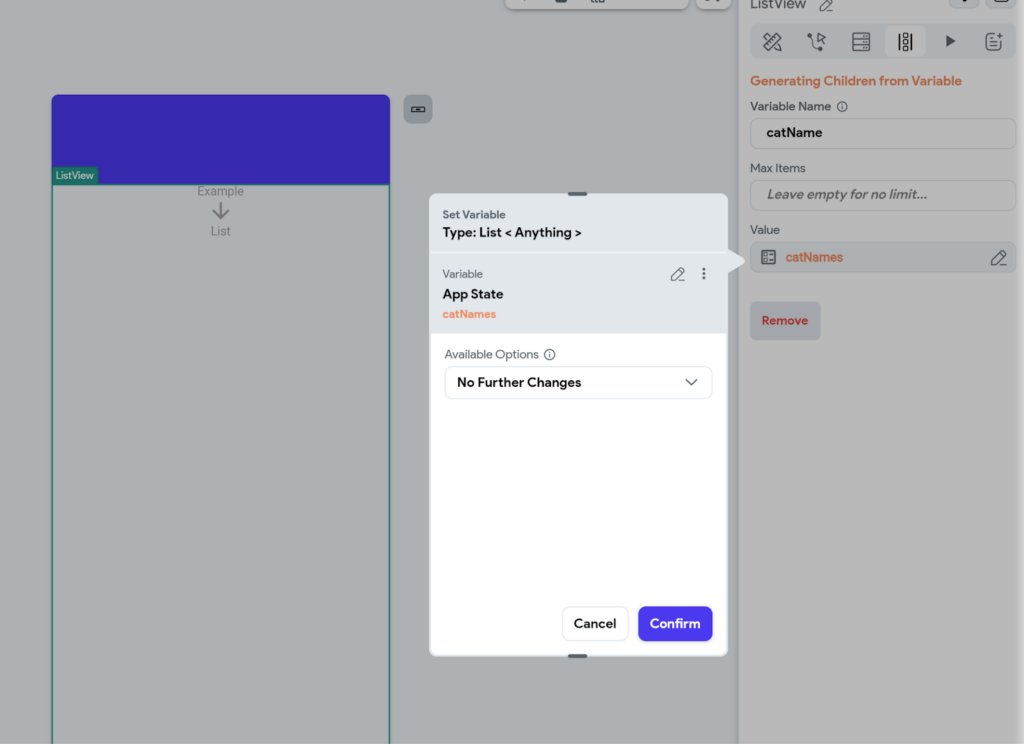
Now, let’s return to our main page where the ListView is located. Tap on the listview and select the tab “generating Children from variable” then give the variable a name and pas the appstate “catNames” to the listView.
Drag the previously configured component into the ListView.

Once placed, we can pass the two essential values required by the component as seen below.
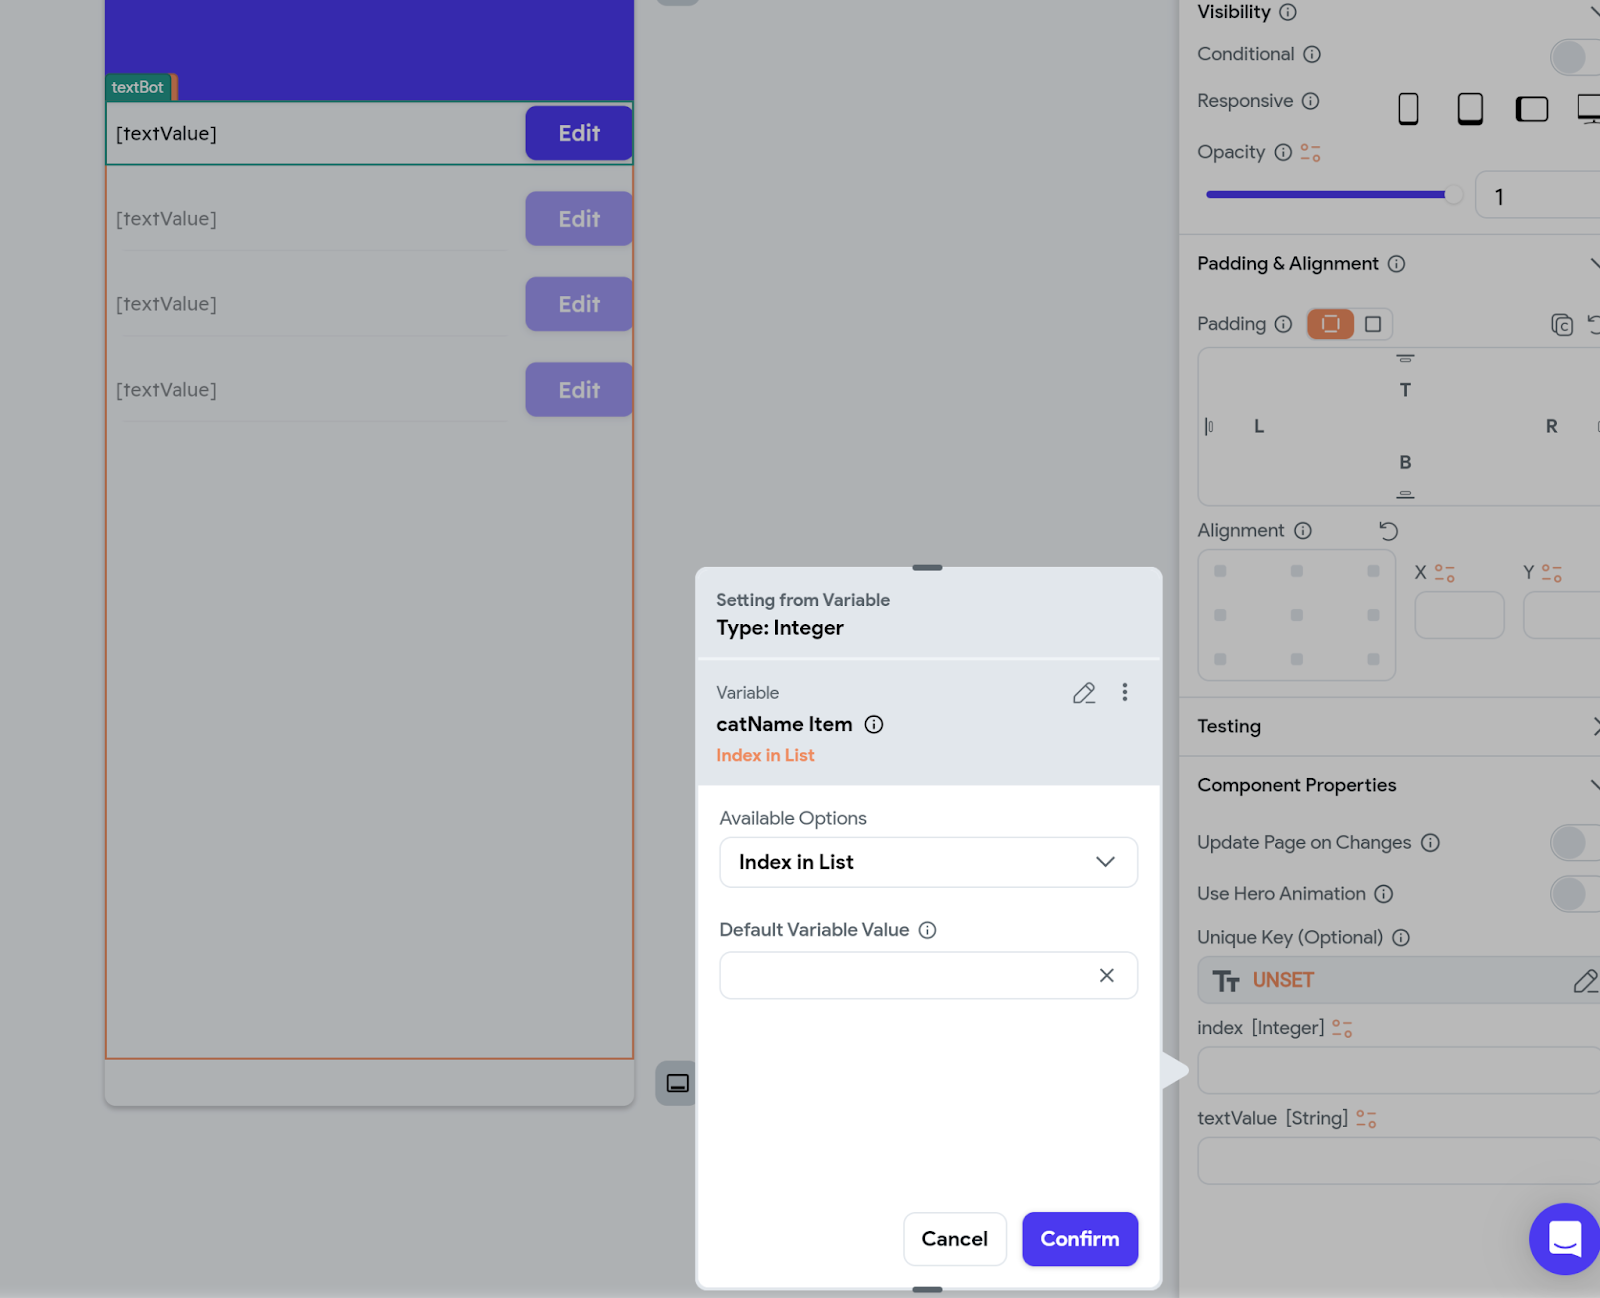
Once these steps are completed, we can proceed to preview the application. Upon previewing, you will observe that we can seamlessly access and display information from the ListView, populated directly from the app state. Moreover, users can effortlessly edit this information at any given time.
It’s worth noting that the same principles can be applied to editing various types of data, including documents referenced from Firebase, Supabase rows, or any other data accessible via app state, API calls, etc.
Utilising component states enables efficient management of state-related issues within FlutterFlow ListView implementations.
Congratulations on successfully navigating through the state management complexities using FlutterFlow ListView.
With these techniques in hand, you are well-equipped to tackle similar challenges and enhance the functionality of your applications. Happy coding!