Moving Pages between Projects in FlutterFlow: A Step-by-Step Guide
Let’s start with a simple question: Can you copy a page from one flutterflow project and paste it in another project?
Well the answer is NO but there is a cool trick that we will cover in this article which is utilising the templates feature in flutterflow to achieve the same desired functionality including copying actions, business logic (not complex ones) etc. from one project to another.
Let’s talk about the flutter flow template feature:
How to move page from one project to another in flutterflow
The FlutterFlow template feature empowers you to convert designs from existing projects into draggable templates that seamlessly integrate into other projects.
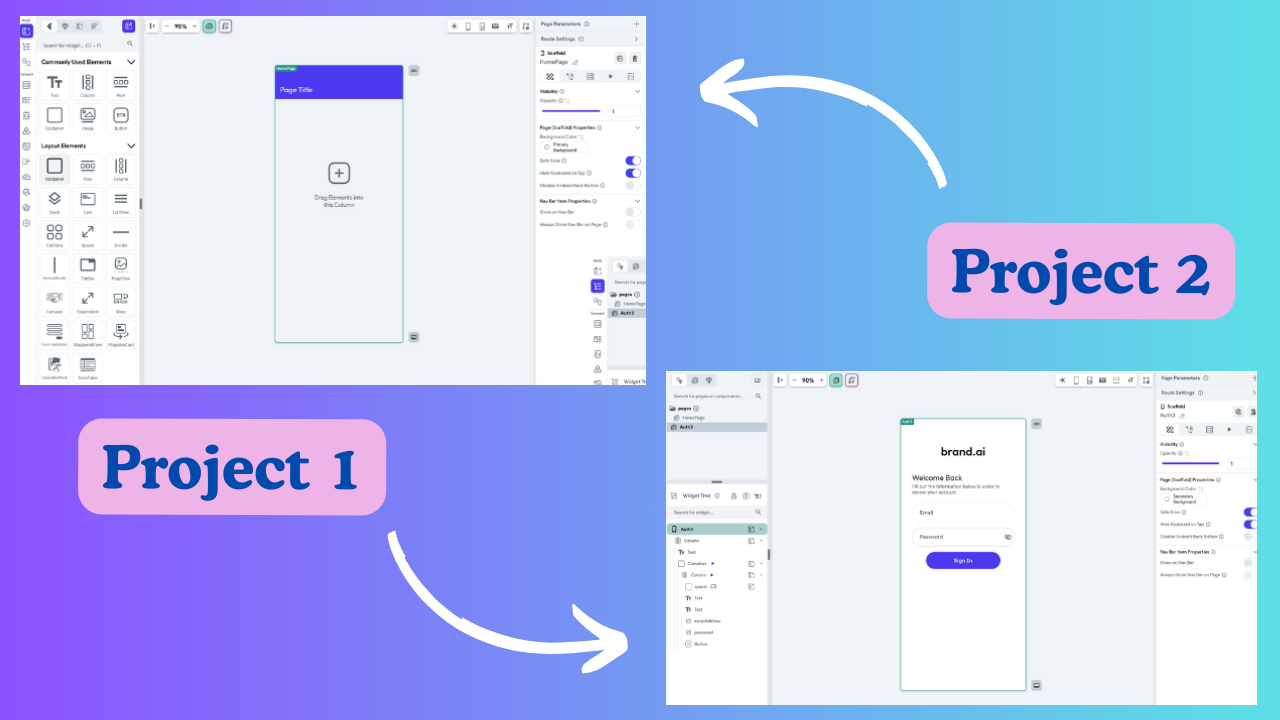
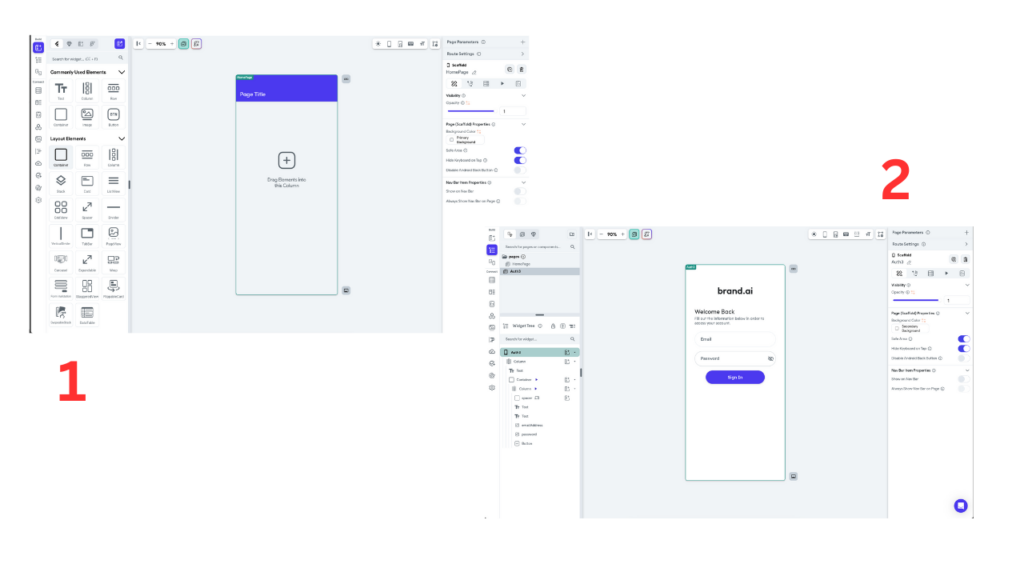
In the image below, you’ll observe two FlutterFlow projects crafted specifically for this article. Project number (1) represents a fresh endeavour, while our aim is to replicate the design from project number (2) into our new venture.
Note I did not say copy a page, that won’t work, but you can start the process by copying other combinations of widgets in flutterflows roster of drag and drop widgets like rows, columns, containers, buttons etc.
That means you can’t copy custom code from a page or widgets that you have turned into a component in flutterflow. (if you don’t know what components are in flutterflow check out our article —-)
So let’s begin!
Step One: Move to the desired page on project (2)
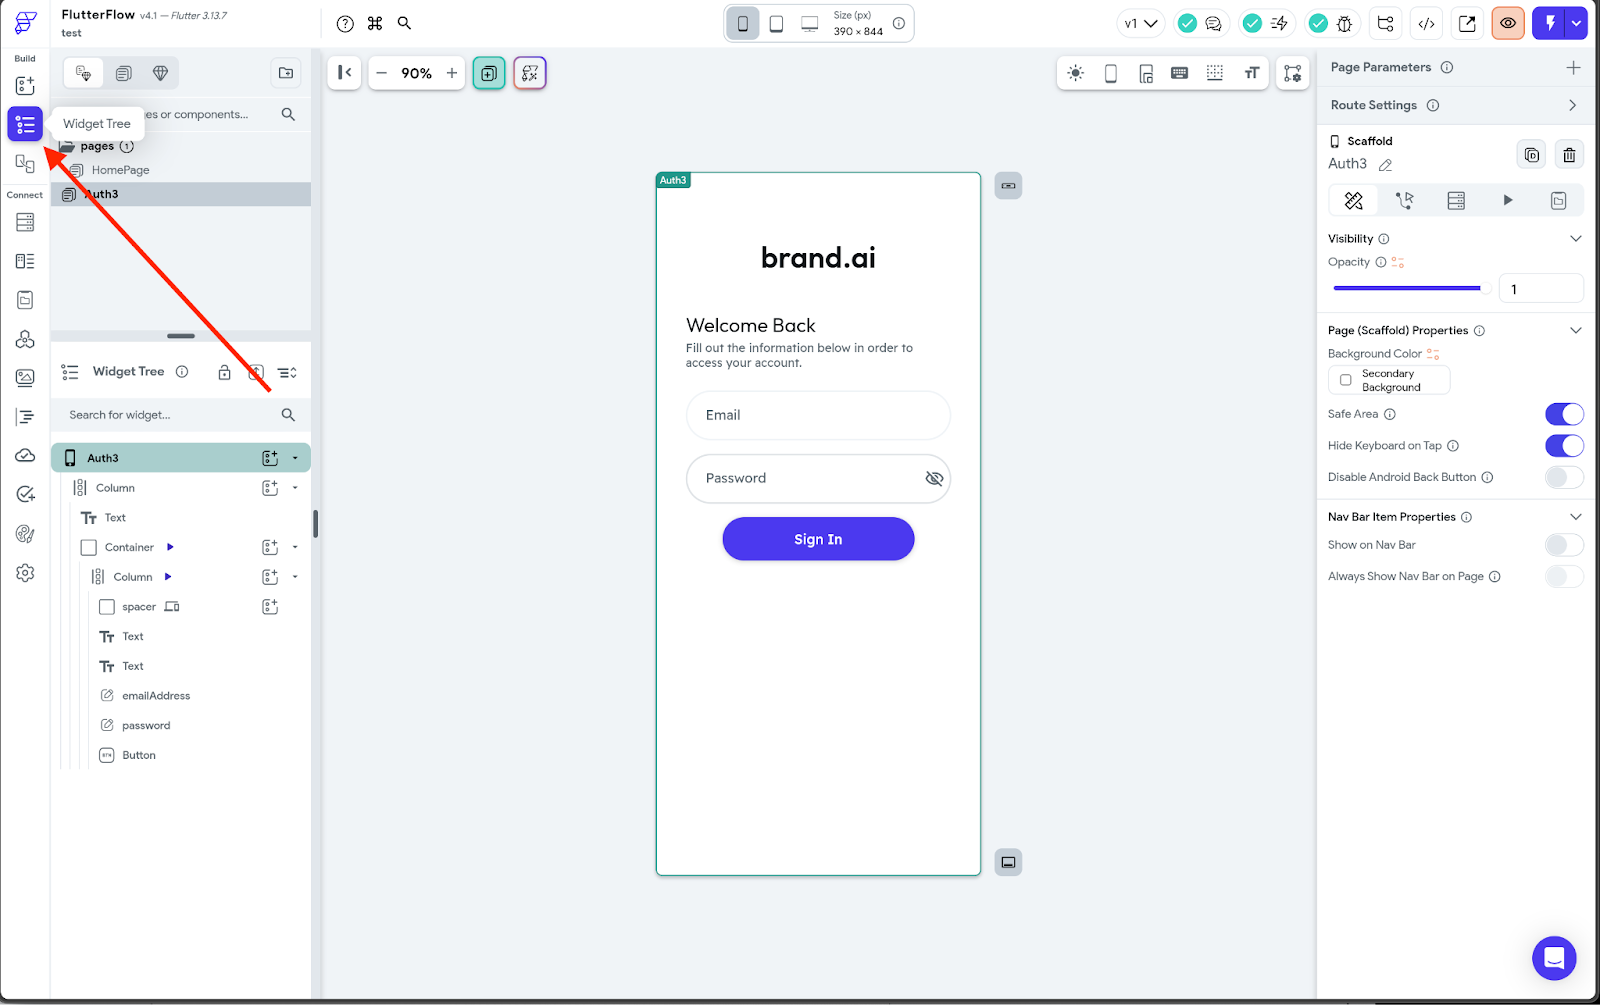
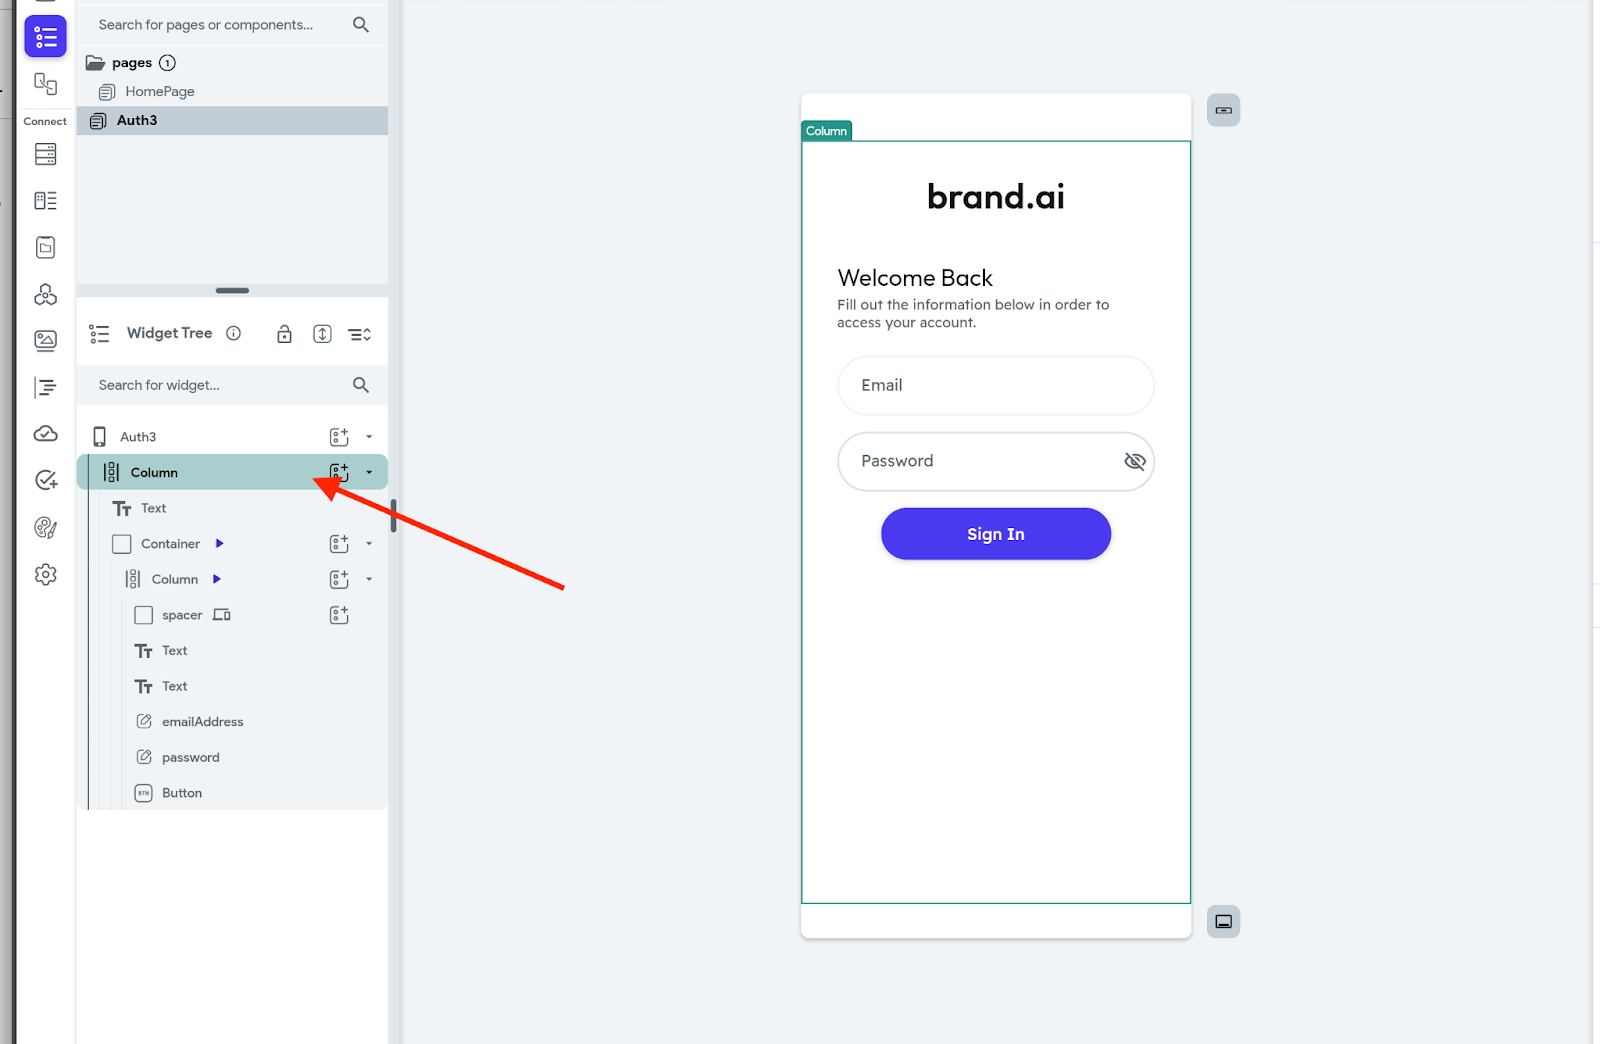
Navigate to the widget tree within project (2) and identify the parent widget or any other widget you intend to copy or relocate. For the purpose of this demonstration, I’ll commence with the column since it occupies the highest position in the tree and functions as a parent widget.
(A brief clarification: In FlutterFlow, parent widgets are those found within the layout elements section, capable of containing one or multiple elements within them. They serve to structure your page and dictate the positioning of child widgets like buttons, text, and more.
Thus, starting with a parent widget such as a column enables us to copy all other widgets within it simultaneously, given that columns can accommodate multiple widgets.)
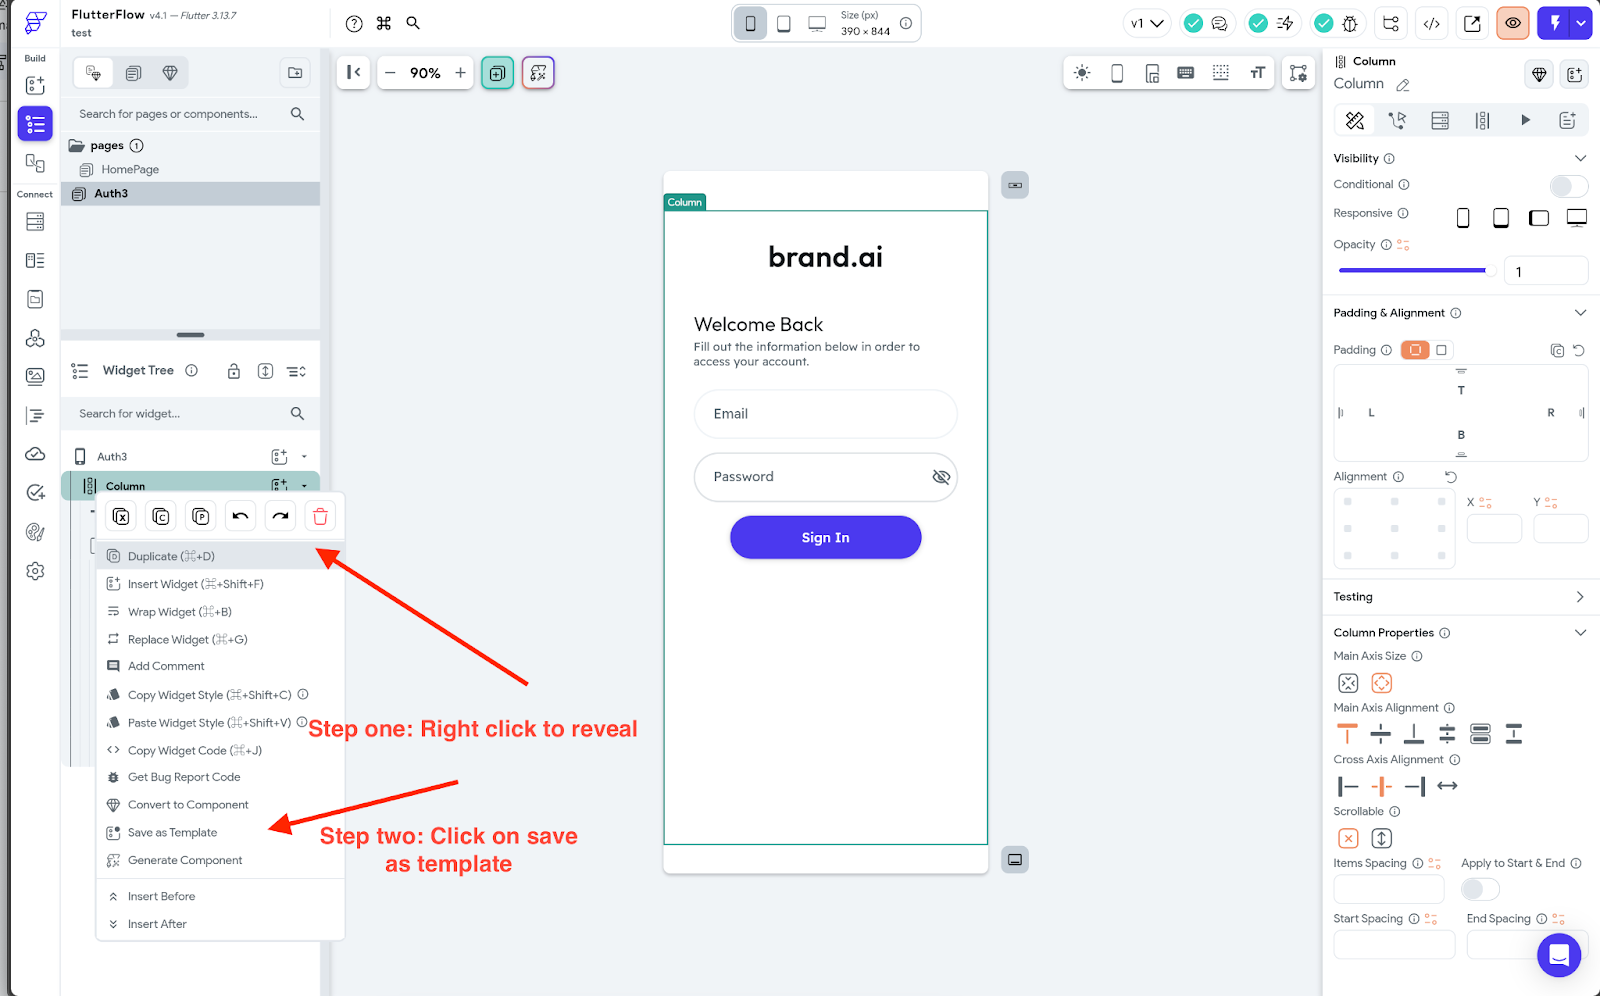
Step Two: Save as Template
1. Select the widget from the widget tree or the canvas area.
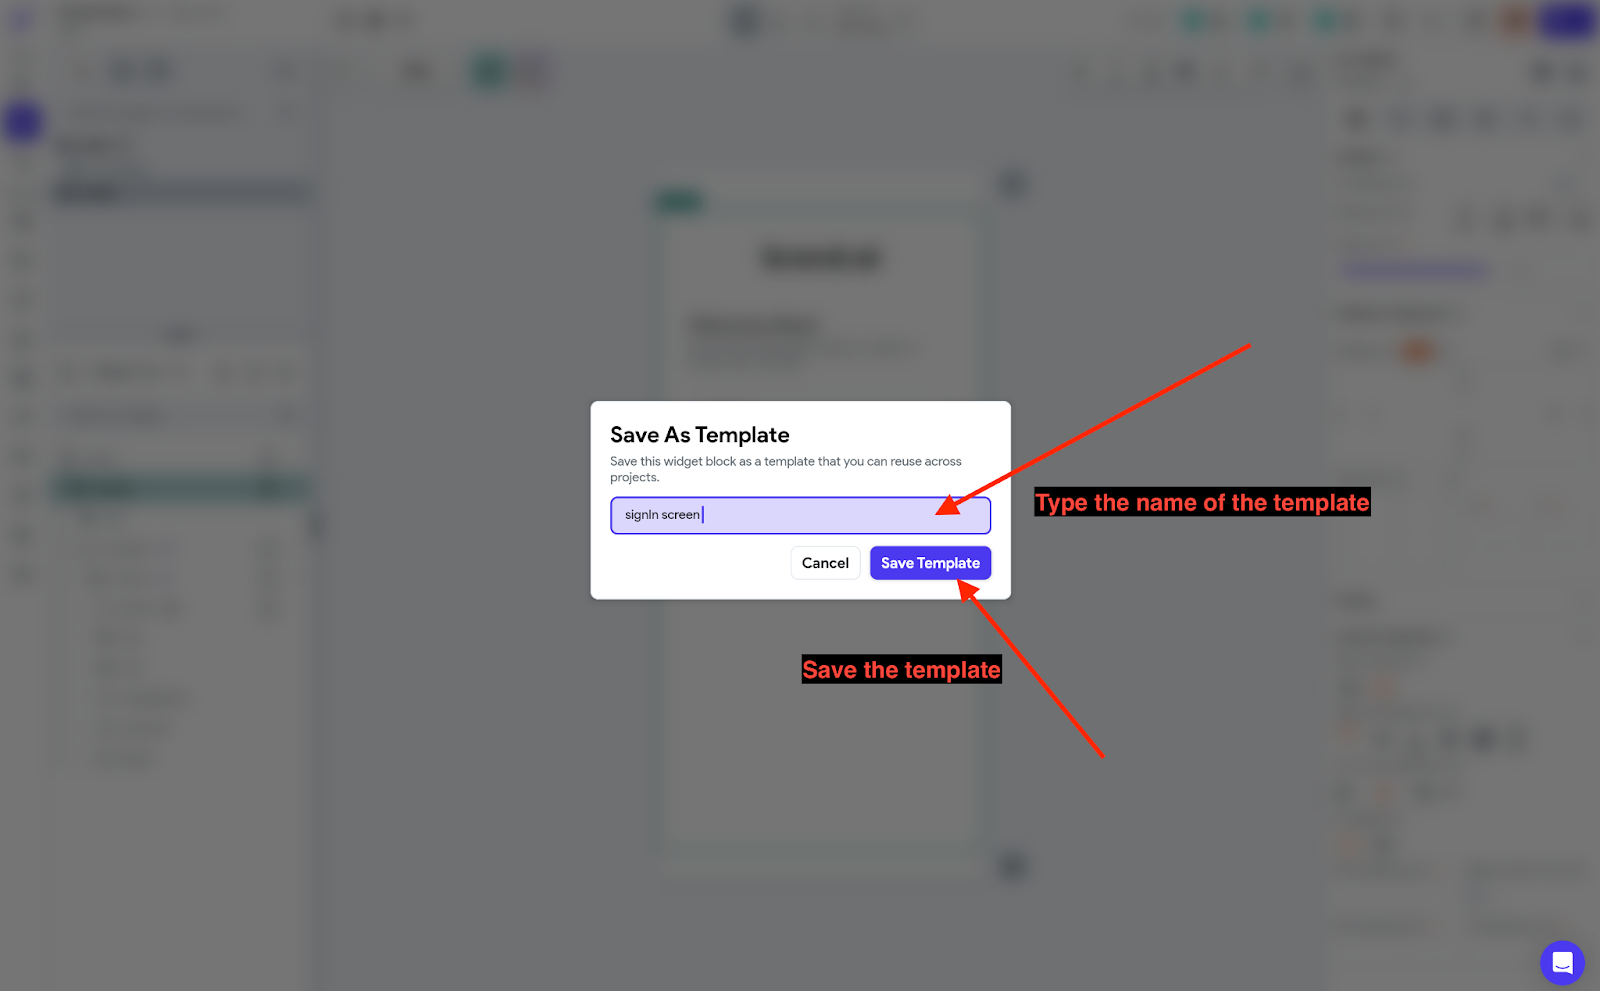
2. Right-click and choose the “Save as Template” option. A popup will appear.
3. Enter the Template Name and click “Save Template.”
We followed those same steps in the illustrations below:
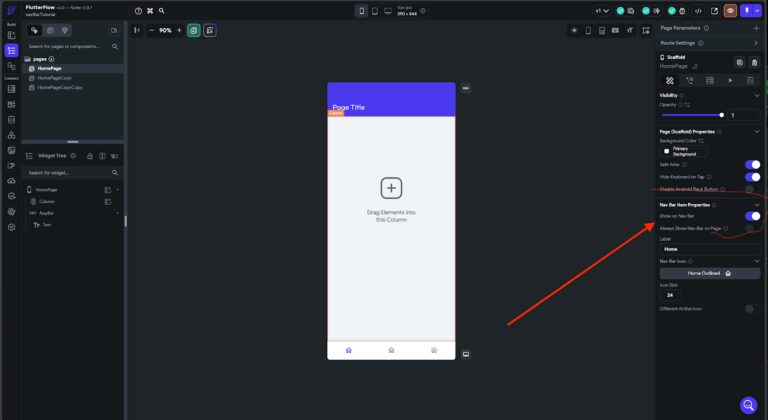
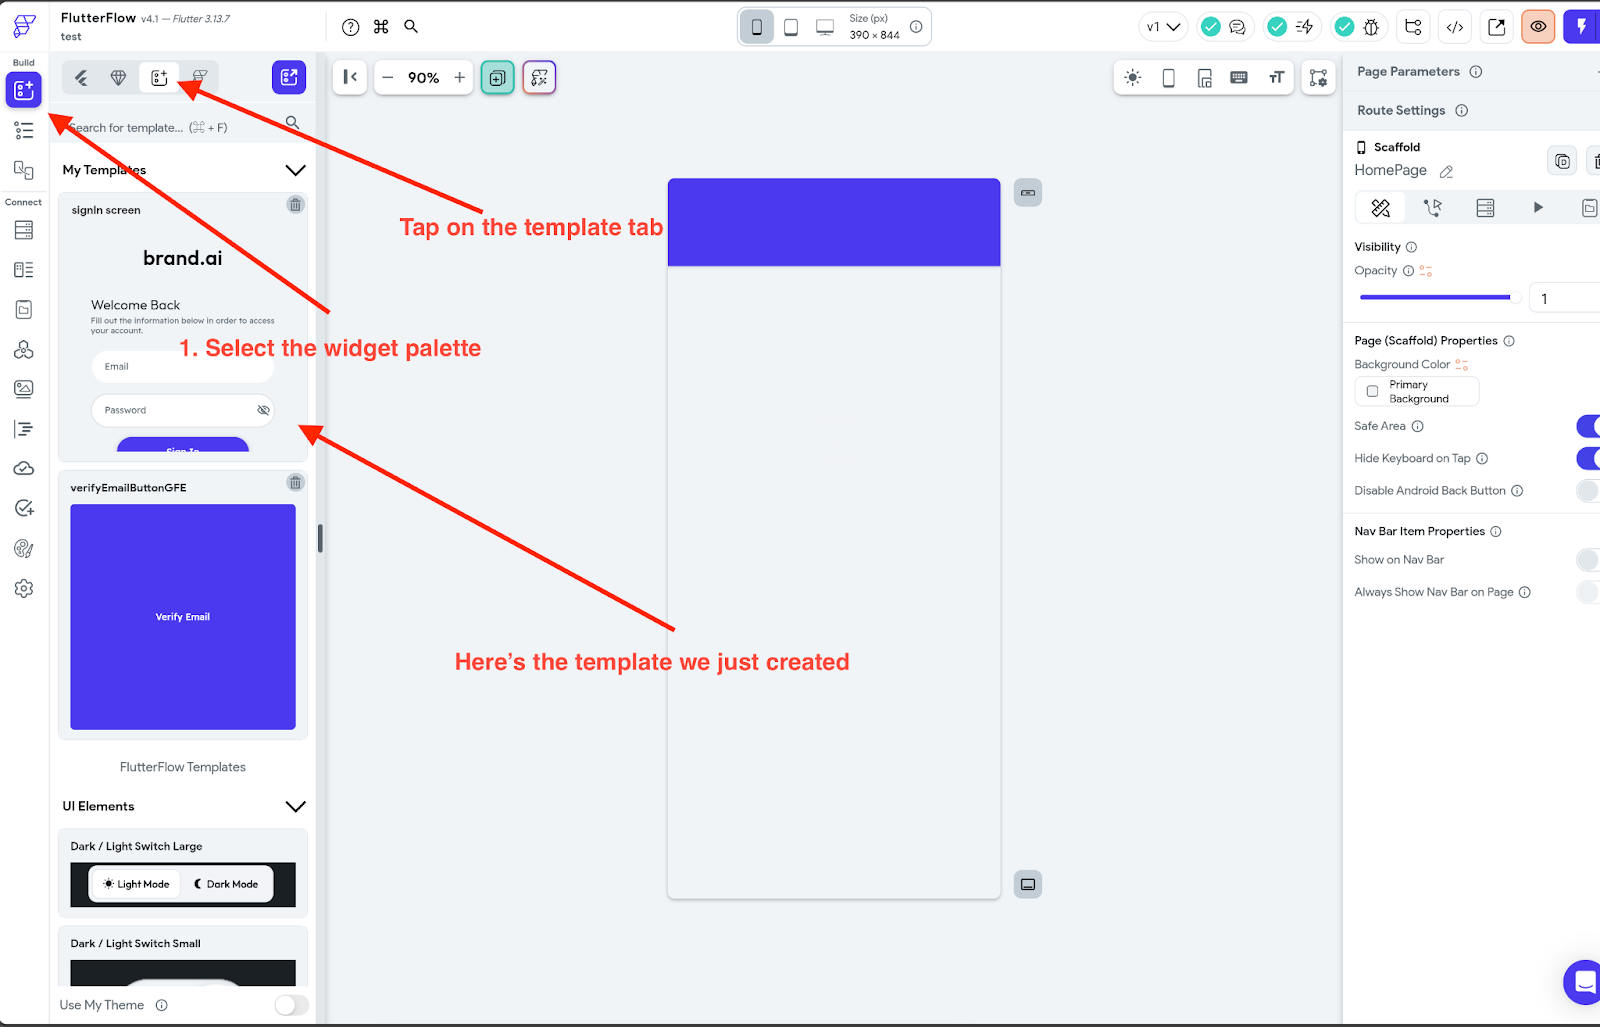
Step Three: Drop the saved Template into Project (1)
- Return to project (1) and navigate to a new blank screen.
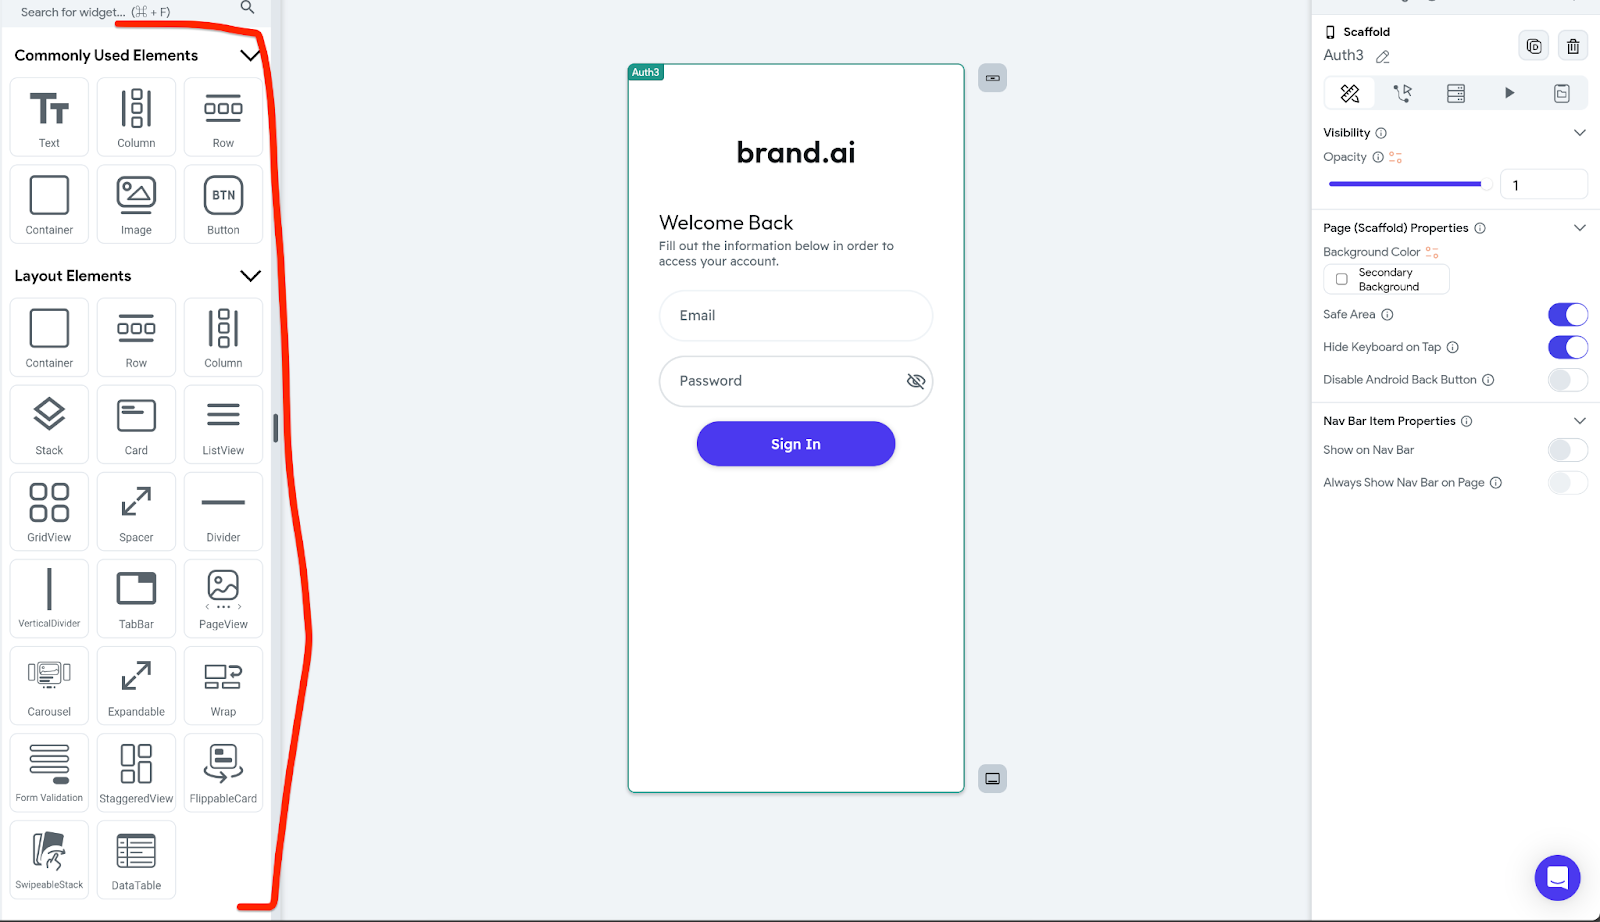
- Click on the widget palette and access the templates tab. Locate your saved template, then effortlessly drag and drop it onto the desired page within your new project.
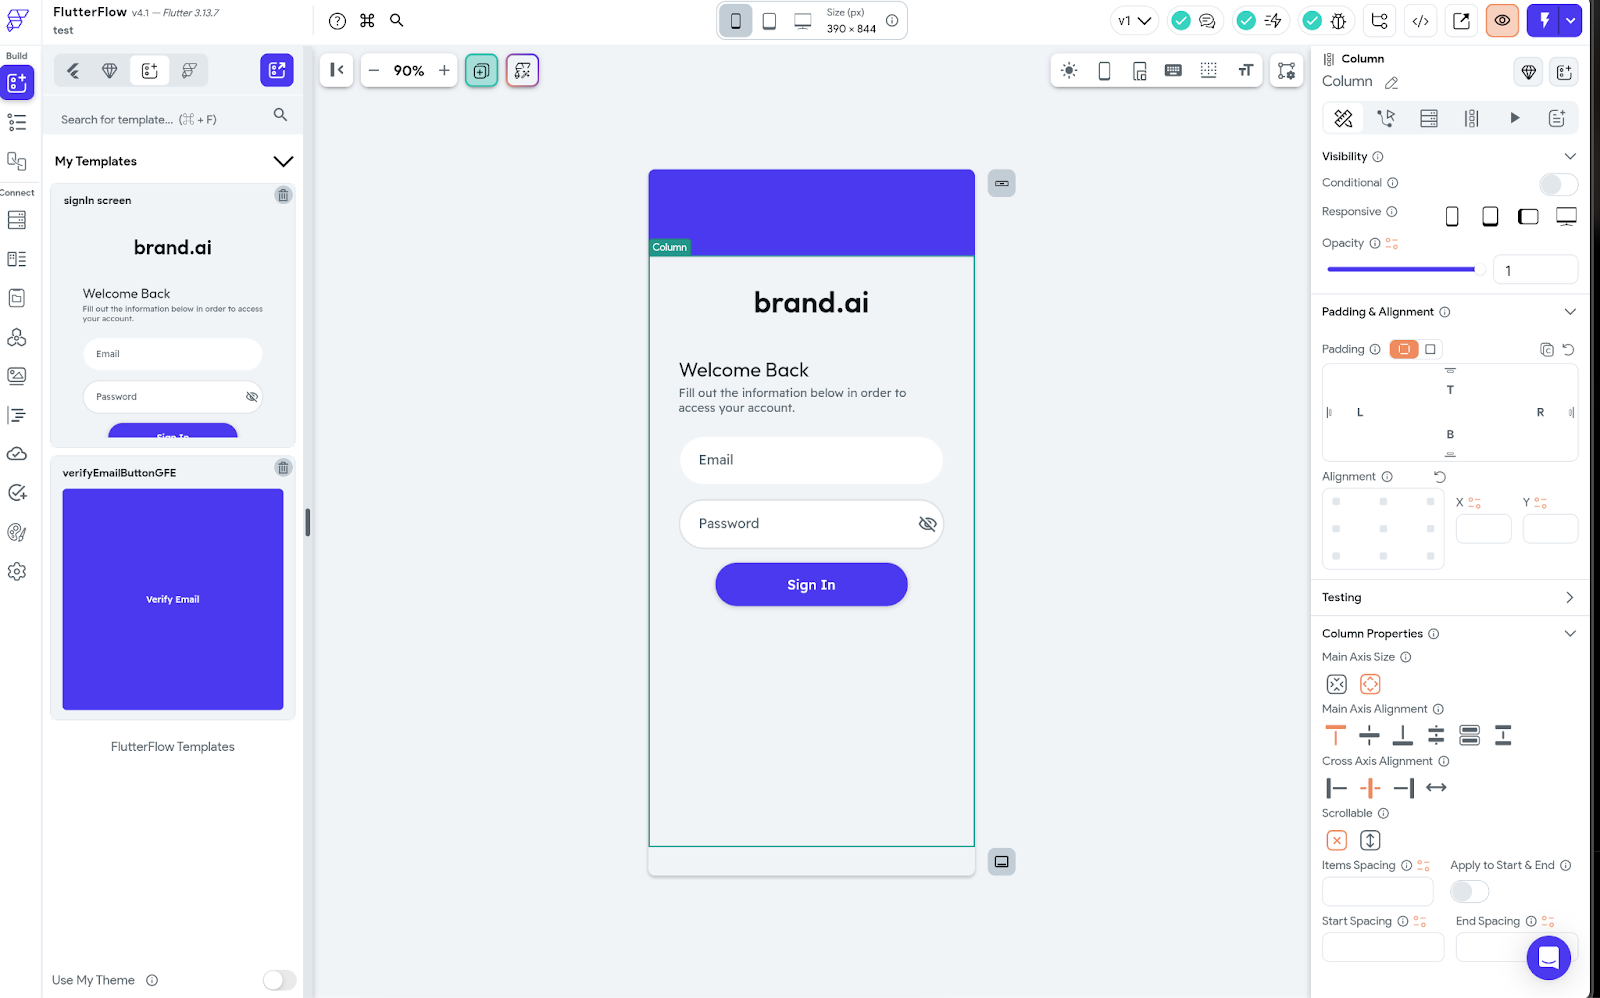
And there you have it – you’ve successfully imported a widget/UI design from project (2) to project (1). It’s essential to note that this process seamlessly integrates with UI components available within FlutterFlow’s library.
If you encounter an error during the transfer, the error message can provide valuable insights into the issue. Additionally, if the widgets you’re copying contain business logic tied to variables, such as app states that don’t exist in the new project, errors may arise.
However, these challenges can be addressed by recreating the necessary actions, variables, or conditional flows from the previous project.
For a hassle-free experience with template creation, we strongly advise utilizing this feature exclusively for UI elements if you are new to flutterflow. Happy coding, friends!
If you’re looking flutterflow inspiration check this article : Here is a list of +21 apps built with flutterflow :