How to make Flutterflow push notifications with OneSignal ( without firebase )
Push notifications are essential for keeping users engaged and informed within mobile applications.
While FlutterFlow seamlessly integrates with Firebase Cloud Messaging for push notifications, many developers seek the versatility of custom notifications and services like One signal offers great value.
In this tutorial, we’ll explore how to set up OneSignal push notifications in FlutterFlow using custom code, opening the door to automated notifications and targeted messaging.
How to make Flutterflow push notifications with OneSignal
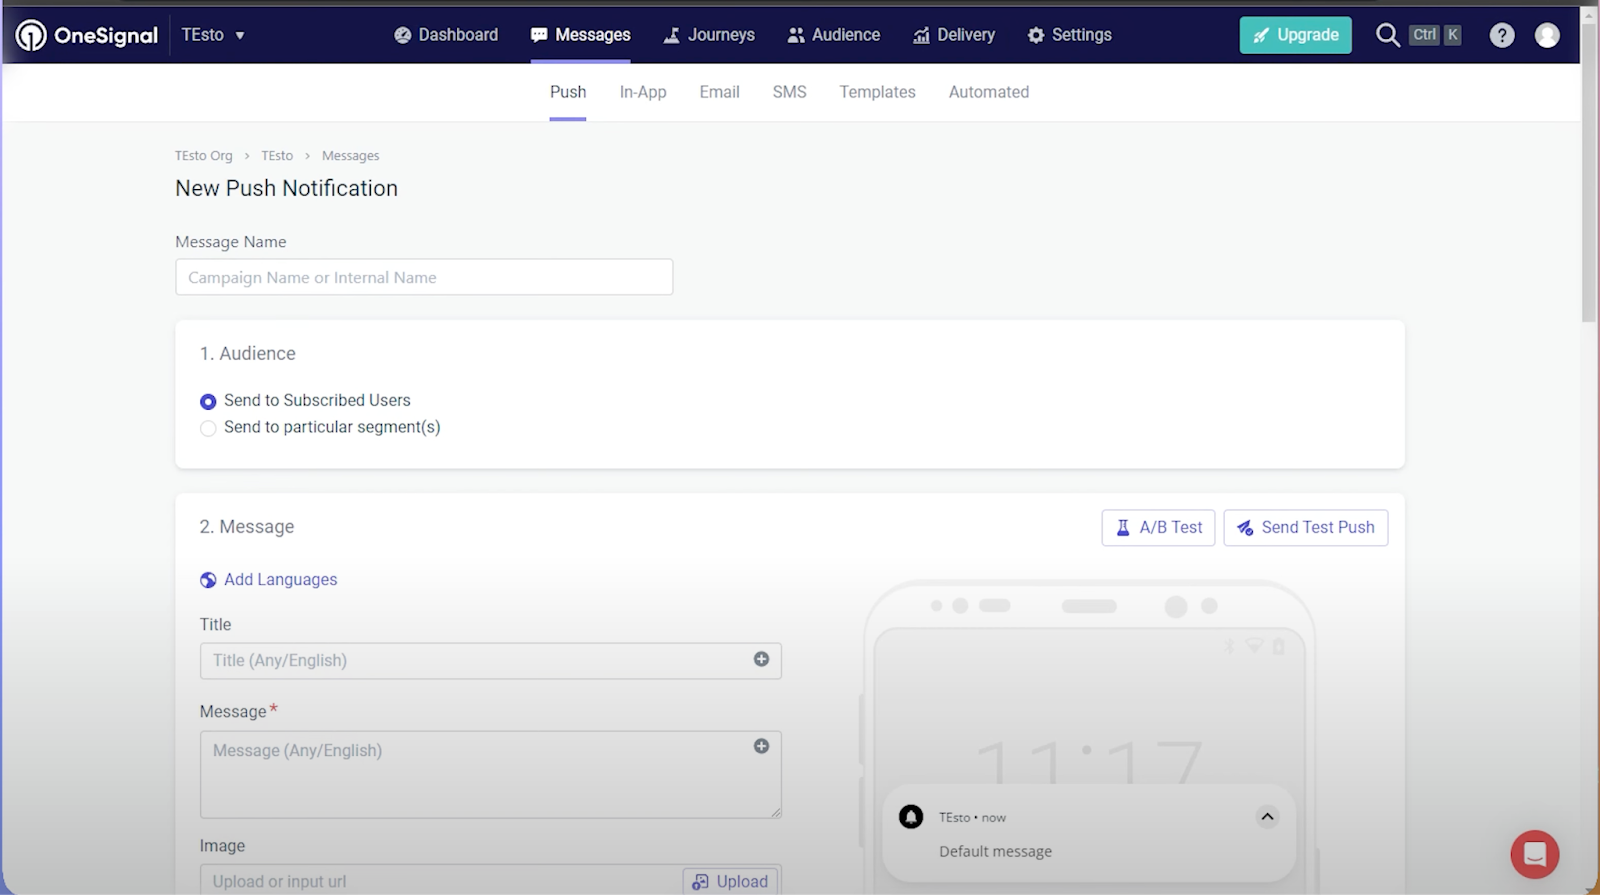
Onesignal gives you a dashboard to send notifications to your users easily and you can also work with api calls in flutterflow to programmatically send notifications.
Getting Started with OneSignal
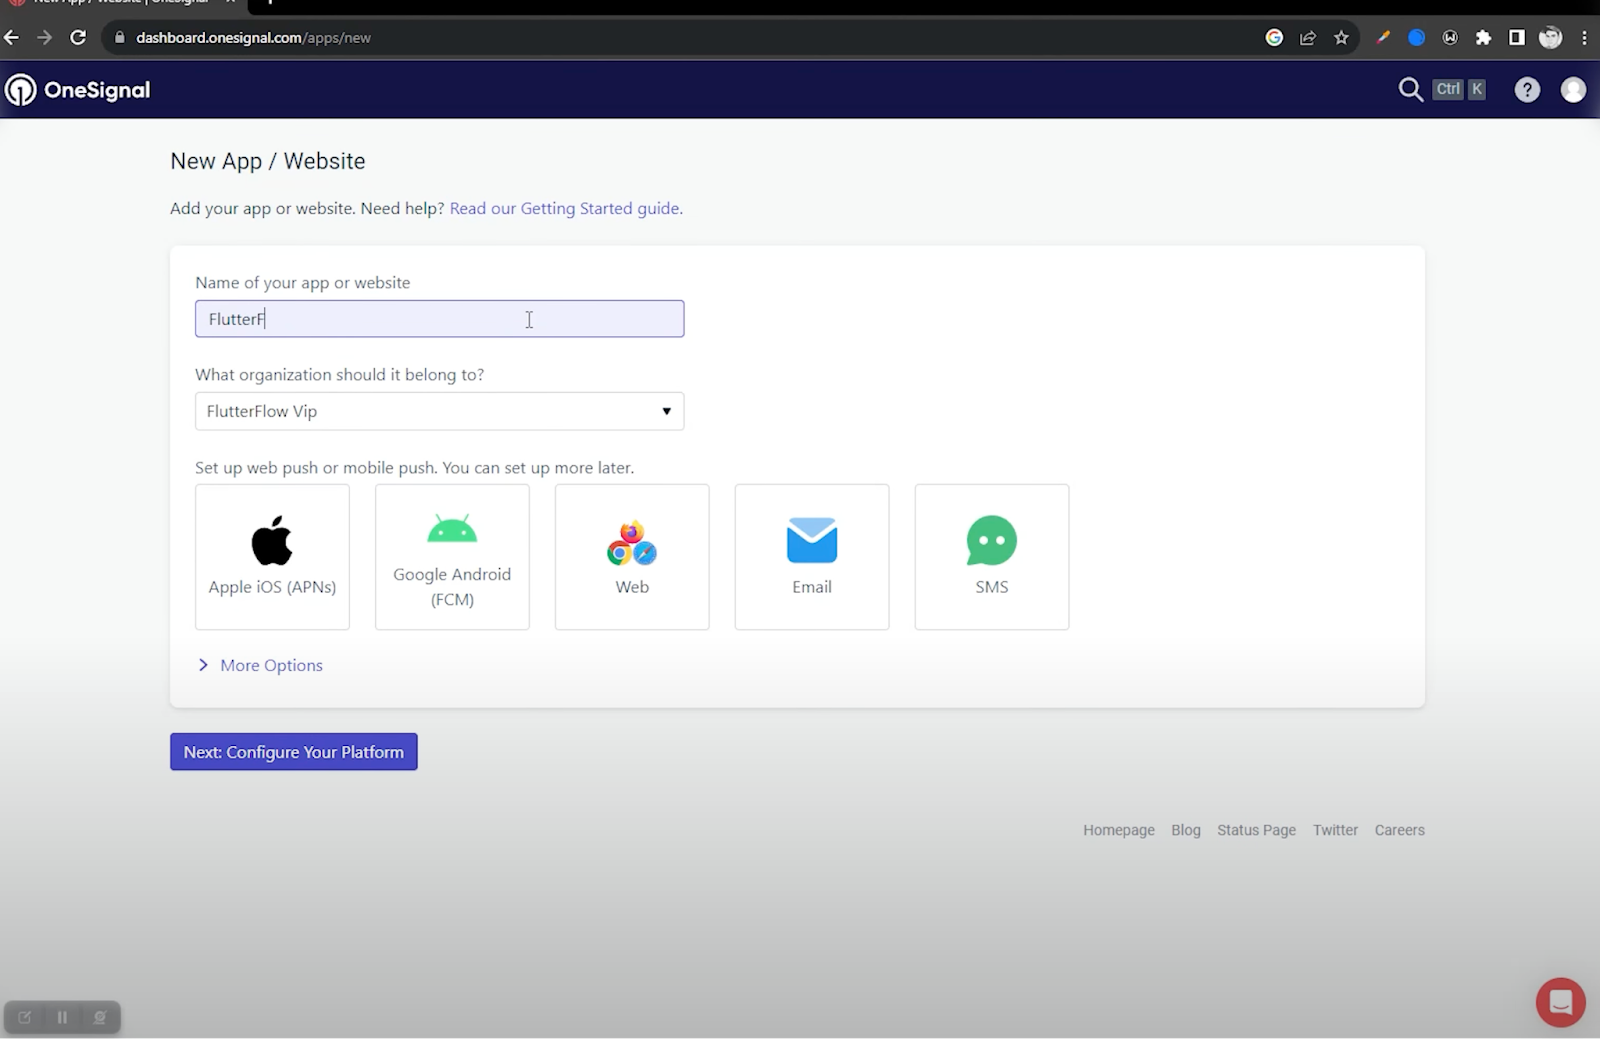
Firstly, ensure you have a OneSignal account. Navigate to the OneSignal dashboard and create a new app by following the prompts. Provide the necessary details, including your app’s name and the platform to select is (Google Android).
To complete the setup, upload the Firebase service account JSON file obtained from the Firebase console (note: You need to set up a firebase project just to retrieve the json file even if you are using a different backend as a service like supabase)
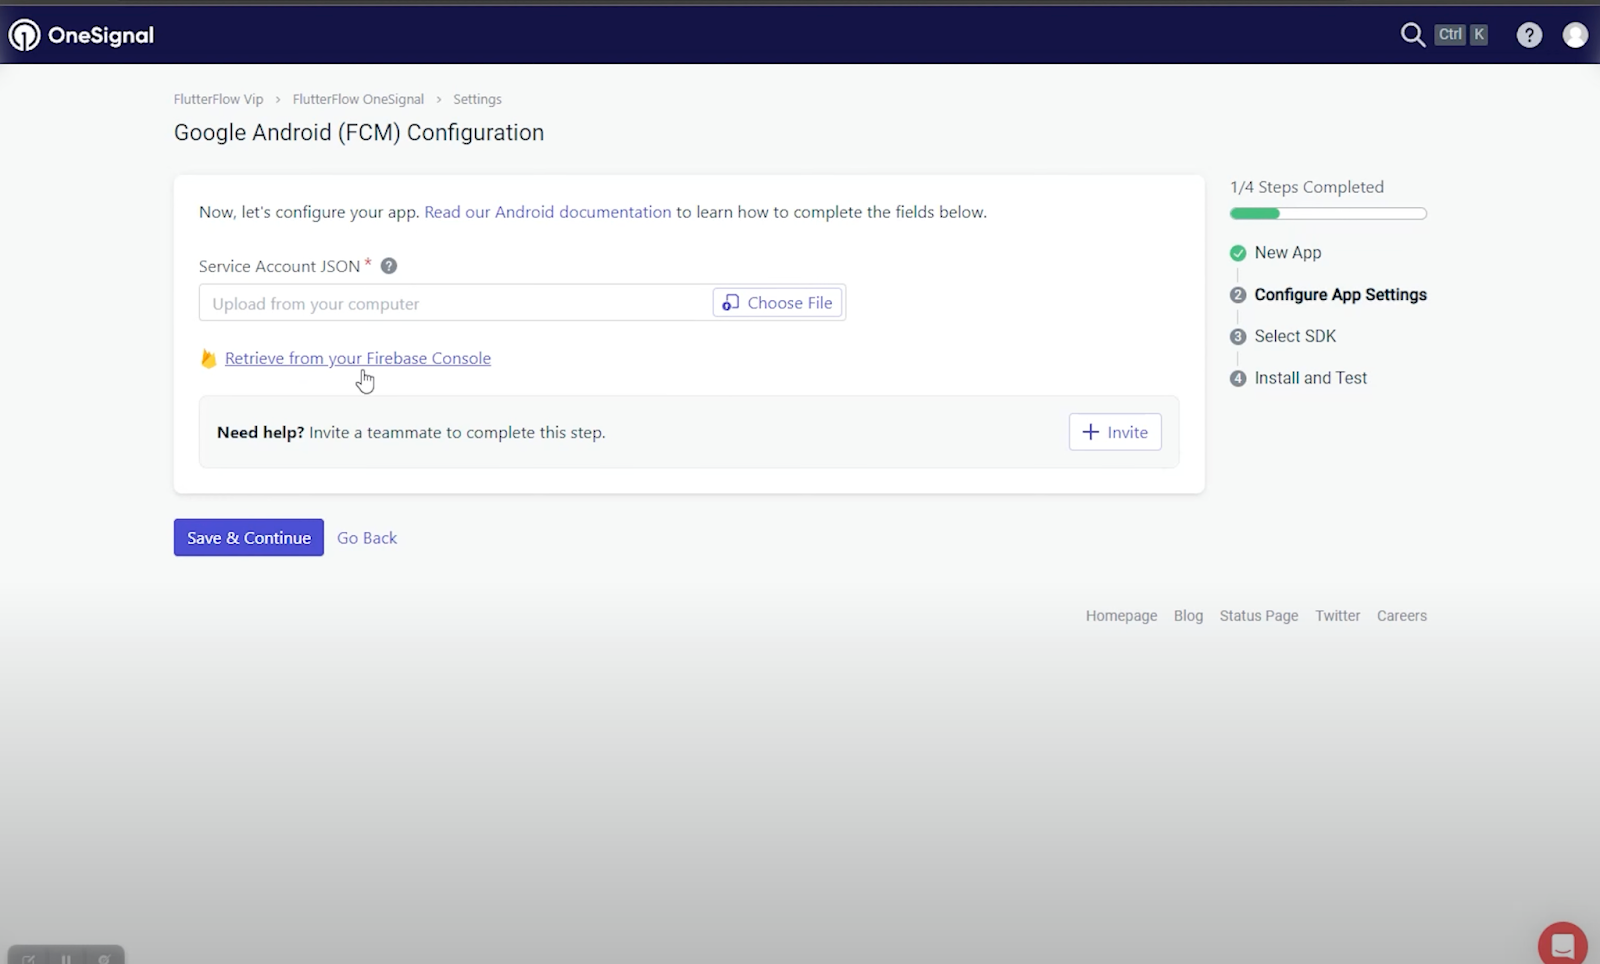
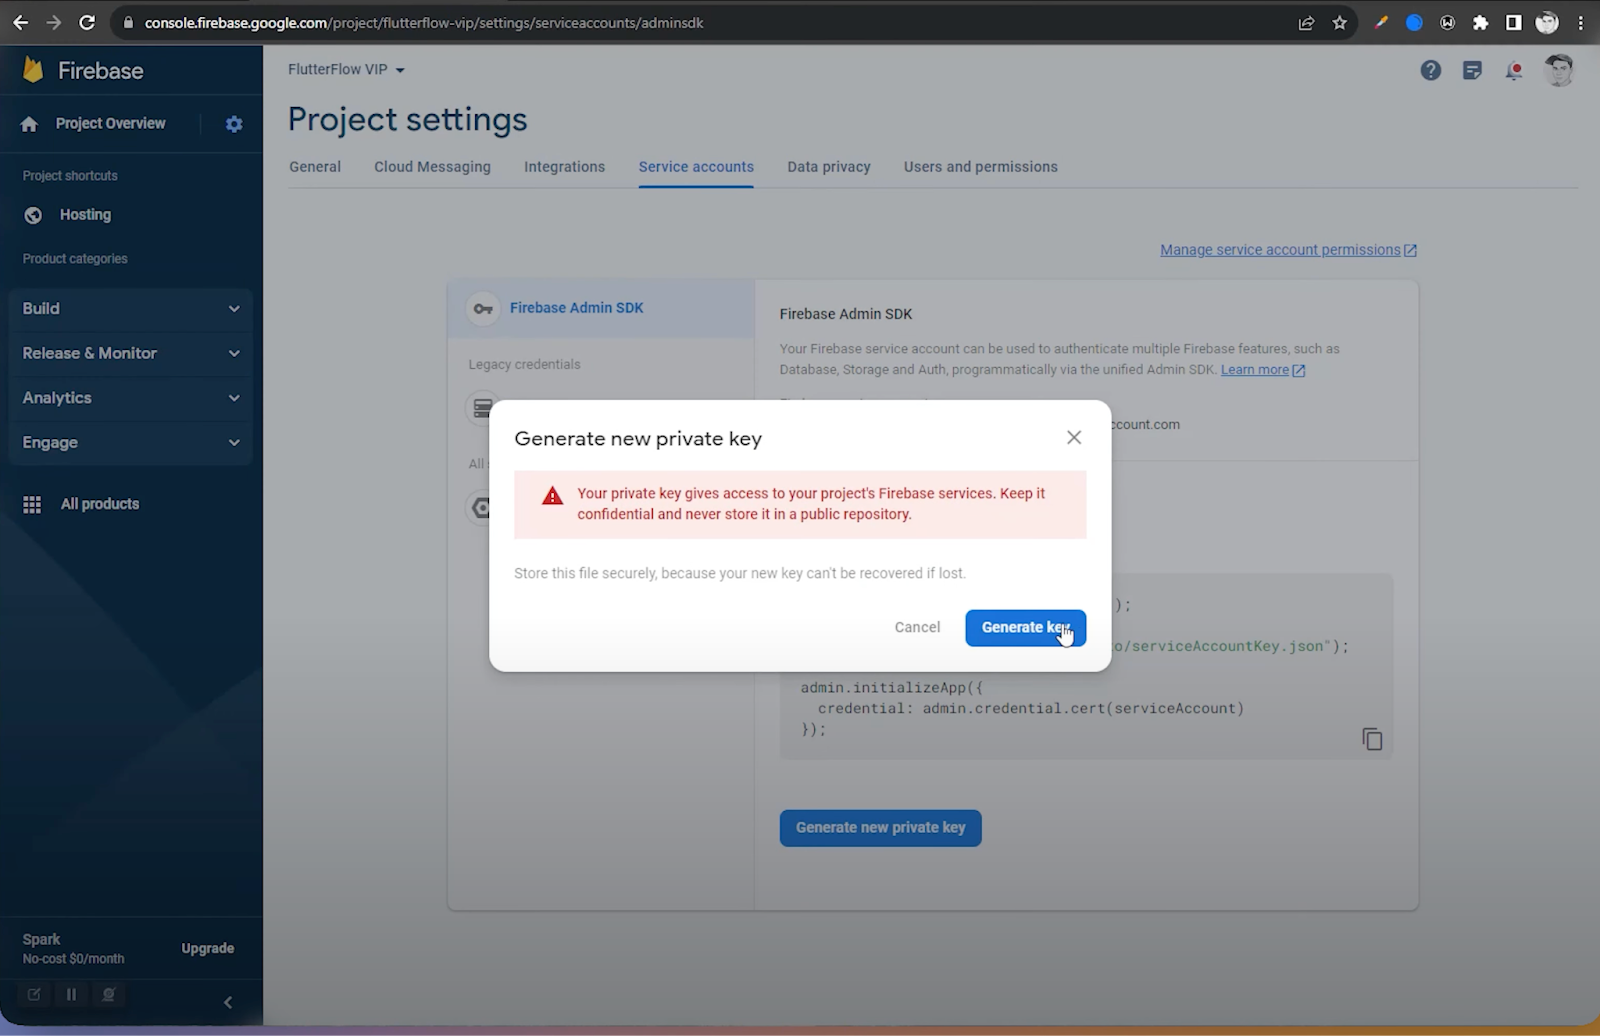
Set Up a firebase project then head access the Project overview >> project settings >> Service accounts >> then hit the generate new private key setting. Download the key and upload it on onesignal.
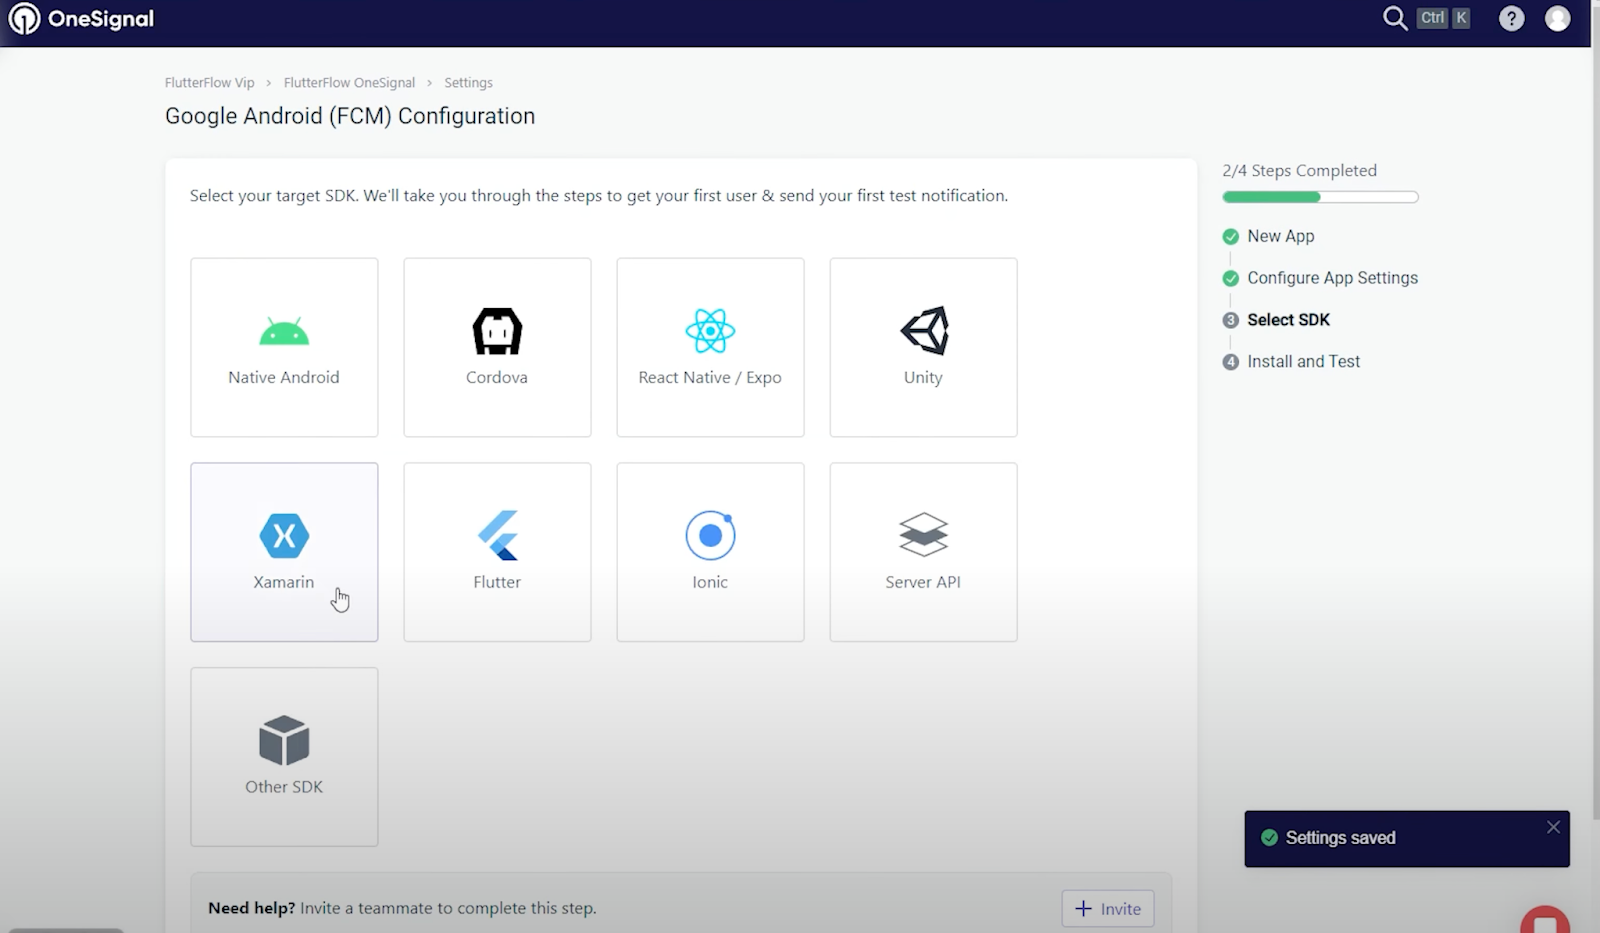
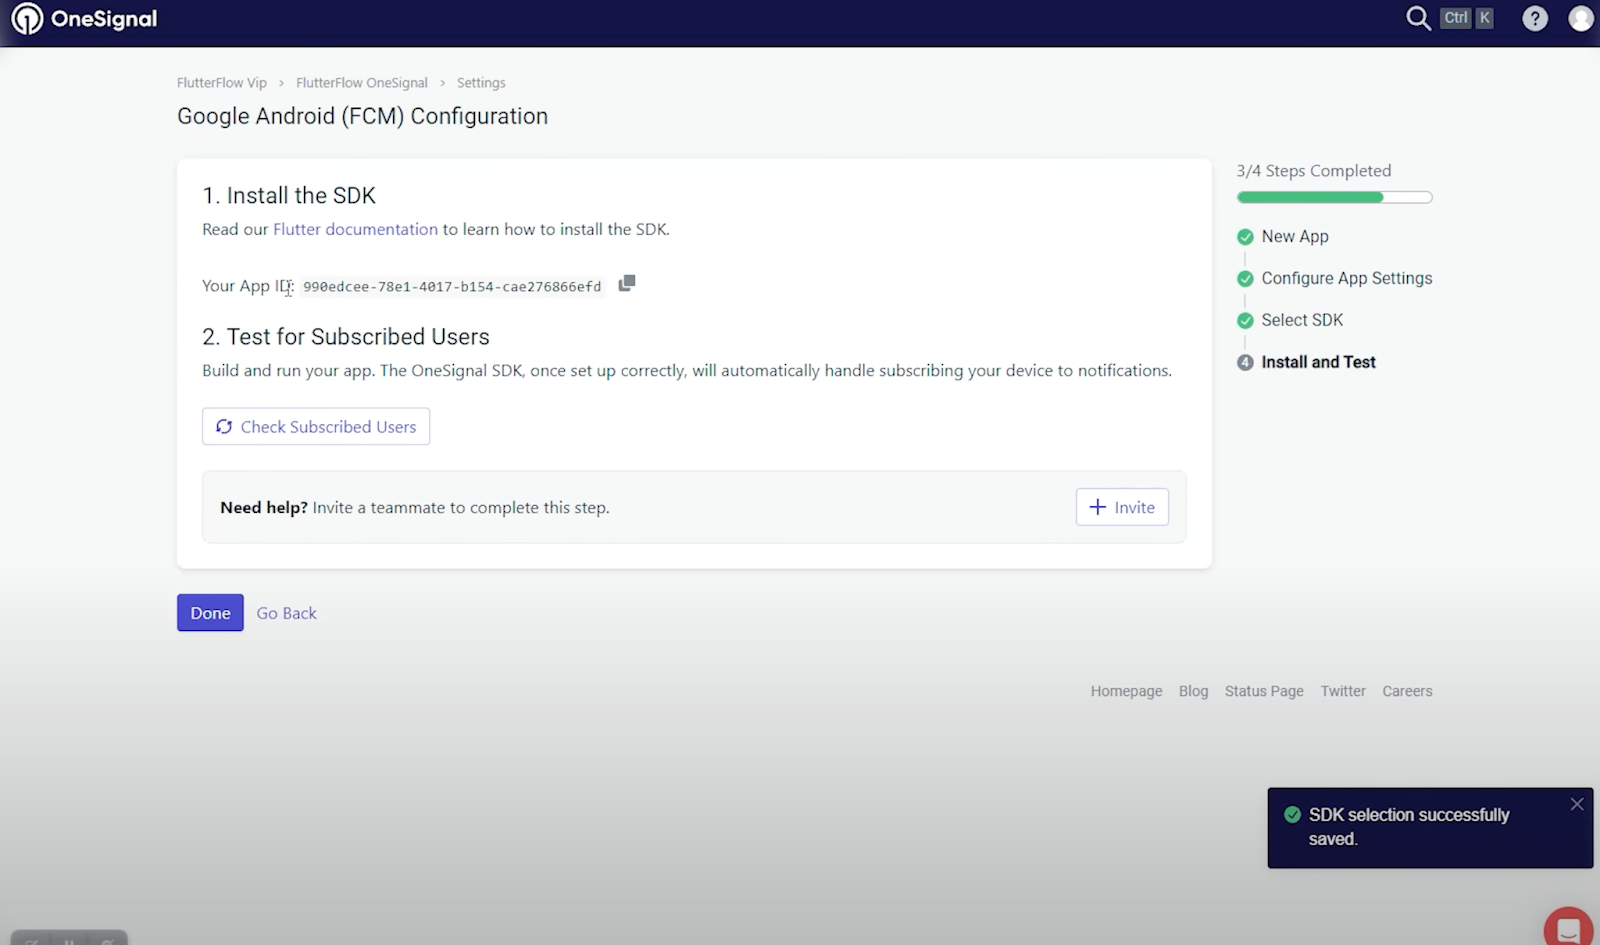
In the next step select Flutter as the project type. This process generates a unique OneSignal app ID, crucial for integrating push notifications into your FlutterFlow app.
Implementing OneSignal in FlutterFlow
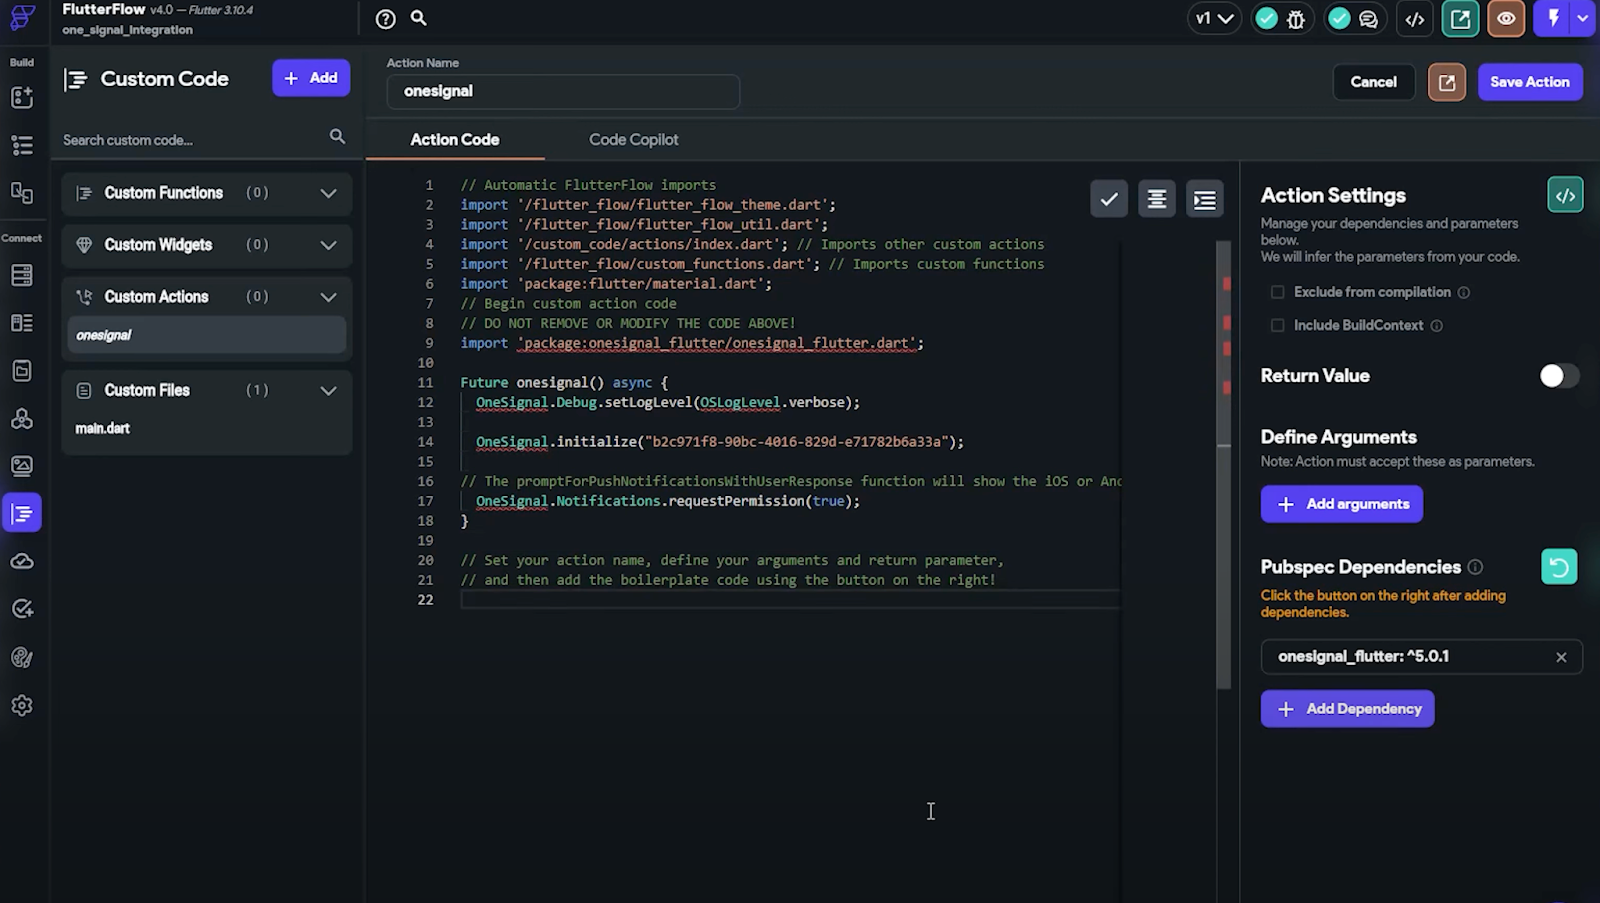
Moving to FlutterFlow, access your project and proceed to the custom code section. Create a new custom code action named “OneSignal” and input the provided code snippet,
Replace the placeholder with your generated OneSignal app ID. While the ID is hardcoded for demonstration purposes, it’s advisable to securely store it in the app’s state variable for production use.
Add the dependency <onesignal _flutter: ^5.0.1>
After saving the action, integrate it into your FlutterFlow app by adding the OneSignal action to the main.dart section.
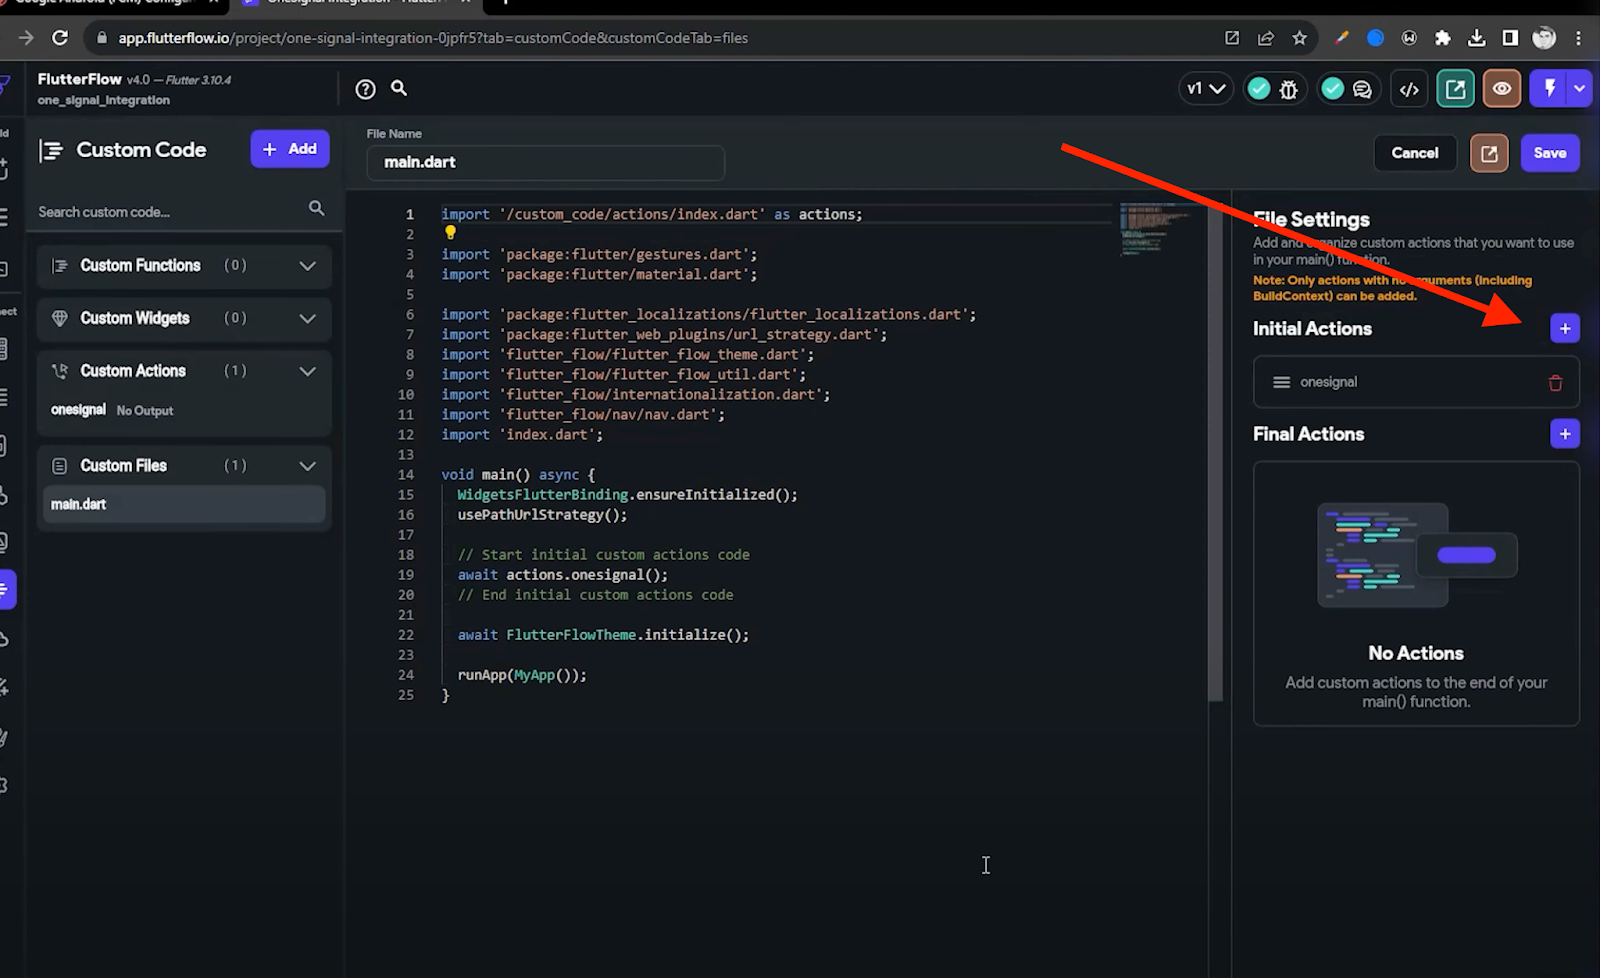
Click on the plus button and add the one signal custom action we just built. This integration enables the app to receive and process OneSignal push notifications effectively.
Testing OneSignal Push Notifications
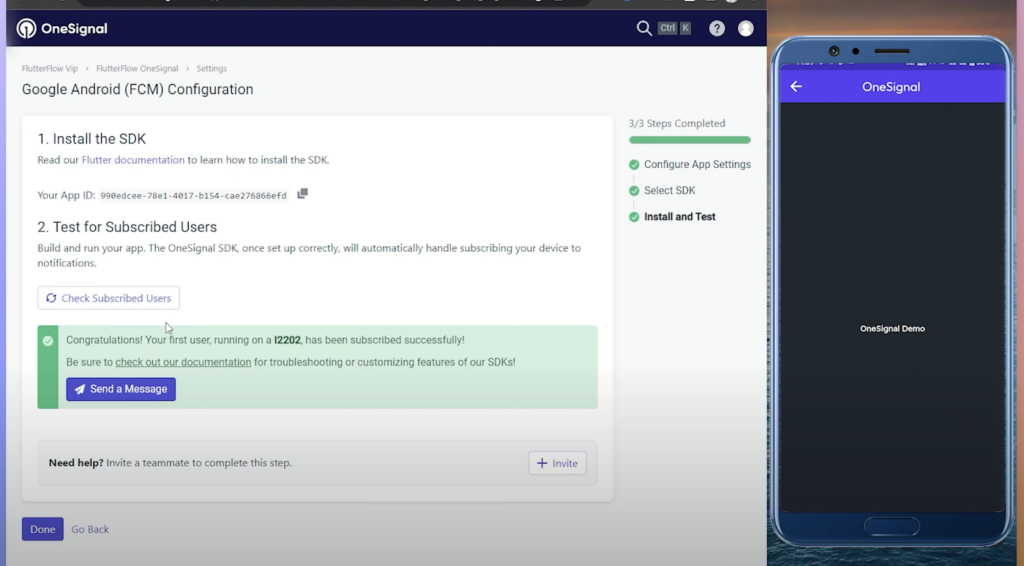
As testing push notifications in a development environment is limited, deploy the app to a real device to assess its functionality.
Download the APK and install it on your device, granting necessary permissions. With the app installed, subscribe to notifications via the OneSignal dashboard to verify successful integration.
You can send notifications from your onesignal dashboard to your device to test it with images and text.
Conclusion
In conclusion, integrating OneSignal push notifications into FlutterFlow apps enhances user engagement and provides valuable communication channels.
By following these steps, developers can harness the power of OneSignal’s features to deliver timely and relevant notifications to their app users.