Beginner’s Guide to Google Authentication with Supabase in FlutterFlow
In today’s tutorial, we will explore how to integrate Google authentication with Supabase in a Flutter Flow application.
Currently, Flutter Flow only supports email authentication when using Supabase as an alternative to Firebase.
By adding Google authentication through custom code, we can expand the authentication options available to users. Let’s dive into the process step by step.
FlutterFlow Supabase Google authentication step by step
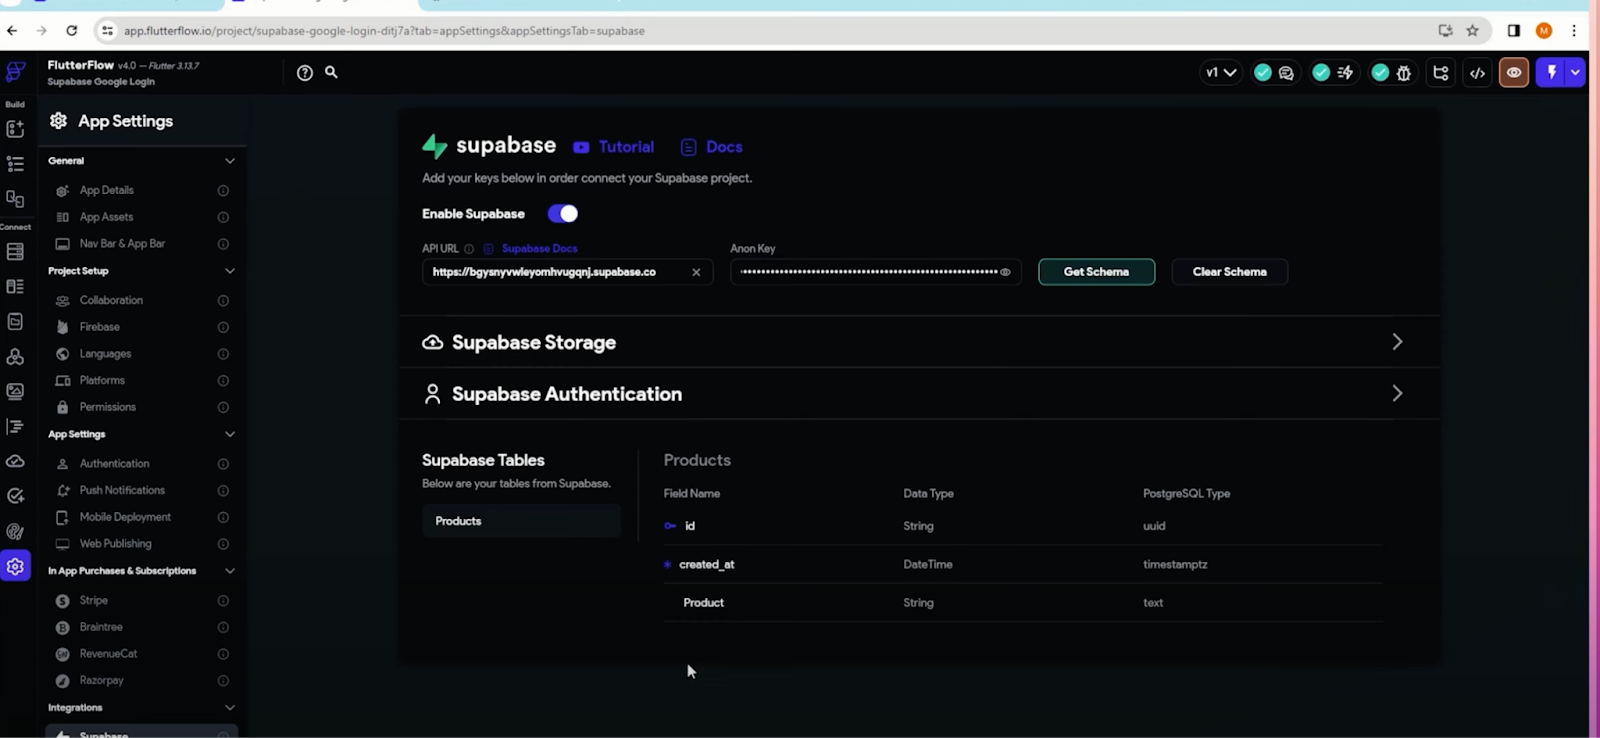
Step 1: Setting Up Supabase Connection in Flutter Flow:
1. Access your Flutter Flow project and navigate to settings.
2. Click on Supabase and input the Supabase host URL and API key obtained from your Supabase project settings.
3. Verify the connection by fetching the schema to ensure proper integration.
Step 2: Implementing Email Authentication:
1. Within Flutter Flow settings, navigate to authentication.
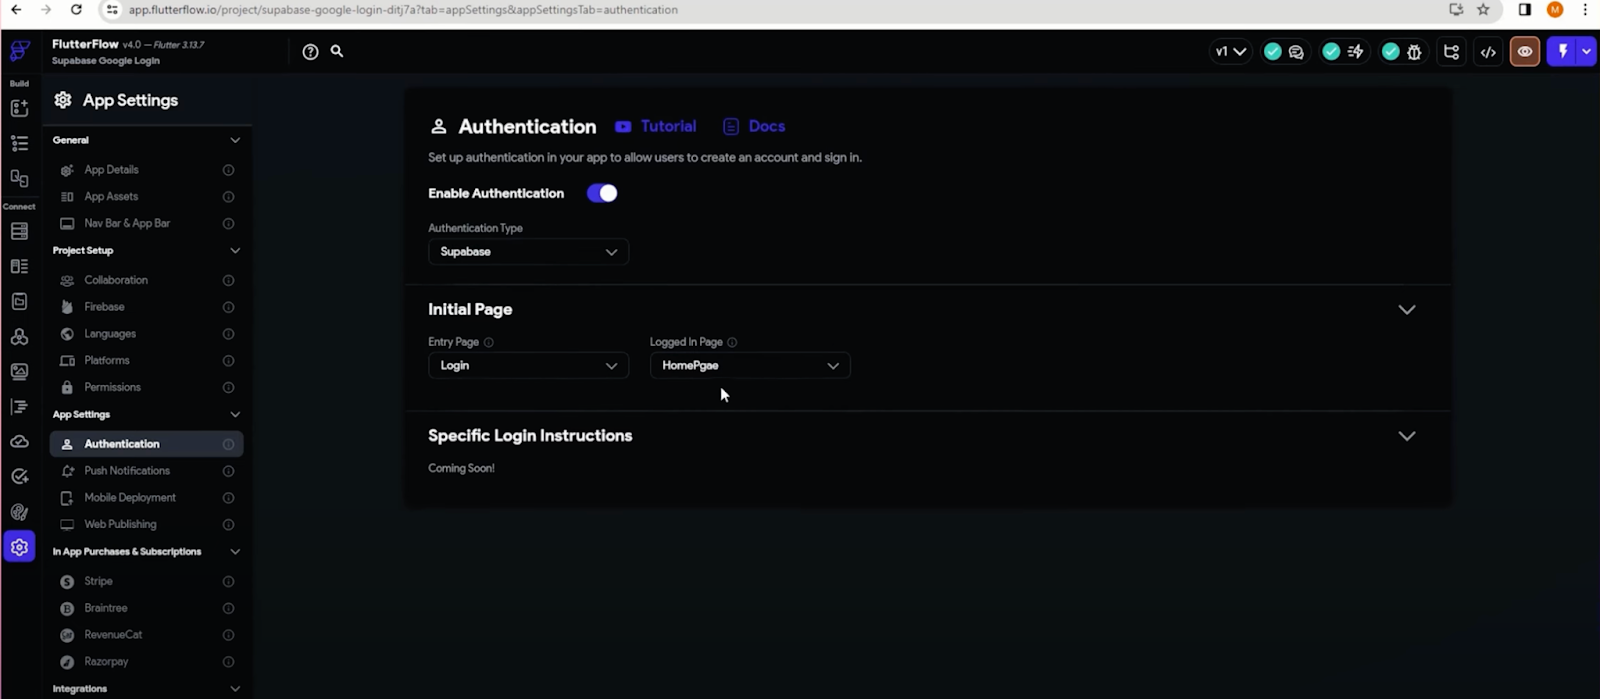
2. Select Supabase as the authentication type and designate the login and homepage screens.
3. Set up email authentication for account creation and login using the action flow editor on your login and create account page..

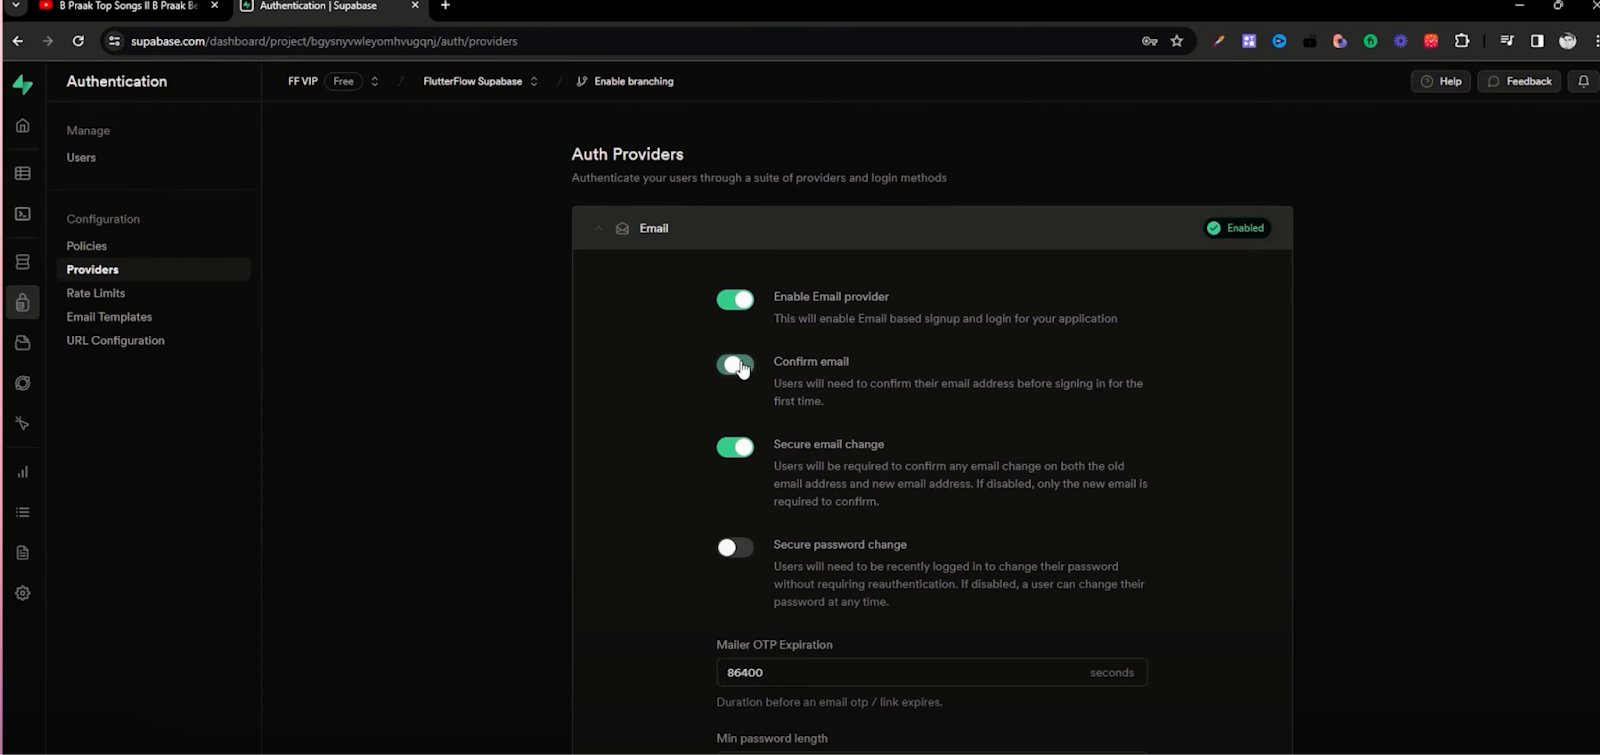
Step 3 : Testing and Disabling Email Confirmation:
For testing purposes, disable email confirmation within Supabase authentication settings temporarily. This allows smoother testing without email verification hassles.
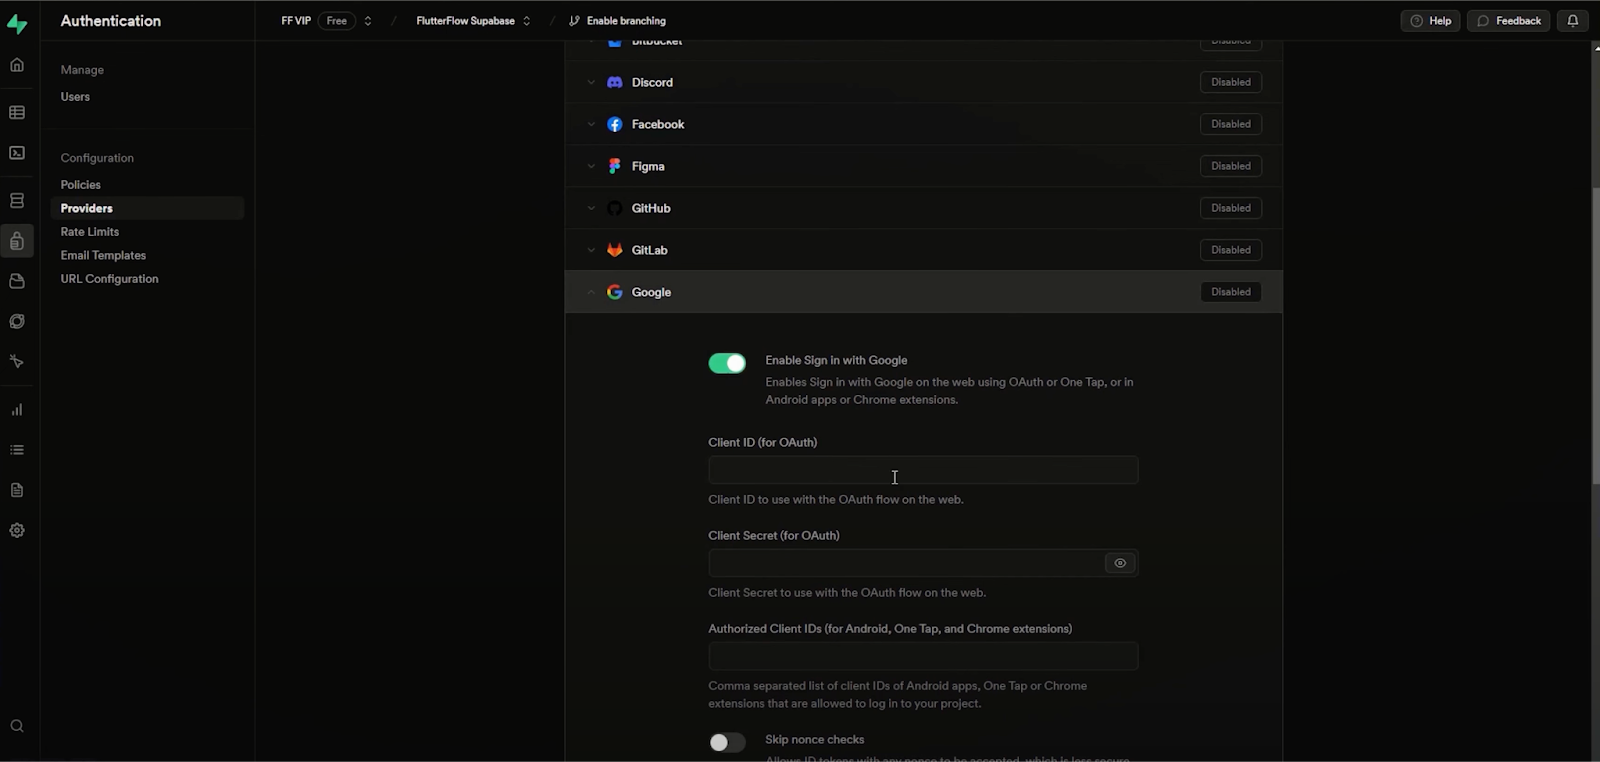
Step 4: Enabling Google Authentication:
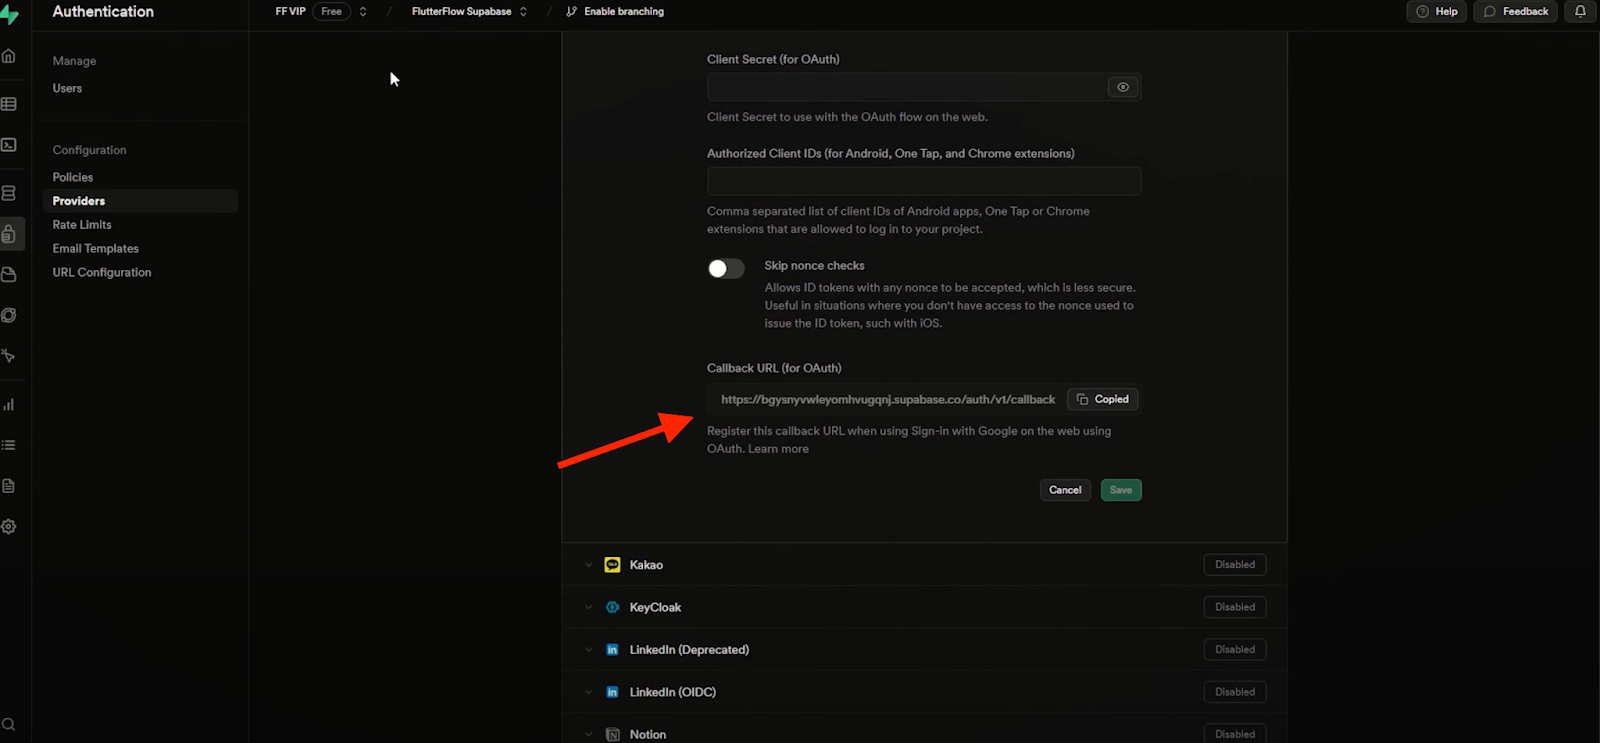
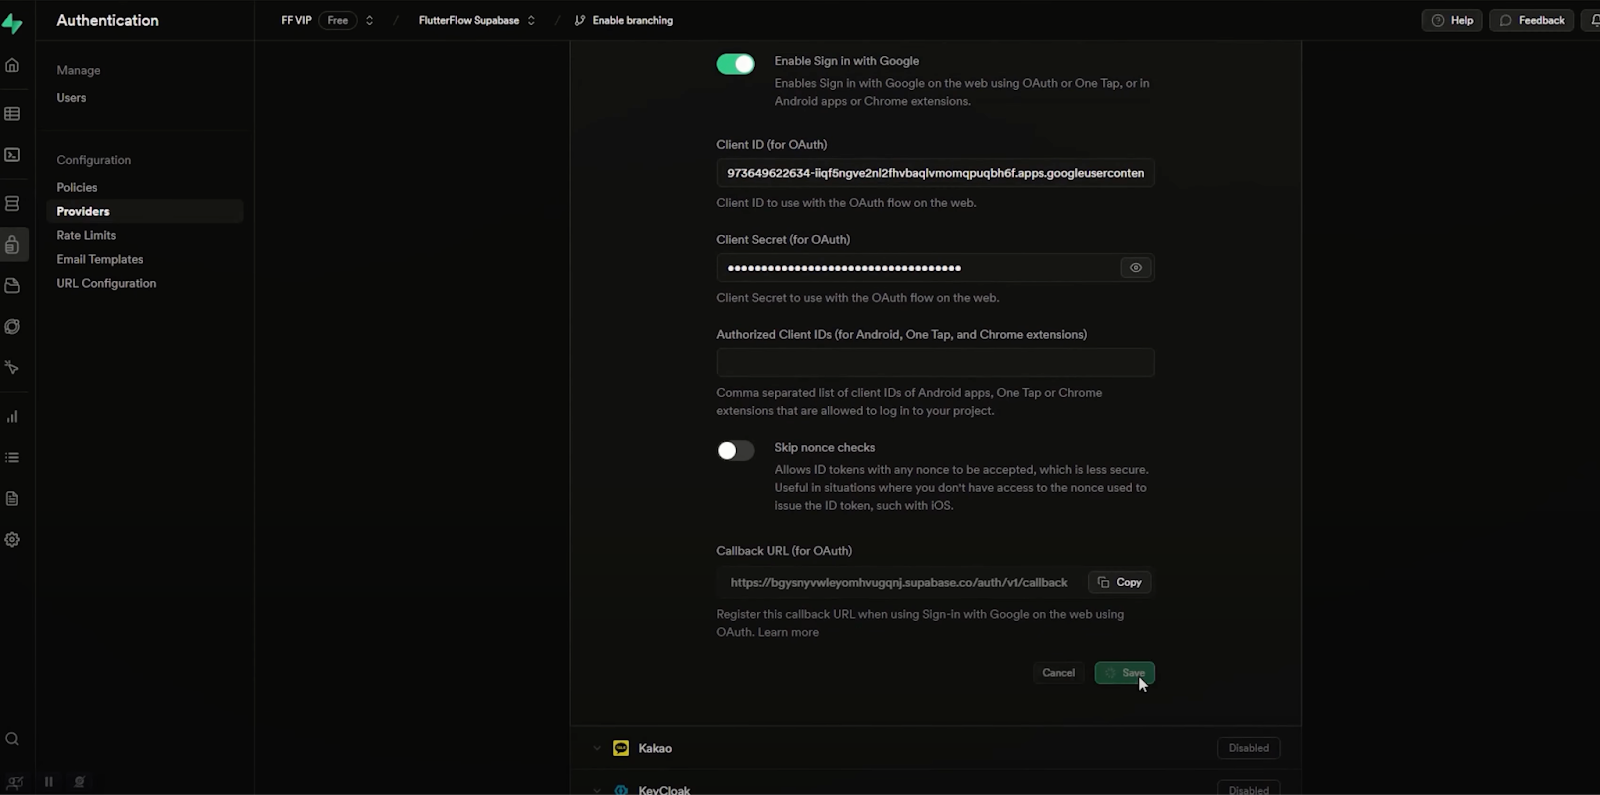
Enable Google authentication within Supabase settings by providing client ID and client secret obtained from Google Cloud Platform.
The primary step involves pasting the sign-in credentials in SupaBase. These credentials are obtained from your Google account, accessible through the Google Cloud Console profile.
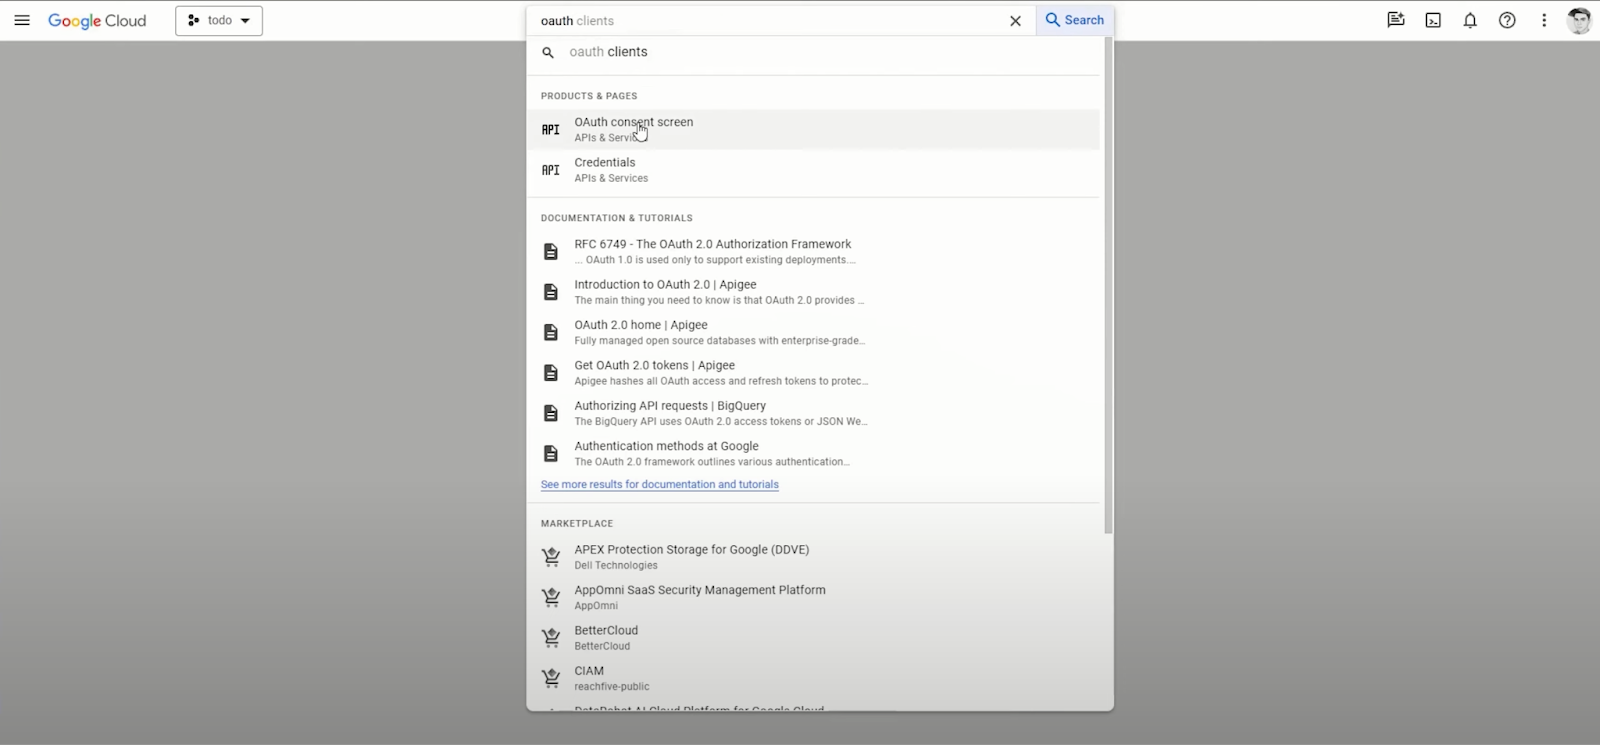
navigate to your Google Cloud Console profile, which can be easily accessed by searching for it on “Google” on Google, Once on your dashboard proceed to the search area and type “OAuth”. Click on the first option to initiate the setup process for your project.
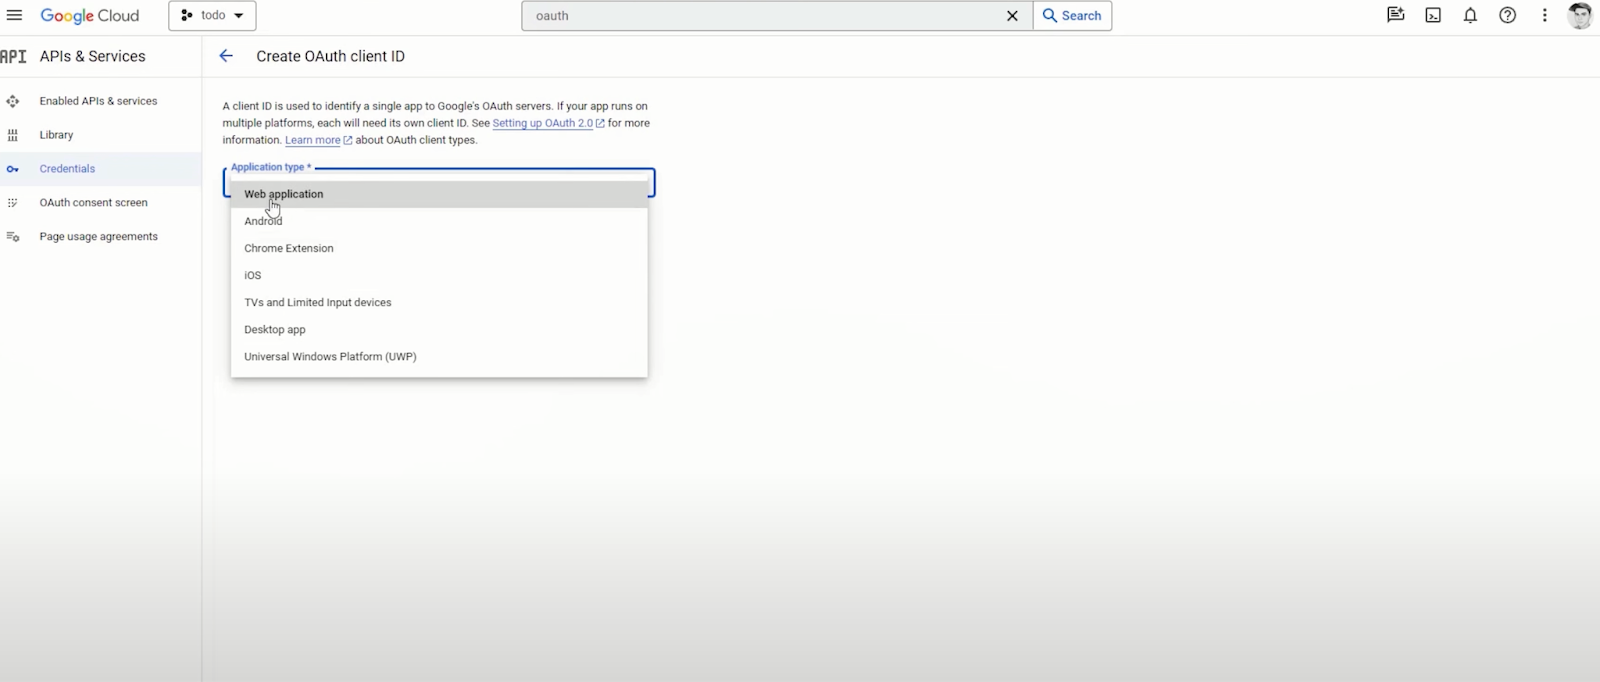
Next, add your project’s email and save your settings. Then, proceed to the Credentials page and create new credentials, selecting OAuth Client ID.
Choose the appropriate application type, such as web application, for your project needs.(The web option will work for web and android).
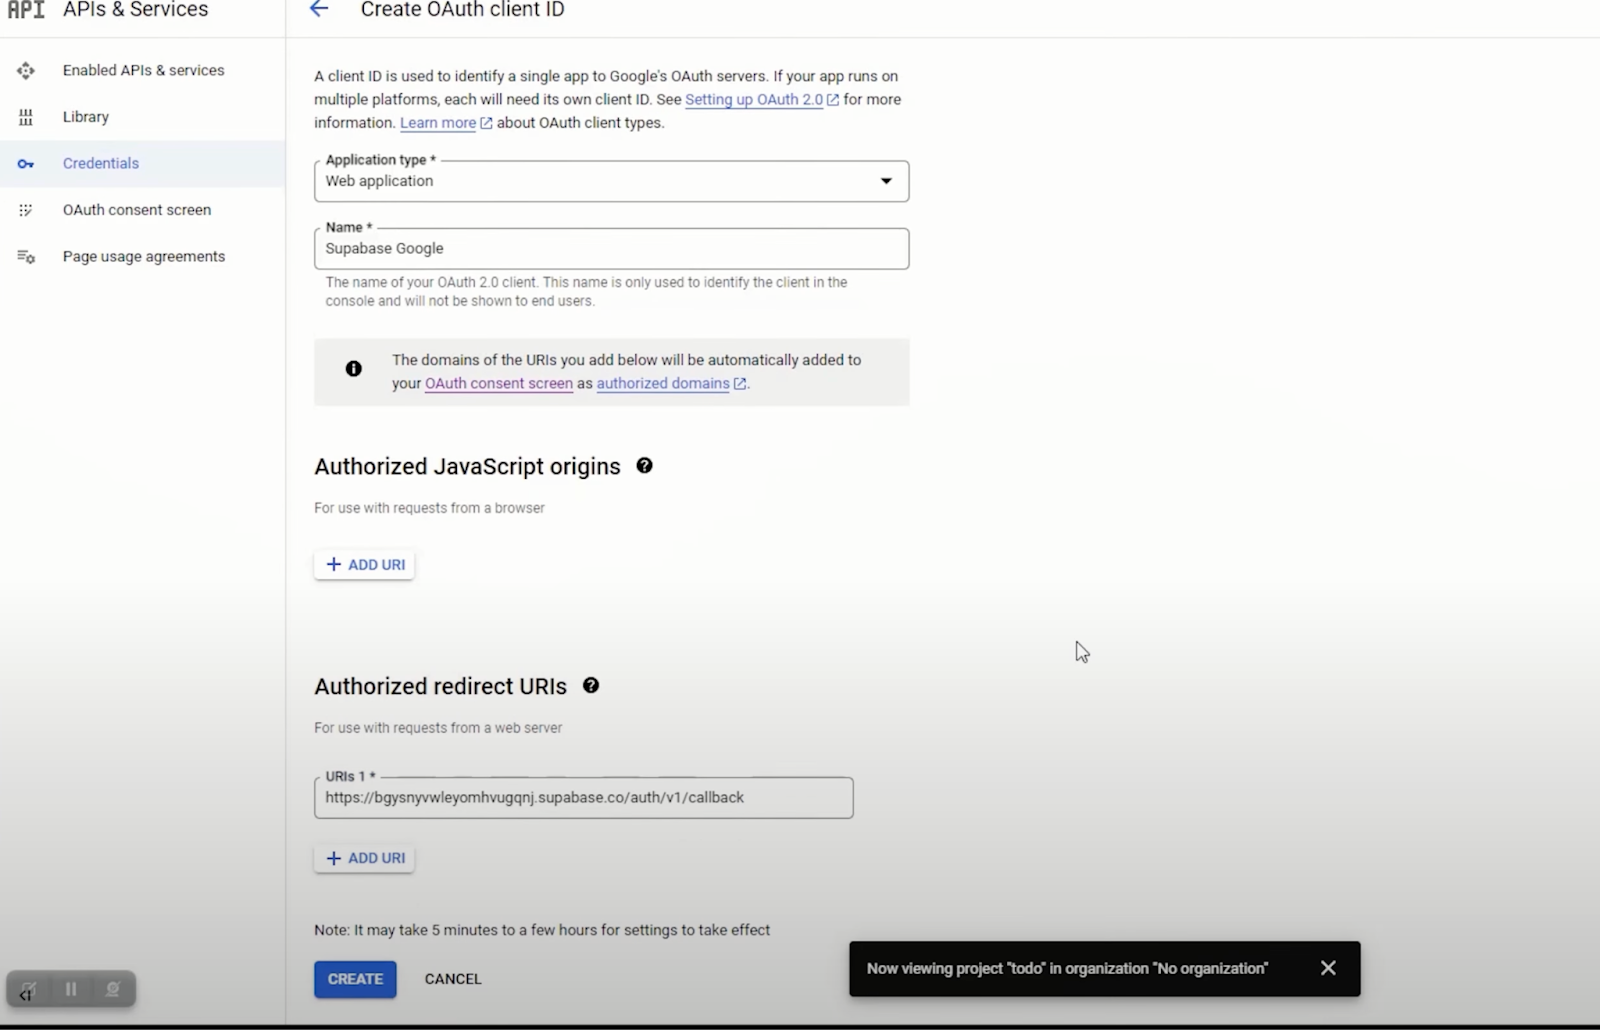
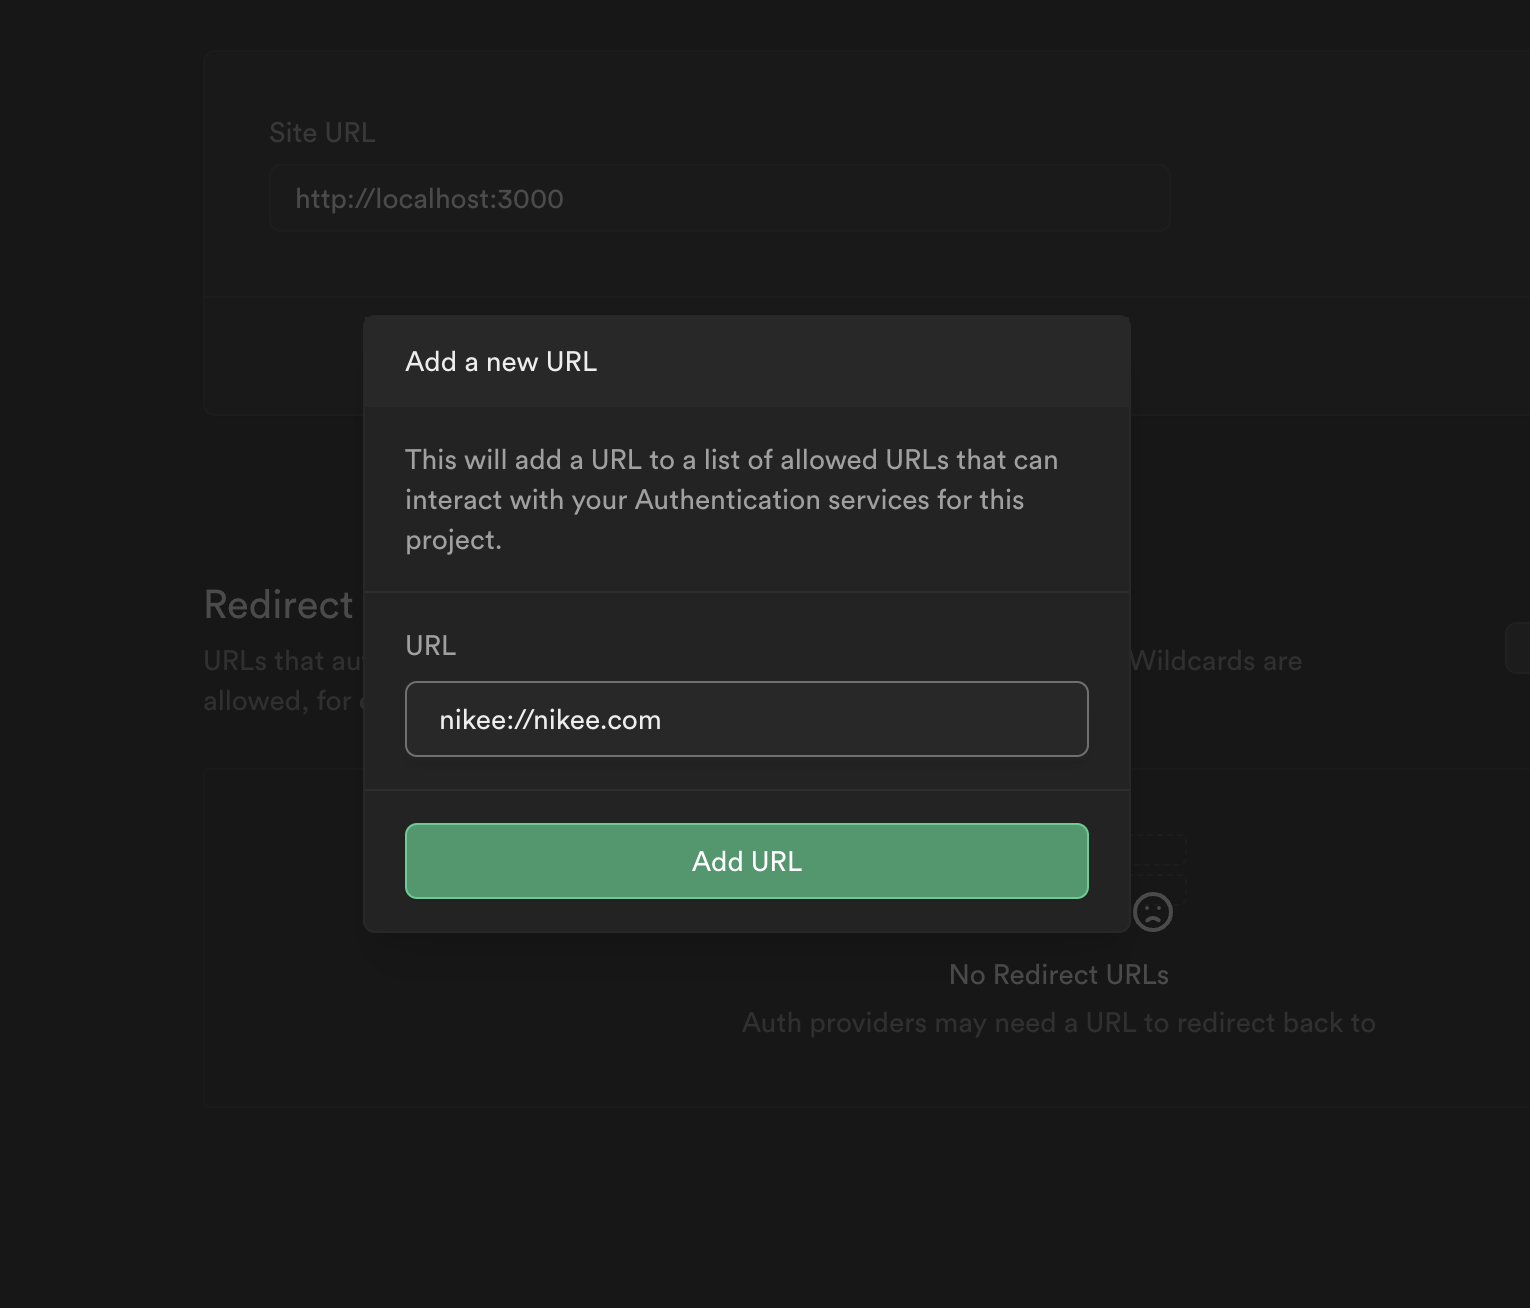
You can assign any desired name to the credential. Next you will need to add an authorized redirect url which supabase will provide for you.
In SupaBase, navigate to the OAuth and Google Provider section. Here, you’ll find authorized URLs that can access your Google OAuth. Copy the link provided by SupaBase and paste it into the authorized url field in google..
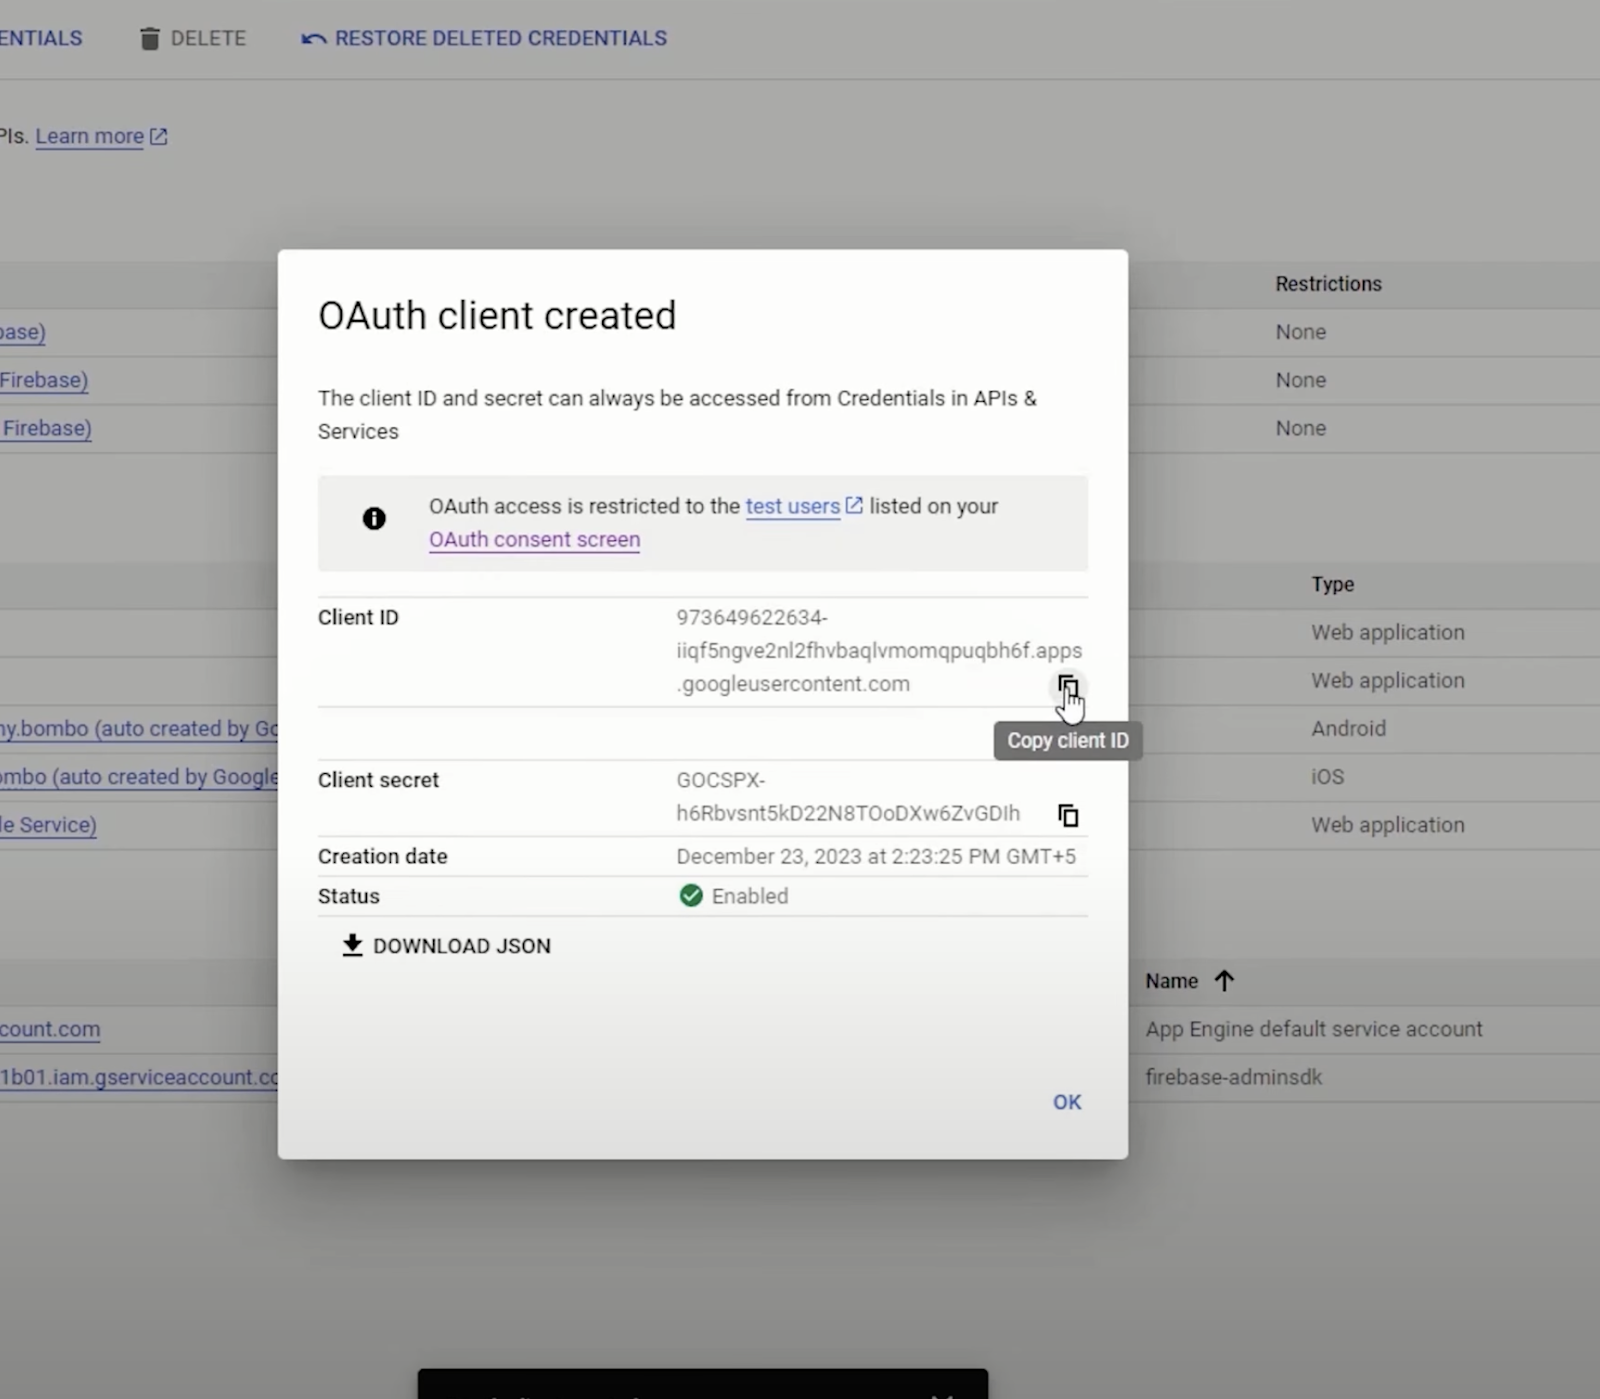
After creating the credentials, you’ll receive your Client ID and Client Secret Code. Copy these credentials and paste them into the corresponding sections in SupaBase.
Finally, configure the URL by pasting the web URL of your project.
It’s worth noting the importance of having a dedicated web page for redirects, as discussed in a previous article. For adding forgotten password functionality to supabase,
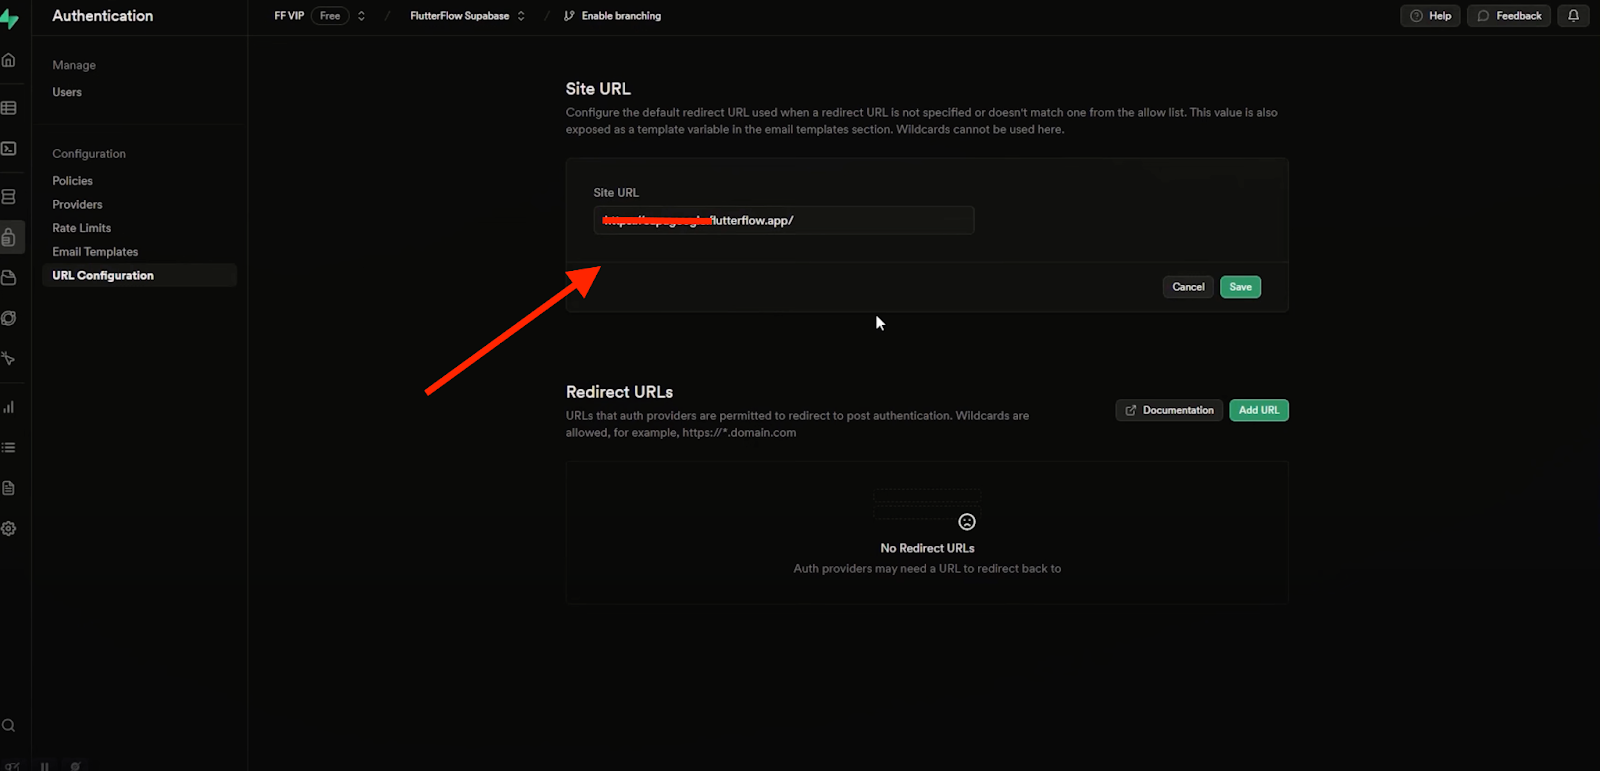
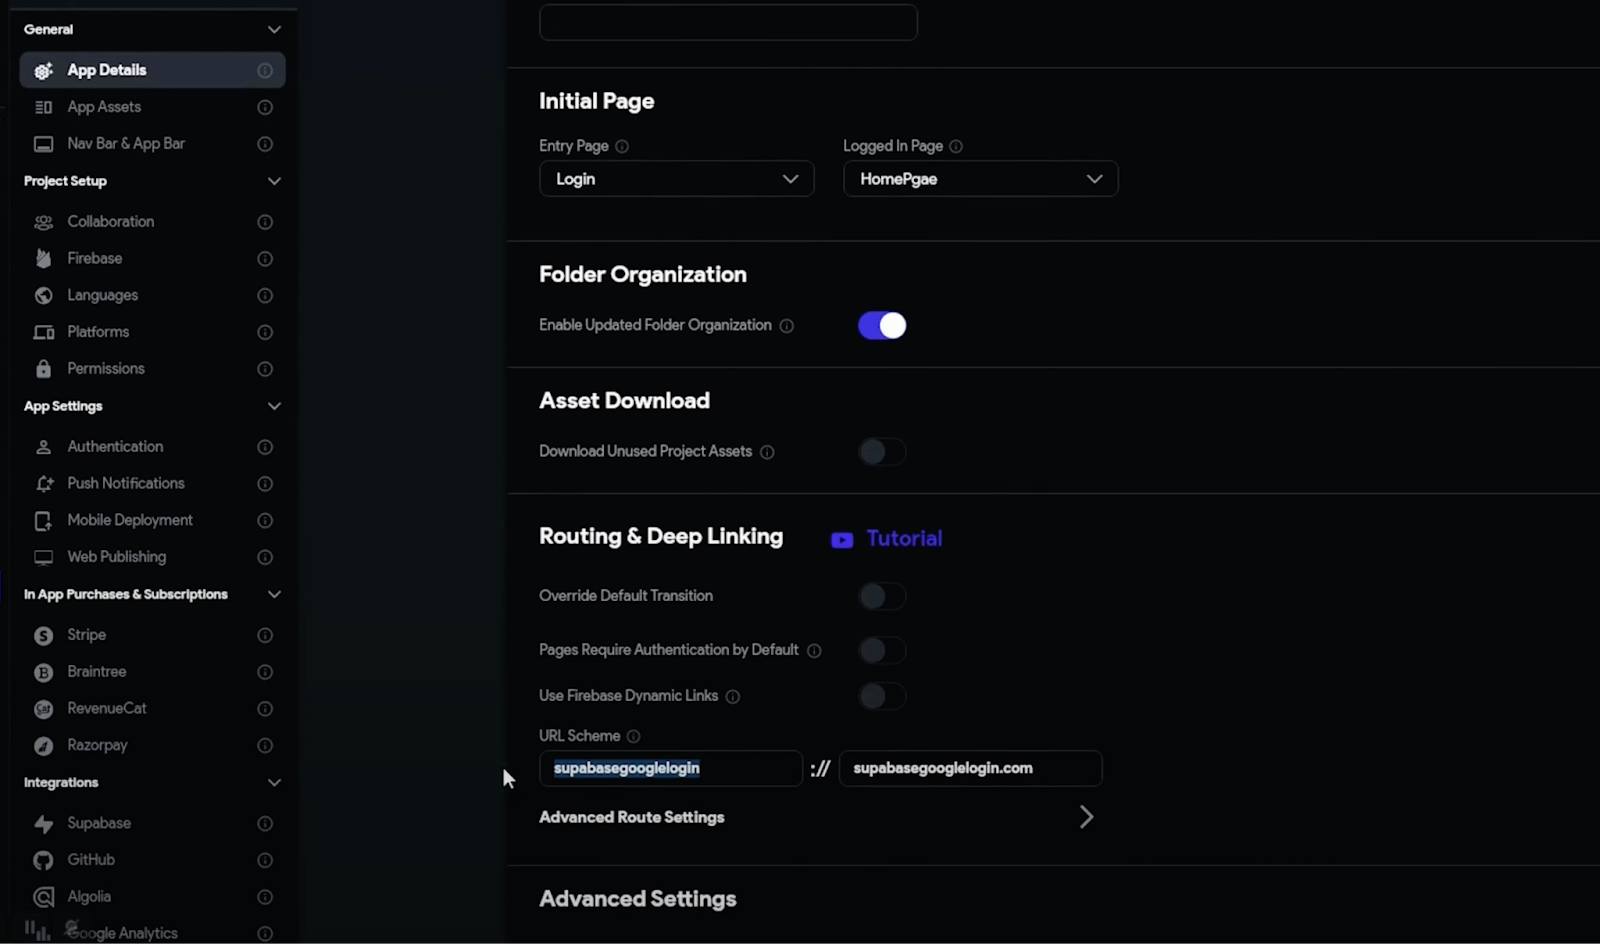
but for this tutorial it’s crucial to redirect the application back to the user’s device especially when building an application. Copy the deep link provided by Flutterflow in the Settings >> App Details >> Routing and deeplinking, check for the url detail and paste it into the redirect URL section too.
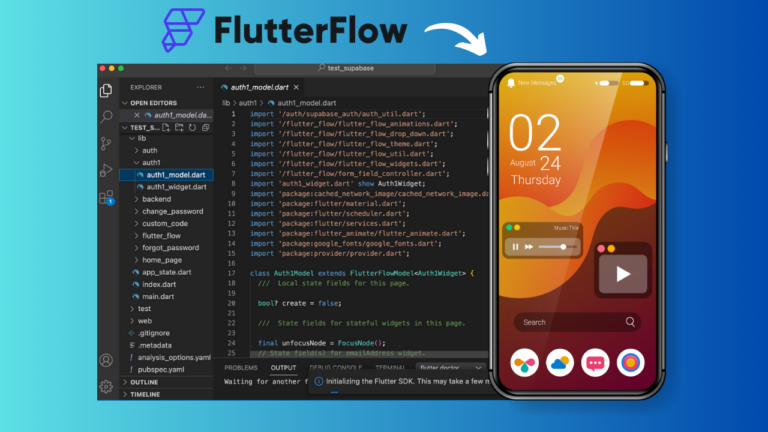
Custom Action for Google Authentication:
1. Create a custom action named “Sign in with Google” within FlutterFlow’s custom code section.
2. Modify the provided code snippet to include the domain name and app deep link gotten from flutterflow as pasted in the redirect url in supabase for proper authentication.
Heres the code below
Note that in this line you are meant to add the redirect url from your flutterflow Routing & Deep Linking section to replace this line within the quotes ‘com.my.app://login-callback/’
redirectTo: kIsWeb ? null : ‘<Your routing link here>’,
Finally add the custom action to the button assigned for google login and test it.
Conclusion:
With this implementation, users can seamlessly authenticate via Google within the FlutterFlow application, enhancing the authentication options available. Happy coding.